
Octavia Mk1
|
|
 Note
Note
|
|
 WARNING
|
|
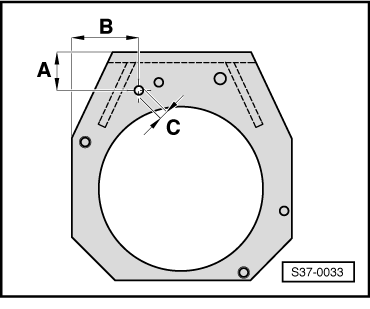
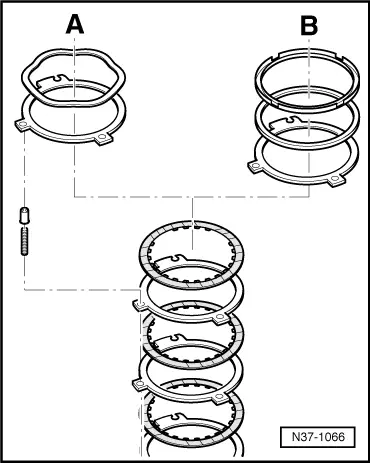
| -A- | = 55 mm | |
| -B- | = 96 mm | |
| Ø -C- | = 12 mm | |
|
Note |
|
|
|
|
|
|
|
|
Note
|
|
|
|
|
|
Note
|
|
|
|
Note
|
|
|
|
|
|
|
|
Note
Note
|
|
|
|
|
|
|
|
|
|
Note
|
|
Note
|
|
|

|
Note
|
|
|
|
|
|
|
|
|
|
|
|
Note
|
|
Note
|
|
|
|
|
|
|
|
|
|
Note
|
|
Note
|
|
Note
Note
|
|
|
|
|
|
|
|
Note
Note
|
|
Note
|
|
|
|
|
|
|
|