skoda Workshop Repair Guides

Skoda Workshop Service and Repair Manuals

Inspecting outer CV joint > < Removing outer CV joint
Installing the outer CV joint
Special tools and workshop equipment required
t  Tensioning pliers, e.g. -V.A.G 1682 A-
The joint boot and the drive shaft must be free of grease.
   
–  Always replace circlip -1-.
–  Push on the small open warm-type clamp with the joint boot and position the joint boot onto the drive shaft according to the version.
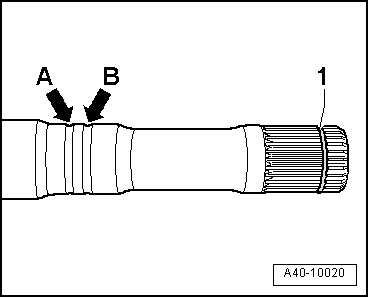
Version with the identification groove:
  A40-10020
–  Fit the joint boot in the outer groove -arrow B-.
The inner groove -arrow A- must remain visible („indentification groove“ for a correct installation of the joint boot).
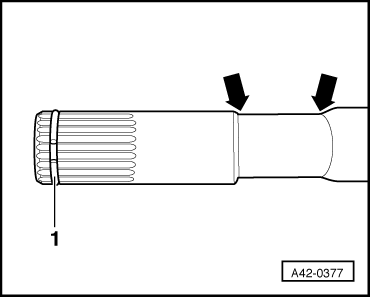
Version with deeper bearing:
  A40-10020
–  Fit the joint boot between the -arrows-.
–  Fill the joint with allowed grease quantity → Chapter.
  A42-0377
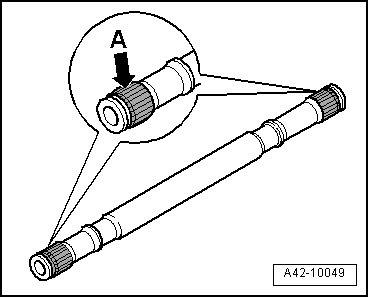
–  Thinly coat the serration -A- with joint grease before installing the joint.
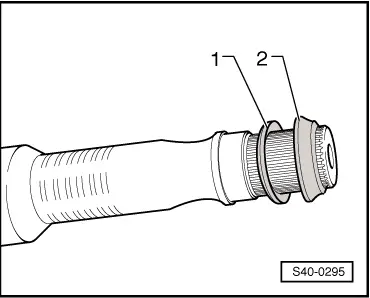
–  Observe the fitting position of the disc spring -1- and the thrust ring -2-.
  A42-10049
Fitting position of the disc spring and the thrust ring
  Note
The fitting position of the disc spring -1- and the thrust ring -2- is not valid for CV joints RO104 and RO3700, which do not have these parts.
1 - Disc spring
2 - Thrust ring
–  Insert circlip in the groove of the shaft.
–  Push the CV joint up to the circlip.
  S40-0295
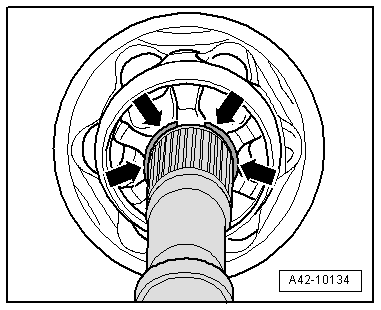
–  Align the circlip upwards to the centre of the hole, see -arrows-.
  A42-10134
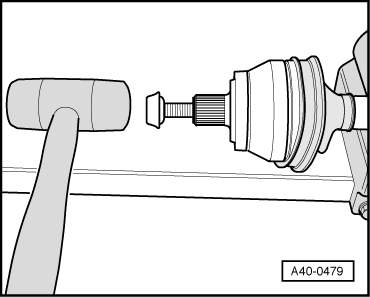
–  Screw the old screw for the drive shaft, as shown, into the joint.
–  Use a plastic hammer to strike the joint on the drive shaft until the circlip locks in place.
–  Fill the joint with the allowed grease quantity on the side of the boot, see table → Chapter.
–  Push the joint boot onto the joint.
–  Bleed the joint boot.
–  Pay attention to the correct position of the joint boot on the outer joint.
The joint boot must be positioned in the groove and must rest on the contour of the joint.
–  Tighten the open warm-type clamp on the outer joint.
  A40-0479
Tighten the open warm-type clamp at the larger diameter
  S40-0440
Tighten the open warm-type clamp at the smaller diameter
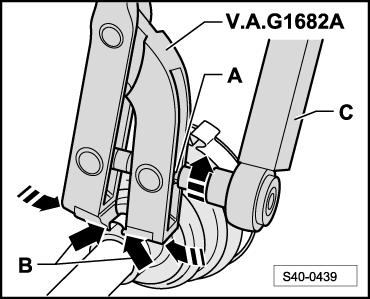
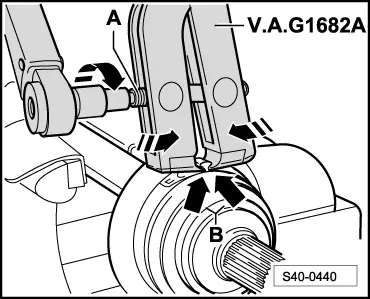
–  Position the tensioning pliers as shown in the figure. Make sure the cutting edges of the pliers are positioned in the corners -arrows B- of the open warm-type clamp.
–  Tighten the open warm-type clamp by turning the spindle with a torque wrench (do not tilt the pliers during this process.)
  Note
t  In view of the hard material (as opposed to rubber) of the joint boot, which requires the use of a stainless steel open warm-type clamp, the latter can only be tightened with tensioning pliers, e. g. -V.A.G 1682 A-.
t  Tightening torque: 25 Nm.
t  Use torque wrench -C-.
t  Ensure that the thread of the spindle -A- of the pliers is smooth. Lubricate if necessary with grease.
t  If it is not smooth, e.g. if the thread is dirty, the necessary clamping force of the open warm-type clamp is not reached at the given torque.
  S40-0439

Inspecting outer CV joint > < Removing outer CV joint