Skoda Workshop Service and Repair Manuals
HOME
FEATURES
MENU
INDEX
ABOUT US
Summary of components: shock absorber, helical spring (vehicles with four-wheel drive) >
< Removing and installing trailing arm with bracket
Octavia Mk2
Axles, steering
Rear suspension, drive shaft
Summary of components: wheel-bearing housing, trailing arm (vehicles with four-wheel drive)
Repairing trailing arm
Repairing trailing arm
Repairing trailing arm
Special tools and workshop equipment required
t
Assembly device, e.g. -T10230/10-
t
Assembly device, e.g. -T10230/12-
t
Ejection tool -T30082 (3372)-
t
Pressure plate -MP3-406 (VW 401)-
t
Pressure plate -MP3-407 (VW 402)-
Pulling out the rubber-metal bearing
–
Removing the trailing arm
→ Chapter
.
–
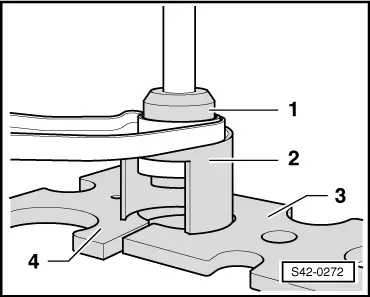
Position the special tools as shown in the figure.
1 -
Assembly device, e.g. -T10230/10 -
2 -
Ejection tool -T30082 (3372)-
3 -
Pressure plate - MP3-406 (VW 401)-
4 -
Pressure plate - MP3-407 (VW 402)-
–
Pulling out the rubber-metal bearing.
Inserting the rubber-metal bearing
–
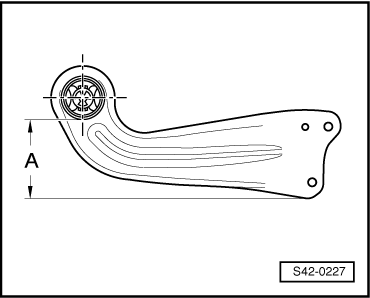
Position the trailing arm on an even surface.
–
Mark a vertical line on the bushing of the trailing arm.
Dimension
-A-
= 114 mm
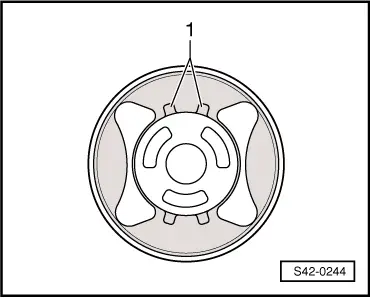
The marked line must be between the lobes
-1-
after inserting.
–
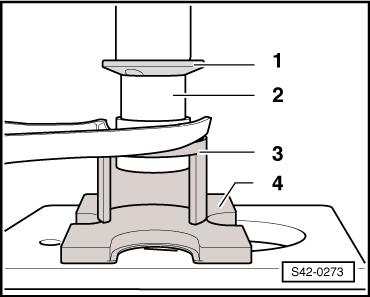
Position the special tools as shown in the figure.
1 -
Pressure plate e.g. -T10230/12-, the chamfer must point to the rubber-metal bearing.
2 -
Rubber-metal bearing
3 -
Ejection tool -T30082 (3372)-
4 -
Pressure plate - MP3-407 (VW 402)-
–
Insert the rubber-metal bearing flush.
–
Install bracket at trailing arm
→ Anchor
.
–
Installing the trailing arm
→ Chapter
.
–
Perform chassis alignment
→ Chapter
Axles, steering
Rear suspension, drive shaft
Summary of components: wheel-bearing housing, trailing arm (vehicles with four-wheel drive)
Repairing trailing arm
Summary of components: shock absorber, helical spring (vehicles with four-wheel drive) >
< Removing and installing trailing arm with bracket