skoda Workshop Repair Guides

Skoda Workshop Service and Repair Manuals

Removing and installing oil pump > < Oil filter holder - Summary of components
Removing and installing oil pan
Special tools and workshop equipment required
t  Flexible-head wrench SW 10 -3185-
t  Sealant remover gasket stripper (bearing code GST, bearing article no. R 34402), manufacturer Retech s.r.o.
t  Cleaning and degreasing agent, e.g. -D 009 401 04-
t  Protective goggles and gloves
t  Silicone sealant -D 176 404 A2-
  Note
Observe safety measures and rules for cleanliness when working on vehicles with liquefied petroleum gas system (LPG) → Chapter.
Removing
–  Remove the sound dampening system → Body Work; Rep. gr.50.
–  Drain engine oil.
–  Disconnect plug connection at oil level and oil temperature sender -G266-.
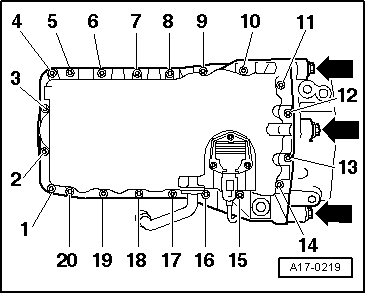
–  Release the oil pan's fixing screws.
  Note
Slacken oil pan bolts at flywheel side with hinged wrench -3185 - and unscrew with wrench socket.
–  Remove oil pan, if necessary release by applying slight blows with a rubber-headed hammer.
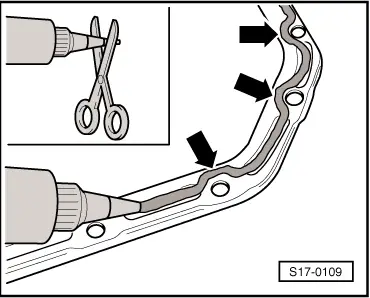
  WARNING
Wear protective gloves when working with sealant and grease remover!
–  Remove the remaining sealant from the sealing surface on the cylinder block (while doing so remove the baffle) and on the oil pan with chemical sealant remover.
–  Degrease the sealing surfaces.
Install
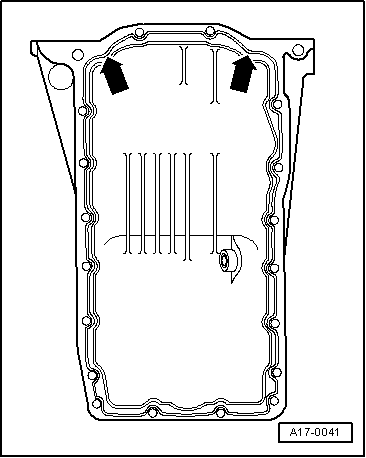
Installation is performed in the reverse order, pay attention to the following points:
   
–  Cut off nozzle tube at the front marking (Ø of nozzle approx. 3 mm).
  S17-0109
–  Apply silicone sealant bead to the clean sealing surface of the oil pan, as shown.
t  Thickness of sealant bead: 2…3 mm.
  Note
t  The sealant bead must not be thicker than recommended otherwise excess sealant may get into the oil pan and clogg the strainer in the oil suction pipe.
t  Take particular care when applying sealant bead in the area of the sealing flange at the rear -arrows-.
t  The oil pan must be installed within 5 minutes after applying the silicone sealant.
  A17-0041
–  Fit on oil pan immediately and tighten the bolts in the following order:
1 - Tighten all the bolts of oil pan/cylinder block slightly diagonally across.
2 - Tighten the three bolts of oil pan/cylinder block slightly.
3 - Tighten all the bolts of oil pan/cylinder block slightly diagonally across.
4 - Tighten the three bolts of oil pan/gearbox to 40 Nm.
5 - Tighten all the bolts of oil pan/cylinder block diagonally across to 15 Nm.
  Note
t  When installing the oil pan with the engine removed, ensure that the oil pan is flush with the cylinder block at the flywheel side.
t  After installing the oil pan, allow the sealant to dry for about 30 minutes. Only then may engine oil be filled in.
The further assembly is carried out in reverse order to disassembly.
  A17-0219

Removing and installing oil pump > < Oil filter holder - Summary of components