
Repairing Air Conditioner Magnetic Coupling N25
| Repairing Air conditioner magnetic coupling - N25- |
| Special tools, test and measuring equipment and aids required |
| t | Two-arm extractor commercially available e. g. -Kukko 20-10- with hook 100 mm clamping depth |
| t | Depth gauge |
| t | Strap wrench |
 Note
Note| t | It is not necessary to open the refrigerant circuit to repair the magnetic coupling. |
| t | Repairs on the magnetic coupling with the compressor installed should only occur in exceptional cases. |
| t | If the compressor needs to be removed the vehicle must be serviced in a workshop with trained mechanics (service centre for air conditioning systems) because the refrigerant must first be drained at a service position. |
| t | Repair of magnetic coupling with the compressor removed → Chapter. |

| 1 - | 20 Nm |
| q | removing and installing → Fig. |
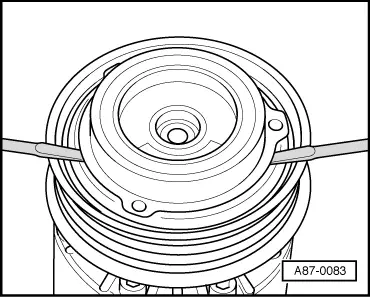
| 2 - | Clutch disc |
| q | depending on the type it can have another shape, the damage is identical. |
| q | remove → Fig. |
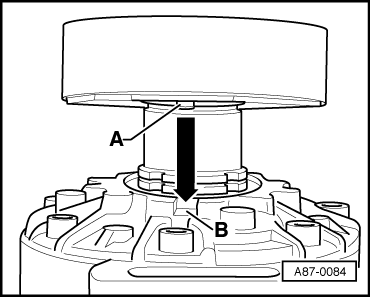
| 3 - | Spacers |
| q | to set the gap between the clutch disk and belt pulley |
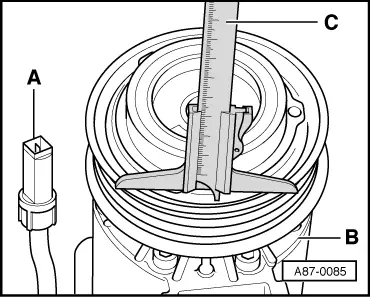
| q | Clearance: 0.4…0.6 mm |
| q | Check gap → Fig. |
| 4 - | Circlip |
| q | replace: |
| – | Fit on correct side: |
| The smooth side points to the compressor. |
| q | pay attention to correct fit in slot |
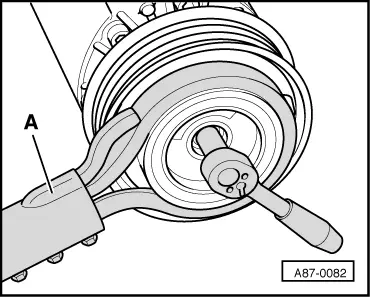
| 5 - | Belt pulley |
| q | remove using a commercially available two or three armed extractor |
| To avoid damaging the belt pulley pay attention to the correct position of the extractor. |
| 6 - | Circlip |
| q | replace: |
| – | Fit on correct side: |
| The smooth side points to the compressor. |
| q | pay attention to correct fit in slot |
| 7 - | Solenoid coil |
| q | installing → Fig. |
Note| An overheating fuse is built into the solenoid coil. The overheating fuse will cut out the solenoid coil as soon as (e.g. because of compressor resistance) the magnetic coupling starts overheating. |
| 8 - | Screw |
| 9 - | Compressor |
|
|
|
|
Note
|
|