
Forester F4-2.5L SOHC (2004)
CAUTION:
^
When fixing the rack housing in vise, be sure to use this special tool. Do not fix rack housing in vise using pad such as aluminum plates,
etc.
^
When using the old rack housing, be sure to clean and remove rust before assembling. Check pinion housing bushing carefully.
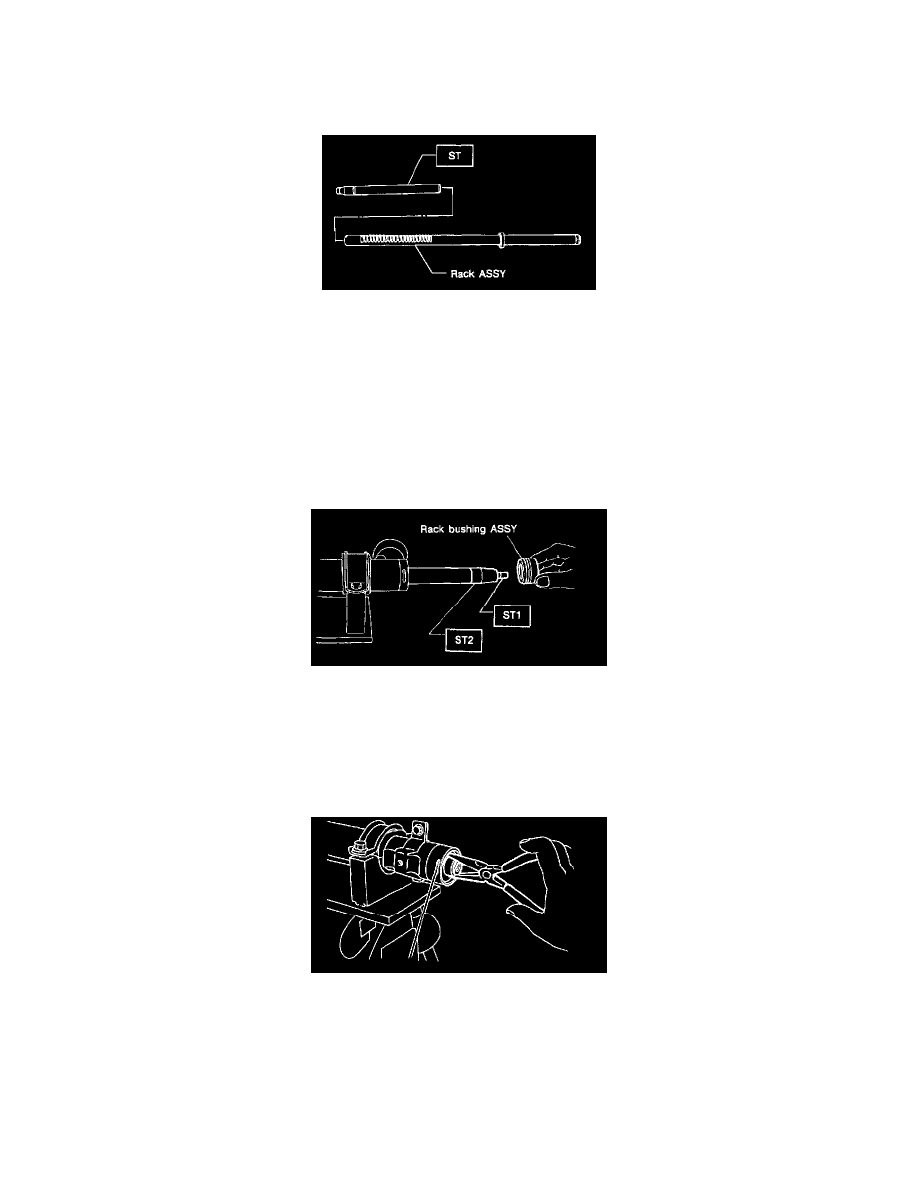
4) Fit the ST over toothed portion of rack assembly, and check for binding or unsmooth insertion. If any deformation is noted on flats at the end
of rack, shape by using file, and wash with cleaning fluid.
ST 926390001 COVER & REMOVER
5) Apply genuine grease to the teeth of thoroughly washed rack assembly, and then fit the ST over the toothed portion.
CAUTION:
^
Be careful not to block the air passage with grease. Remove excessive grease.
^
After fitting cover, check the air passage hole for clogging. If clogged, open by removing grease from the hole.
6) Before inserting the rack assembly, apply a coat of specified power steering fluid to the surfaces of ST and rack piston.
7) Insert the rack assembly into rack housing from cylinder side, and then remove the ST after it has passed completely through oil seal.
8) Fit the ST1 and ST2 over the end of rack, and then install a new rack bushing.
ST1 926400000 GUIDE
ST 2927660000 GUIDE
CAUTION:
^
If burrs, or nicks are found on this guide and rack shaft portion, remove by filing.
^
Dip the rack bushing in specified power steering fluid before installing, and pay attention not to damage O-ring and oil seal.
9) Insert the rack stopper into the cylinder tube until internal groove (on cylinder side) is aligned with external groove (on rack stopper). Turn the
rack stopper with ST so that the rack stopper hole is seen through cylinder slits.
10) Insert the rack stopper into the rack housing, and then wrap a new circlip using a sharp pointed pliers to secure the rack stopper in position.
CAUTION:
^
Be careful not to scratch the rack while winding circlip.
NOTE: Rotate the wrench another 90 to 180° after end of circlip has been wrapped in.