
Forester F4-2.5L SOHC (2004)
Wheels: Service and Repair
Steel Wheel
Steel Wheel
REMOVAL
1) Apply parking brake, and position the select lever to "P" or "LOW".
2) Set jacks or a lift to the specified point, and support the vehicle with its tires slightly contacting the floor.
3) Loosen the wheel nuts.
4) Raise the vehicle until its tires take off the ground using a jack or a lift.
5) Remove the wheel nuts and wheels.
NOTE:
^
While removing the wheels, prevent hub bolts from damage.
^
Place the wheels with their outer sides facing upward to prevent wheels from damage.
INSTALLATION
1) Remove dirt on the mating surface of wheels and brake rotors.
2) Attach the wheel to hub by aligning the wheel bolt hole with hub bolt.
3) Temporarily attach the wheel nuts to hub bolts. (In the case of aluminum wheel, use SUBARU genuine wheel nut for aluminum wheel.)
4) Manually tighten the nuts making sure the wheel hub hole is aligned correctly to guide portion of hub.
CAUTION:
^
Tighten the wheel nuts in two or three steps by gradually increasing the torque and working diagonally, until the specified torque is reached.
For drum brake models, excess tightening of wheel nuts may cause wheels to "judder".
^
Do not depress the wrench with foot; Always use both hands when tightening.
^
Make sure the bolt, nut and nut seating surface of the wheel are free from oils.
6) If a wheel is removed for replacement or for repair of a puncture, retighten the wheel nuts to the specified torque after running 1,000 km (600
miles).
INSPECTION
1) Deformation or damage on the rim can cause air leakage. Check the rim flange for deformation, crack, or damage, and repair or replace as
necessary.
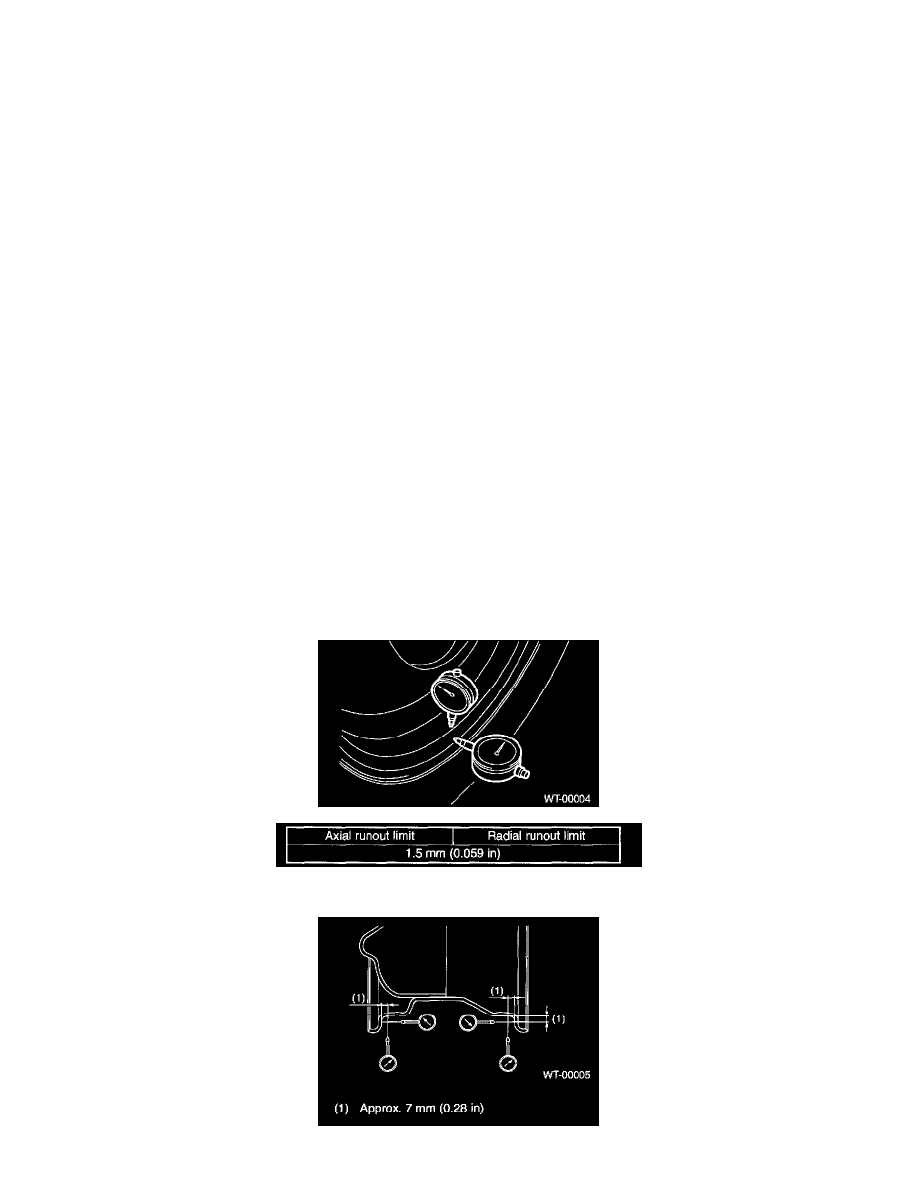
2) Jack-up the vehicle until tires clear the floor.
3) Slowly rotate the wheel to check rim "runout" using a dial gauge.