
Forester F4-25L SOHC (2004) - Automatic Transmission Control Valve Body Repair
(9) Leave the vehicle for 30 seconds as it is.
(10) lf error message "Communicate Failure" is indicated on the display of SUBARU Select Monitor, turn the ignition switch to ON with
depressing the brake pedal. (Keep the brake pedal depressed after this step.)
(11) Confirm that display of SUBARU Select Monitor return to normal indication. (the error message is not shown.)
(12) Set the select lever to "P" range, and then wait for more than three seconds.
(13) Set the select lever to "R" range, and then wait for more than three seconds.
(14) Set the select lever to "N" range, and then wait for more than three seconds.
(15) Set the select lever to "D" range, and then wait for more than three seconds.
(16) Set the select lever to "N" range, and then wait for more than three seconds.
(17) Slightly depress the accelerator pedal to full open.
(18) Slightly release the accelerator pedal to full close.
(19) Start the engine.
(20) Shift the select lever to "D" range after the engine speed decreases and becomes stable.
(21) At this time, AT OIL TEMP warning light in the combination meter blinks at 2Hz.
(22) The advance operation of learning control is finished, when AT OIL TEMP warning light blink changes from 2Hz to 0.5Hz. If the interval of
the blinking changes to 4 Hz (faster interval), the advance operation of learning control is not completed normally. Therefore, turn the ignition
switch to OFF and repeat steps from 5).
(23) lf the advance operation of learning control is completed normally, shift the select lever to "N" range. Turn the ignition switch to OFF and
complete this operation.
CAUTION:
^
After step 8), keep the brake pedal depressed till step 23). (If the brake pedal is released in the midst of operation, AT OIL TEMP
warning light does not illuminate at step 21) or the interval of the blinking changes to 4 Hz.)
^
Before operating the advance operation of learning control, perform Clear Memory Mode 2 and erase the back-up memory in TCM.
DISASSEMBLY
NON-TURBO MODEL ONLY
1. Remove oil strainer from lower control valve body.
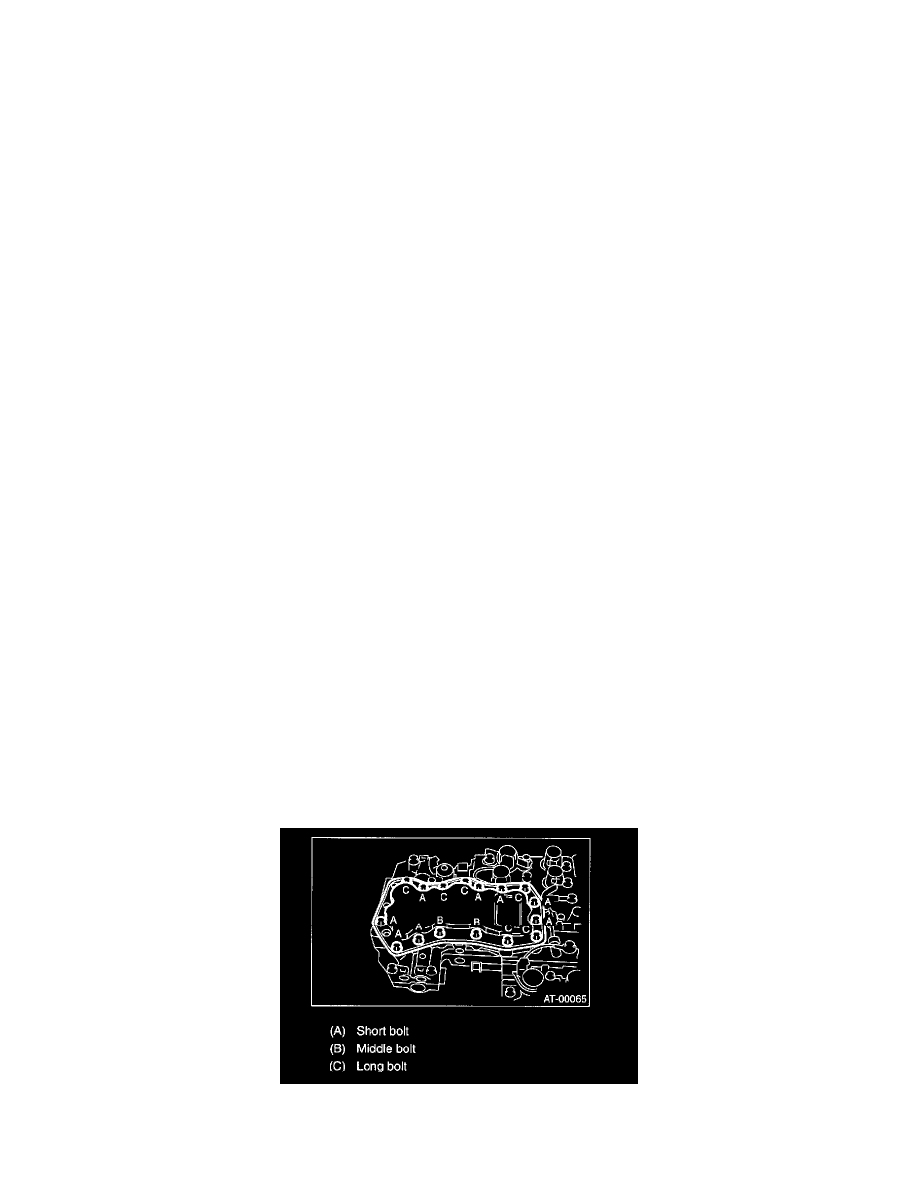
NOTE: Arrange the removed bolts in good order to assemble in the same place as disassembly, because the bolts length are different.