
Outback L.L.Bean Edition AWD F6-3.0L (2002)
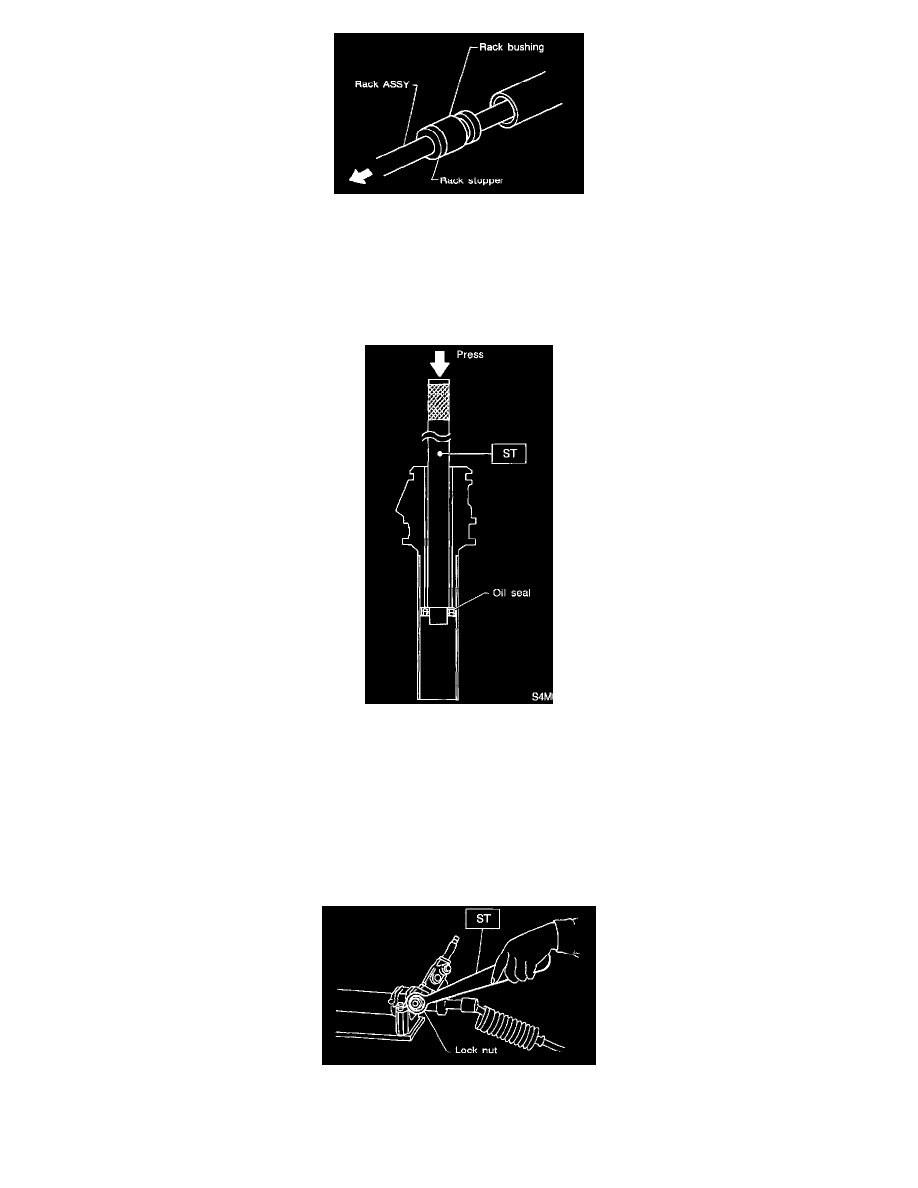
14. Pull rack assembly from cylinder side, and draw out rack bushing and rack stopper together with rack assembly.
CAUTION: Be careful not to contact rack to inner wall of cylinder when drawing out. Any scratch on cylinder inner wall will cause oil leakage.
15. Remove rack bushing and rack stopper from rack assembly.
CAUTION: Do not reuse removed rack bushing and circlip.
16. Insert ST from pinion housing side and remove oil seal using a press.
ST 34199AE050 OIL SEAL REMOVER
NOTE: Discard removed oil seal.
2. CONTROL VALVE ASSEMBLY
NOTE: Parts requiring replacement are described in the smallest unit of spare parts including damaged parts and spare parts damaged. In actual
disassembly work, accidental damage as well as inevitable damage to some related parts must be taken into account, and spare parts for them must
also be prepared. However, it is essential to pinpoint the cause of trouble, and limit the number of replacement parts as much as possible.
1. Using ST, loosen lock nut.
ST 926230000 SPANNER