
SVX LSi AWD L6-3.3L DOHC (1997)
7. Remove shift solenoids 1, 2 and 3, and duty solenoid A.
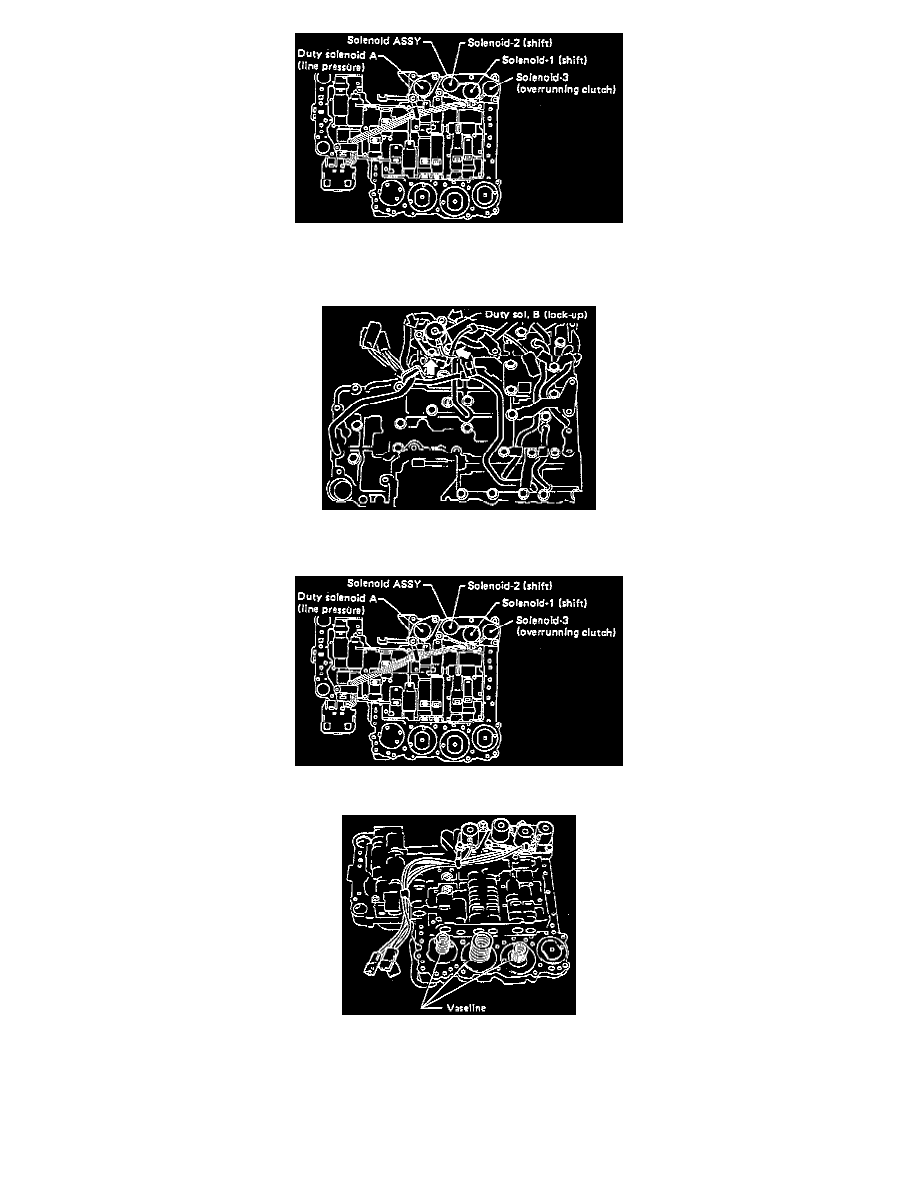
INSTALLATION
1. Install duty solenoid B (lock-up). Tighten bolts shown by solid arrows. The two bolts and brackets shown by arrows " XX " must be tightened
later.
2. Install solenoid valves. Shift solenoids, 1, 2 and 3, and duty solenoid A (line pressure).
3. Install valve body and tighten to 8 Nm (70 in.lb)
a. Secure accumulator springs using Vaseline.
b. Align manual valve connections.
c. Tighten duty solenoid B (lock-up) bracket and two bolts (also used to tighten valve body).