
Aerio L4-2.3L (2006)
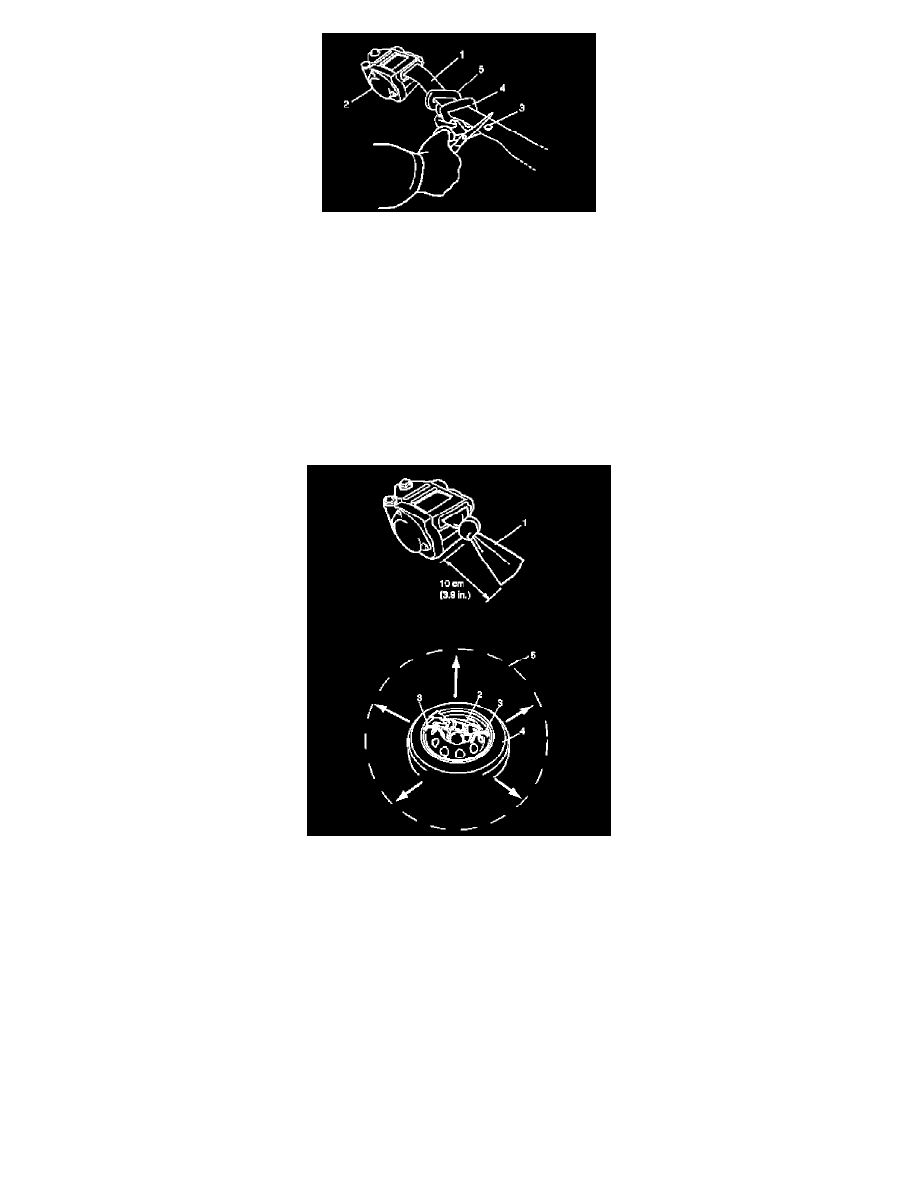
ii. Remove tongue plate (4) and shoulder anchor (5) from webbing.
iii. Tie webbing (1) tightly at 10 cm (3.9 in.) from cutting edge as shown.
iv. Tie seat belt pretensioner (2) with wire harness (3) to wheel-installed tire (4) as shown.
Wire harness specification
Stripped wire harness section 1.25 sq.mm (0.0019 sq.in) or more (Stripped wire harness diameter 1.25 mm (0.05 in.) or more)
NOTE: Wind wire harness (3) around at least 3 times.
v. Clear space (5) on ground about 185 cm (6 ft) in diameter where seat belt pretensioner (2) is to be activated. Paved, outdoor location
where there is no activity is preferred. If outdoor location is not available, space on shop floor where there is no activity and provide
sufficient ventilation. Ensure no loose or flammable objects are within activation area.
vi. Place wheel-installed tire (4) with seat belt pretensioner (2) on ground in step v).
7. Stretch deployment harness (A) from air bag (inflator) module or seat belt pretensioner to its full length 10 m (33 ft).
Special Tool
(A): 09932-75030
8. Place 12 volts vehicle battery (1) near shorted end of deployment harness (A).
9. Verify that area around air bag (inflator) module or seat belt pretensioner is clear of all people and loose or flammable objects.
10. Connect adapter cable (B) or (C) as follows.
Special Tool
(B): 09932-78332
a. For driver air bag (inflator) module Verify that driver air bag (inflator) module is resting with its vinyl trim cover facing up, and connect
adapter cable (B) to driver air bag (inflator) module.
b. For passenger air bag (inflator) module Verify that passenger air bag (inflator) module is firmly and properly secured on deployment fixture