
Equator 2WD V6-4.0L (2009)
Clutch Master Cylinder: Removal and Replacement
Clutch Master Cylinder: Removal and Installation
REMOVAL
1) Remove the snap pin and clevis pin from the clevis, and separate it from the clutch pedal.
2) Drain the brake fluid from the clutch hydraulic system.
CAUTION:
Do not spill brake fluid onto painted surfaces. If it spills, wipe up immediately and wash the affected area with water.
3) Remove the hose clamp and hose from the clutch master cylinder.
4) Remove the clutch tube using suitable tool.
5) Remove the clutch master cylinder nuts, and remove the clutch master cylinder from the vehicle.
INSTALLATION
Installation is in the reverse order of removal.
^
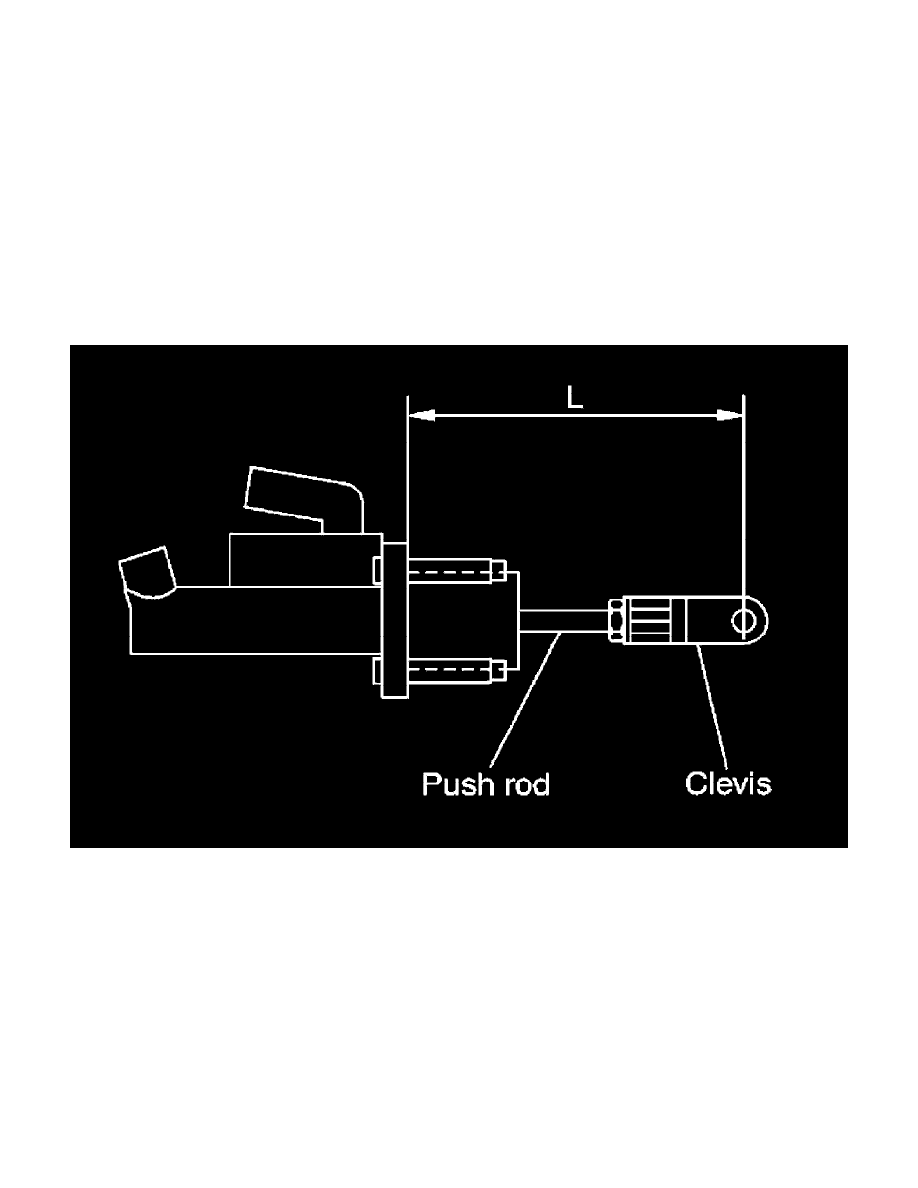
Before installation, check the position of the clevis and push rod. If "L" is outside standard length, adjust the position of the clevis and push rod.
Length "L"
QR25DE: 119.5 mm (4.70 in)
VQ40DE: 120.5 mm (4.74 in)
^
After installation, inspect and adjust the clutch pedal as necessary, then bleed the clutch hydraulic system.