
Paseo Coupe L4-1497cc 1.5L DOHC MFI (1997)
Valve Clearance: Adjustments
VALVE CLEARANCE INSPECTION AND ADJUSTMENT
NOTE: Inspect and adjust the valve clearance when the engine is cold.
1. Disconnect PCV hoses from cylinder head cover.
2. Remove high-tension cords and ignition coils from spark plugs.
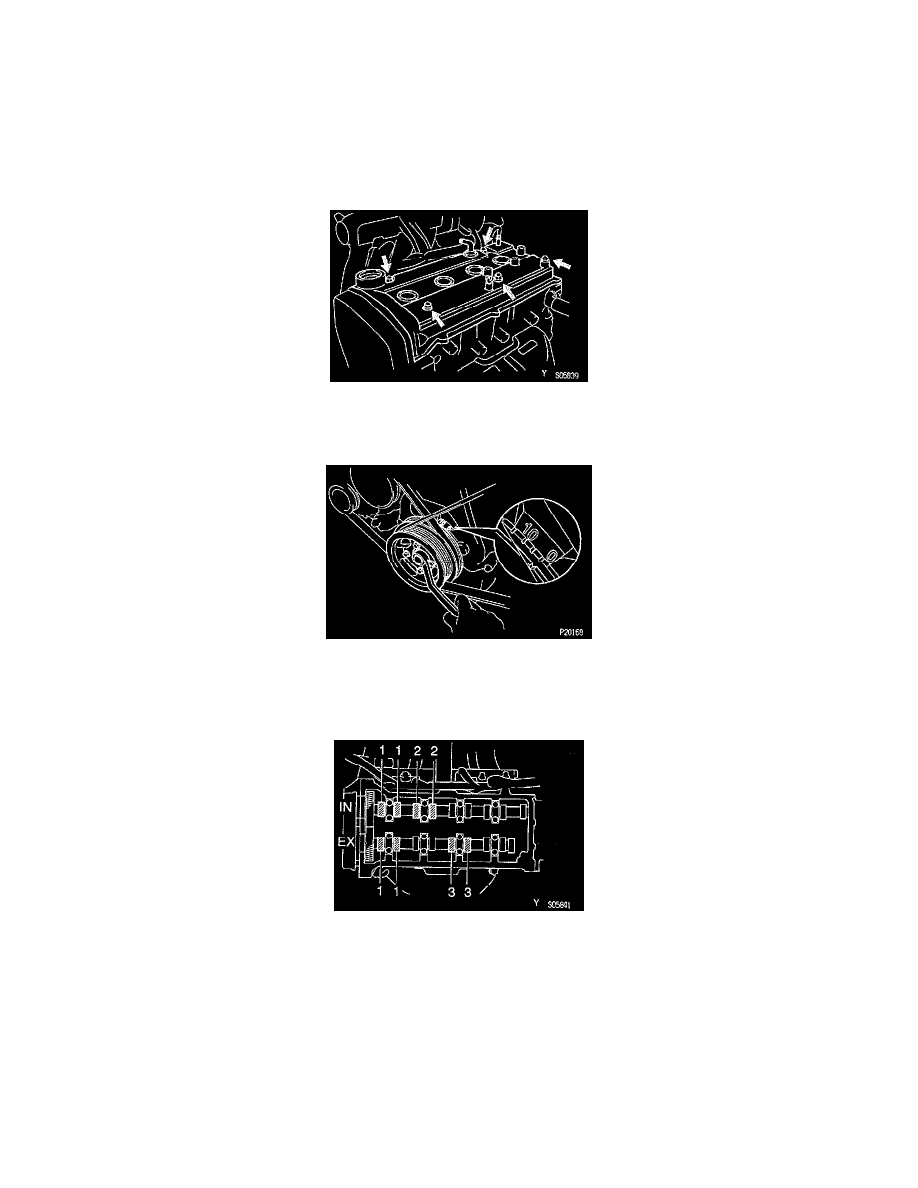
3. Remove cylinder head cover.
(a)
Remove the oil filler cap.
(b) Remove the 5 cap nuts and seal washers.
(c)
Pry out the cylinder head cover, and remove the cover and gasket.
4. Set No.1 cylinder to Top Dead Center (TDC)/Compression.
(a)
Turn the crankshaft pulley, and align its groove with the timing mark "0" of the No.1 timing belt cover.
(b) Check that the valve lifters on the No.1 cylinder E loose and valve lifters on the No.4 cylinder are tight. If not, turn the crankshaft 1 complete
evolution (360°) and align the marks as above.
5. Inspect valve clearance.
(a)
Check only the valves indicated.
^
Using a feeler gauge, measure the clearance between the valve lifter and camshaft.
^
Record the out-of-specification valve clearance measurements. They will be used later to determine the required replacement adjusting
shim.
Valve clearance (Cold):
Intake: 0.15 - 0.25 mm (0.006 - 0.010 inch)
Exhaust: 0.31 - 0.41 mm (0.012 - 0.016 inch)
(b) Turn the crankshaft pulley 1 revolution (360°) and align its groove with the timing mark "0" of the No.1 timing belt cover.