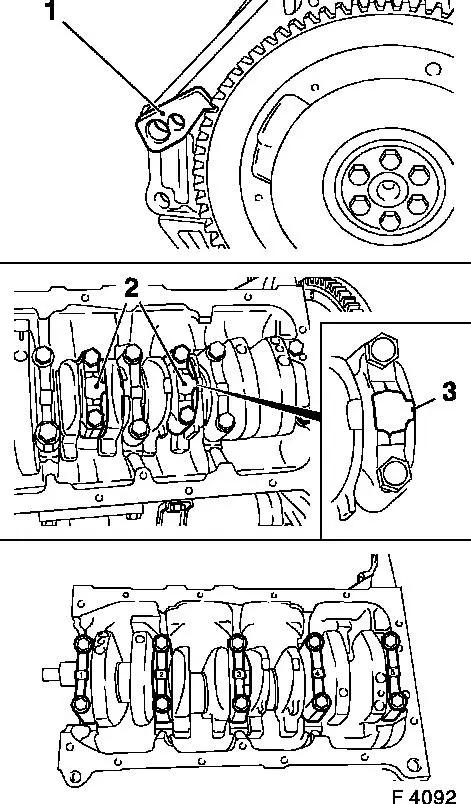
Remove engine - see "Removing and installing engine and transmission" service instruction. Mount engine with KM-412-13 adapter on KM-412 assembly stand. Remove oil pump - see "Removing and installing oil pump" service instruction. Lock flywheel or drive disc with KM-652 (1) and detach from crankshaft.
Mark sequence of con rod bearing covers (2) - con rod bearing cover bead (3) points to transmission side. Remove con rod bearing covers from con rod. Mark sequence of crankshaft bearing covers. Detach crankshaft bearing cover from cylinder block. Remove crankshaft from cylinder block.
Clean
Clean all parts.
Inspect
Check crankshaft - see operation "Crankshaft, Check".
Install, Connect
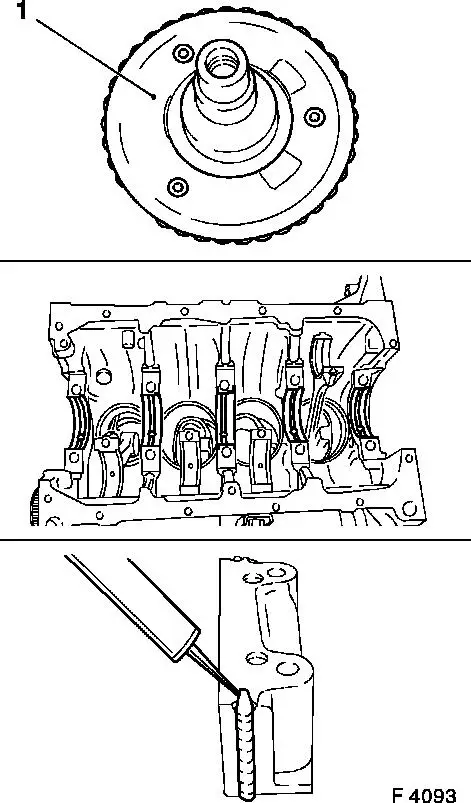
With replacement of the crankshaft: convert crankshaft pulse pickup sensor disc (1) with new bolt - tightening torque 13 Nm/10 lbf. ft.
Moisten bearing bush with engine oil and insert in cylinder block and bearing cover. Carefully insert crankshaft in cylinder block. The crankshaft's position can be correctly by gentle blows from a rubber mallet on the crank web. Apply adhesive sealant (black) in the grooves of the rear crankshaft bearing covers. Install crankshaft and con rod bearing covers, noting marks.
Torque - Angle Method
Crankshaft bearing cap to cylinder block - 50 Nm/37 lbf. ft. + 45 ° + 15 ° 1) 2) .
Con-rod bearing cap to con-rod 35 Nm/26 lbf. ft. + 45 ° + 15 ° 1) .
1) Use new bolts.
2) [Apply] further adhesive sealant (black) from above after installing bearing cover until it extrudes from the joints.
Install, Connect
Install rear crankshaft seal ring - see operation "Seal Ring, Crankshaft, Rear Replace".
Install oil pump - see operation "Oil Pump, Remove and Install".
Remove engine from KM-412 assembly stand with KM-412-8-A adapter.
Install engine - see "Removing and installing engine" service instruction.