Alternator and Starter Cable Replacement - LBQ, LBR, LBS, LBX
with Start/Stop
Removal Procedure
- Open the bonnet.
- Disconnect the battery negative cable. Refer to
Battery Negative Cable Disconnection and Connection .
- Remove the engine control module. Refer to
Engine Control Module Replacement .
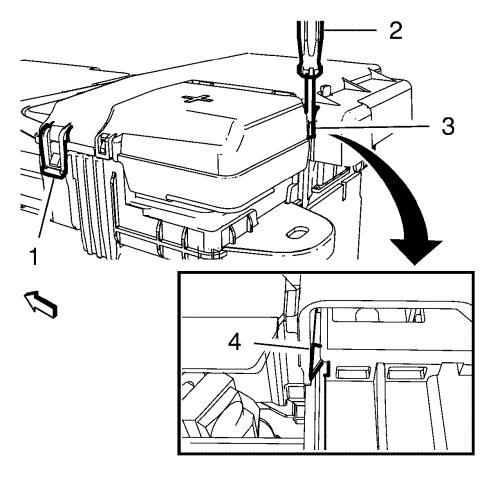
- Unlock the retaining tab (1) on the battery fuse
box cover.
- Use a suitable screwdriver (2) to unlock the
clip (4) through the window (3).
Note: Pull the battery fuse box
housing. DO NOT pull the flap.
- Open the battery fuse box cover (1).
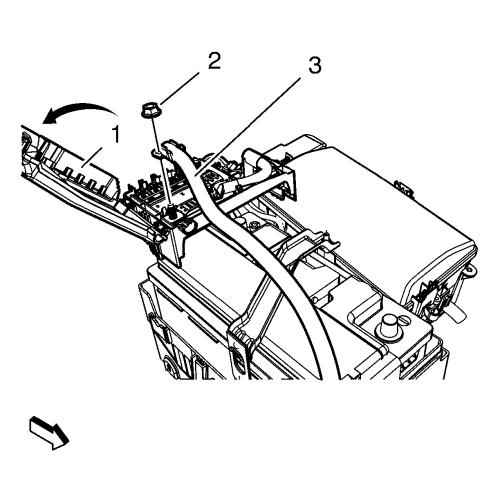
- Remove the battery positive cable to starter
nut (2).
- Remove the battery positive cable to starter (3)
from the battery.
- Remove the battery ground cable nut (1).
- Remove the battery wiring harness ground
cable (2) and the battery negative cable (3).
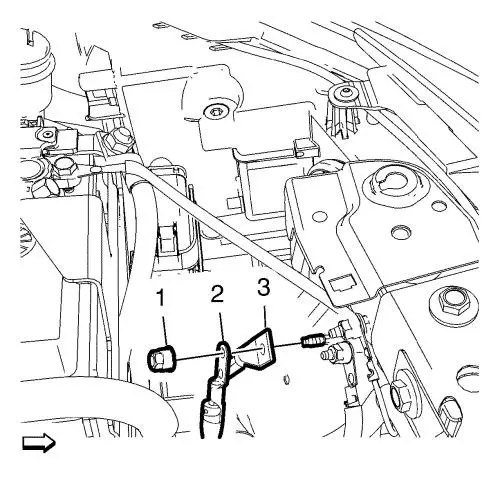
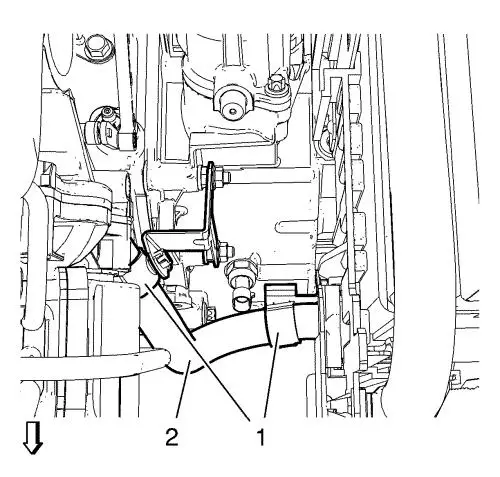
- Unclip the alternator and starter cable
conduit (1) from the bracket (2).
- Raise and support the vehicle. Refer to
Lifting and Jacking the Vehicle .
- Remove the front compartment insulator. Refer to
Front Compartment Insulator Replacement .
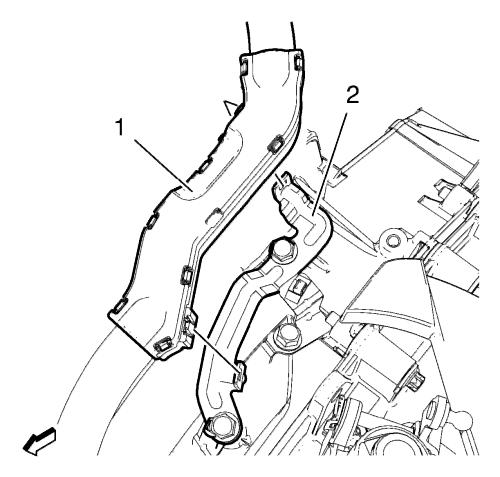
- Open the 2 wiring harness clips (1) and
remove the wiring harness (2) from the clips.
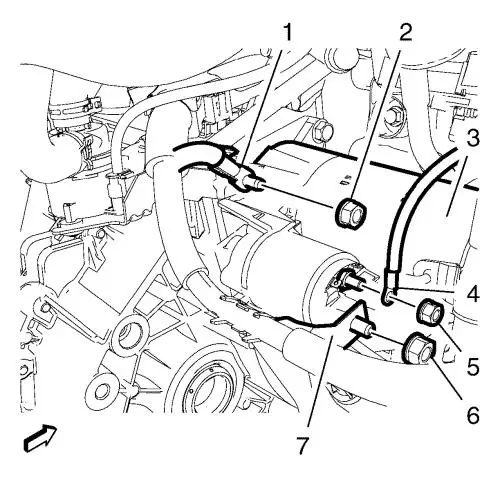
- Remove the starter and alternator positive cable
nut (6) and the starter and alternator positive
cable (7).
- Remove the ground cable nut (2) and the ground
cable (1) from the starter (3).
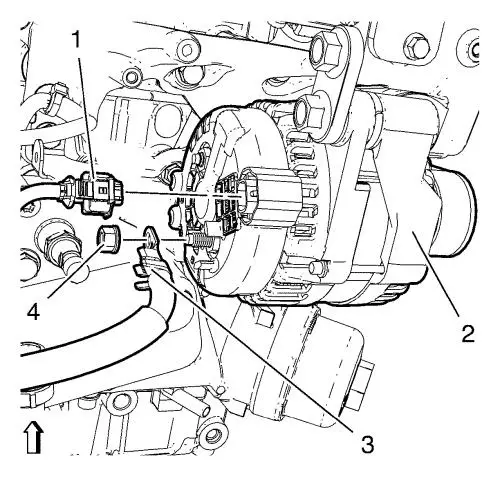
- Disconnect the wiring harness plug (1) from the
alternator (2).
- Remove the alternator positive cable nut (4) and
remove the alternator positive cable (3) from the
alternator.
- Lower the vehicle.
- Remove the alternator and starter cable.
Installation Procedure
- Install and position the alternator and starter
cable.
- Clip the alternator and starter cable conduit (1)
into the bracket (2).
- Raise the vehicle.
- Connect the wiring harness plug (1) to the
alternator (2).
- Install the alternator positive cable (3) to the
alternator.
Caution: Refer to
Fastener Caution in the Preface
section.
- Install the positive cable nut (4) and tighten
to
13 N·m (115 lb in)
.
- Install the ground cable (1) and the ground cable
nut (2) to the starter (3) and tighten to
12.5 N·m (115 lb in)
.
- Install the starter and alternator positive
cable (7) and the starter and alternator positive cable
nut (6) and tighten to
13 N·m (115 lb in)
.
- Open the 2 wiring harness clips (1) and
install the wiring harness (2) to the clips.
- Install the front compartment insulator. Refer to
Front Compartment Insulator Replacement .
- Lower the vehicle.
- Install the battery negative cable (3) and the
battery wiring harness ground cable (2).
- Install the battery ground cable nut (1) and
tighten to
9 N·m (80 lb in) .
- Install the battery positive cable to starter (3)
to the battery.
- Install the battery positive cable to starter
nut (2) and tighten to
12 N·m (106 lb in)
.
- Close the battery fuse box cover and lock the
retaining tabs (1) and (4).
- Install the engine control module. Refer to
Engine Control Module Replacement .
- Connect the battery negative cable. Refer to
Battery Negative Cable Disconnection and Connection .
- Close the bonnet.
|
