vauxhall Workshop Repair Guides

Vauxhall Workshop Service and Repair Manuals

Connecting Rod, Replace > < Piston with Connecting Rod, Remove and Install (Engine Installed)

Connecting Rod, Replace


Remove piston.

See corresponding operation in this group.


Press out wrist pin using Remover KM-427 (1.3 litre OHC engines) or KM-337 (1.6 and 1.8 litre OHC engines). When doing this, support piston with a pipe at wrist pin recess.

If piston is supported properly, no damage occurs and piston can be used again.

Object Number: 2373913  Size: DEFAULT


Heat new connecting rod to assembly temperature of 280 °C/ 536 °F in electric oven or on hot plate (1,500 to 2,000 Watts).

Temperature can be checked using thermocolour pencil, No. 2815/ 280, manufactured by Faber Castell, obtainable at most stationers.
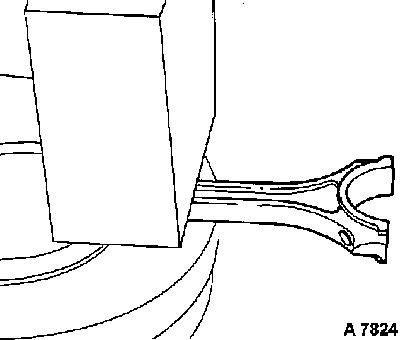
 

Upper eye of connecting rod is placed on hot plate. Eye must lie completely flat on heating surface to obtain rapid and even heating.

In order to avoid heat loss, it is recommended to place a firebrick on the connecting rod.

Object Number: 2373914  Size: DEFAULT


Colour connecting rod eye and upper part of shaft with temperature indicator pencil.

When eye of connecting rod reaches 280 °C/536 °F, green colour turns to black , indicating desired assembly temperature.

Paint must not change colour over its entire length, but only as far as beginning of connecting rod shaft.

Object Number: 2373915  Size: DEFAULT


After assembly temperature has been reached, lightly clamp connecting rod in vice. Insert guide cone and Installer KM-427 (1.3 litre OHC engines) or KM-337 and KM-538 (1.6 and 1.8 litre OHC engines) in wrist pin (coated with engine oil) and guide into bore in piston. For this, piston contacts connecting rod in direction of pressure of wrist pin. Guide piston over connecting rod in such a way that beads are on same side as shown in illus. A 7756.

Wrist pin must be pushed quickly and smoothly into piston.


Important!

Connecting rod cools quickly: rapid assembly is therefore important for perfect seating of the wrist pin.

Object Number: 2373916  Size: DEFAULT


Wrist pin cannot be re-adjusted once firmly seated.

Only connecting rods of the highest weight class are supplied as spare parts. The weight of a new connecting rod can easily be matched to the connecting rods in the engine by grinding down the two weight bosses.

The maximum permissible difference in weight between connecting rods on an engine is 8 g/0.28 oz.

See Technical Data for table of connecting rod weights.


Install piston.

Object Number: 2373912  Size: DEFAULT


Related Literature Units
-
-

Connecting Rod, Replace > < Piston with Connecting Rod, Remove and Install (Engine Installed)