vauxhall Workshop Repair Guides

Vauxhall Workshop Service and Repair Manuals

Piston Rings, Replace > < Needle Bearing in Crankshaft, Replace

Piston with Connecting Rod, Remove and Install (Engine Installed)


Remove cylinder head.

See corresponding operation in this group.

Remove oil pan.

See operation "Oil Pan Seal, Replace" in this group.


Mark connecting rod bearing caps before removing.


Remove connecting rod bearing caps.
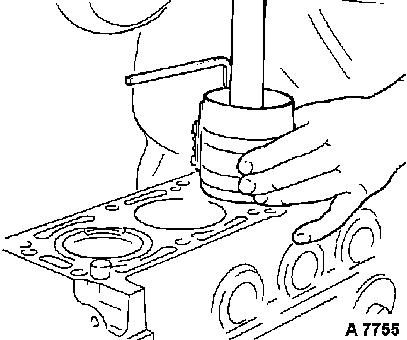
 

Push pistons out upwards with connecting rods.


Replace pistons.

See operation "Connecting Rod, Replace" in this group.

Object Number: 2373908  Size: DEFAULT


Before inserting pistons in cylinders, turn all connecting rod bearing journals to "BDC" or "TDC". On all pistons, offset gap of each ring 180° to gap of adjacent ring.

Object Number: 2373909  Size: DEFAULT


Insert piston/connecting rod assembly with lubricated connecting rod bearing halves into relevant cylinder.


Note:

The identification number of the cylinder bores is stamped on the oil pan sealing surface of engine block on 1.2 and 1.3 litre OHC engines and in the vicinity of the engine number on 1.6 and 1.8 litre OHC engines.

Object Number: 2373910  Size: DEFAULT


Ensure correct installation. Arrow on piston head points to timing gear side and bead on piston (arrow) to clutch side of engine.

Object Number: 2373912  Size: DEFAULT


Position piston ring compressor and compress piston rings.

Push piston into cylinder with hammer handle until connecting rod bearing shell is seated on connecting rod journal of crankshaft.

Lubricate all connecting rod bearings and mount bearing caps.

Observe prescribed torque.

Object Number: 2373911  Size: DEFAULT


Related Literature Units
-
-
-
-
-
-
-

Piston Rings, Replace > < Needle Bearing in Crankshaft, Replace