|
J 600500 Radiator, Replace (Y 17 DT, with AC,
RHD)
1. Open bonnet
2. Drain air conditioning
- Note! Drain air conditioning – see operation "Drain air
conditioning" in group "D"
Caution!
On vehicles from model year 04 with ESP - the steering angle
sensor loses its basic adjustment each time the battery is
disconnected. It must be recalibrated.
3. Disconnect battery
|
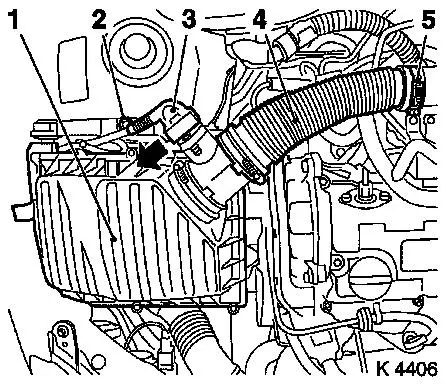
4. Remove air cleaner housing (1)
- Remove wiring harness plug for hot film mass air flow meter
(3)
- Release in direction of arrow
- Remove air intake hose (4)
- Remove bolt (2)
|
|
|
5. Release upper front panelling
|

|
6. Raise vehicle
|
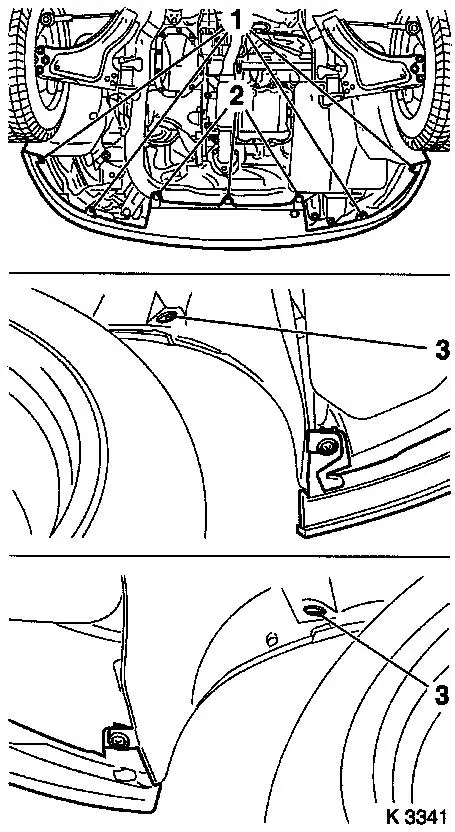
7. Release lower front panelling
- Disconnect wiring harness plug
- Remove 3 clips (2)
- Remove 4 bolts (1)
- Remove 2 nuts (3)
|
|
8. Detach front panelling
9. Raise vehicle
|
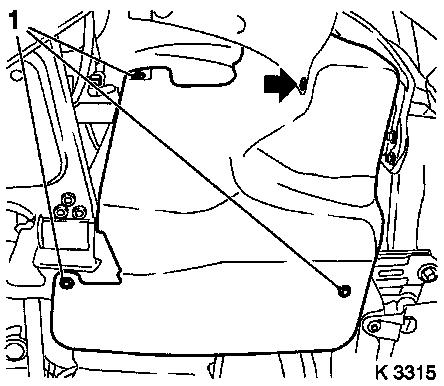
10. Remove ribbed V-belt cover
- Remove 3 bolts (1)
- Remove clip (arrow).
|
|
|
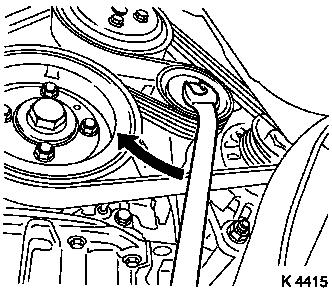
11. Remove ribbed V-belt
- Tension ribbed V-belt tensioner in direction of arrow
- Note! Mark running direction
|
|
|
12. Remove lower charge air pipe
(1)
- From centre charge air pipe (2), intercooler
- Remove from guide
|
|
|
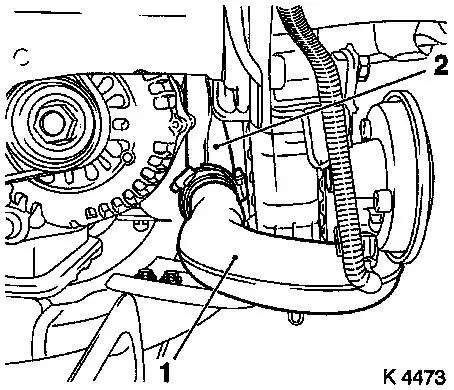
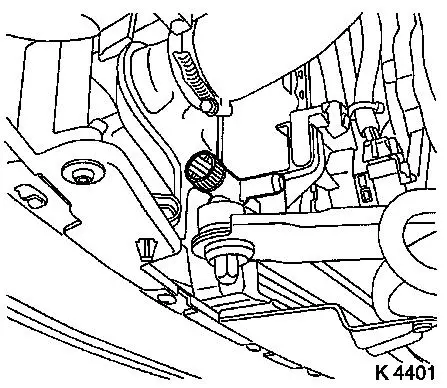
13. Remove lower AC line (2)
- Unclip wiring harness
- Disconnect pressure switch wiring harness plug (1)
- Remove bolt (3)
- Set line to one side
|
|
14. Remove charge air hose
|
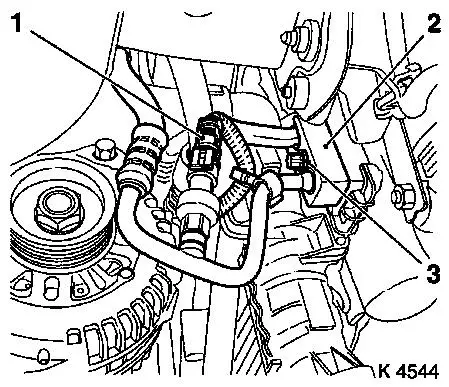
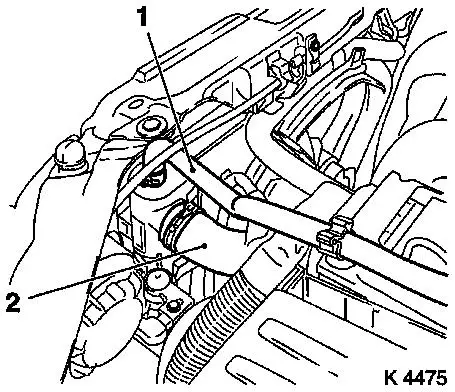
15. Detach fan housing
- Unscrew right bolt (3)
- Disconnect compressor wiring harness plug (1)
- Release lower coolant hose (2)
|
|
|
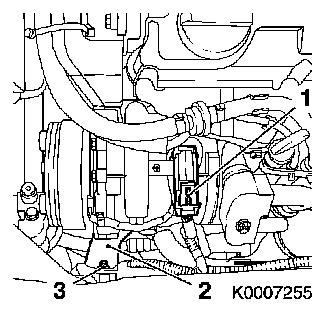
16. Release lower radiator bracket
- Remove rear 2 bolts
- Release 2 front bolts
|
|
17. Lower vehicle
|
18. Drain coolant
- Place collecting basin underneath.
- Open drain bolt
|
|
|
19. Unclip air duct (2)
- Caution! Carefully pull upward (danger of breakage)
|
|
20. Remove auxiliary fan
- Detach wiring harness plug (1)
21. Lower vehicle
|
22. Remove overflow hose (1)
23. Detach upper coolant hose (2)
|
|
24. Detach fan housing
25. Detach ribbed V-belt guide
roller
26. Disconnect lower radiator hose
27. Raise vehicle
28. Remove radiator
- Note! 2. mechanic
- Detach fan housing
- Remove radiator downwards carefully
- Note! Swing lower radiator bracket aside
|
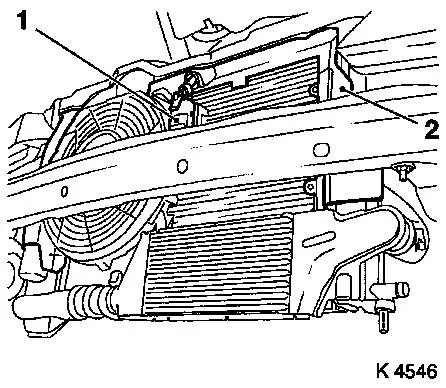
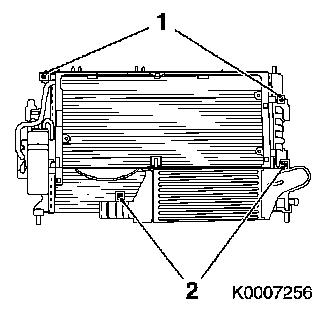
29. Detach AC radiator
30. Remove intercooler
- Loosen 2 fastening clamps (2)
|
|
31. Transfer attaching parts
- Intercooler bracket rubber mounts
32. Attach intercooler
- Fasten 2 fastening clamps
33. Attach AC radiator
34. Install radiator
- Note! 2. mechanic
- Close coolant drain bolt
- Insert radiator
- In lower radiator bracket
35. Install auxiliary fan
- Connect wiring harness plug.
36. Carefully clip in air duct
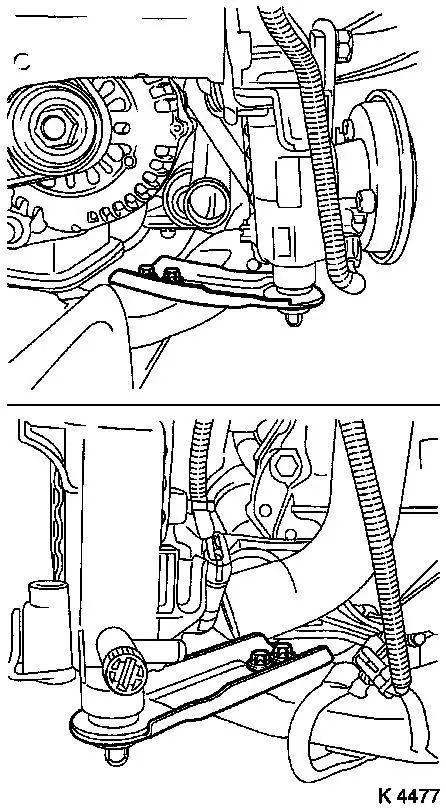
37. Tighten lower radiator bracket
- Note! Observe fan housing positioning
- Tighten bolts (15 Nm / 11 lbf. ft.)
38. Lower vehicle
39. Attach fan housing
- Tighten 2 bolts (5 Nm / 3.7 lbf. ft.)
- Clip in lower coolant hose
40. Connect upper radiator hose
41. Attach overflow hose
42. Connect lower radiator hose
43. Attach ribbed V-belt guide
roller
- Tighten bolt (38.2 Nm / 28.2 lbf. ft.)
44. Raise vehicle
45. Attach charge air hose
46. Install lower charge air pipe
47. Attach lower AC line
- Renew seal rings
- Tighten bolt (20 Nm / 15 lbf. ft.)
- Connect pressure switch wiring harness plug
- Clip on wiring harness.
48. Install ribbed V-belt
- Note! Observe running direction and installation position
- Release ribbed V-belt tensioner
49. Attach ribbed V-belt cover
- Screw in bolts
- Install clip
50. Lower vehicle
51. Position front panelling
52. Fasten lower front panelling
- Install clips
- Tighten bolts
- Tighten nuts
- Connect wiring harness plug.
53. Lower vehicle
54. Fasten upper front panelling
55. Install air cleaner housing
- Tighten bolt
- Fasten air intake hose.
- Tighten clamp (3.5 Nm / 2.6 lbf. ft.)
- Connect wiring harness plug to hot film mass air flow
meter
56. Connect battery
57. Calibrate steering angle sensor
Note: Rotate the
steering wheel one time from its right-hand to its left-hand
stop.
58. Top up coolant
- Note! Top up and bleed cooling system – see operation
"Top up and bleed cooling system"
- Observe specified coolant quantity
59. Program volatile memories
60. Charge air conditioning
- Note! Charge air conditioning – see operation "Evacuate
and charge air conditioning" in group "D".
61. Close bonnet
|
