|
Right And Left Hand Engine Damping Block, Replace
(Z 17 DTH, With Air Conditioning, LHD)
 Remove Remove
| 2. |
Disconnect battery
Important: In vehicles as of
model year 04 with ESP - every time the battery is disconnected,
the steering angle sensor loses its basic setting and must be
recalibrated
|
| • |
Ground cable
|
|
| 3. |
Detach fuel filter
| • |
Disconnect wiring harness plug
Note: Pull out of crash
box
|
|
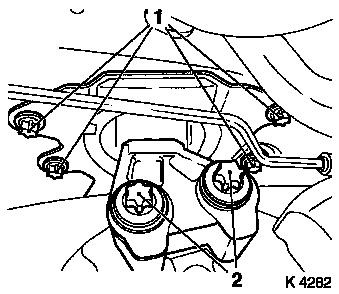
| 4. |
Remove coolant compensation tank
| • |
Remove clip
Note: Remove from
bracket and set aside
|
|
| 6. |
Unclip wiring harness on air intake pipe
|
|
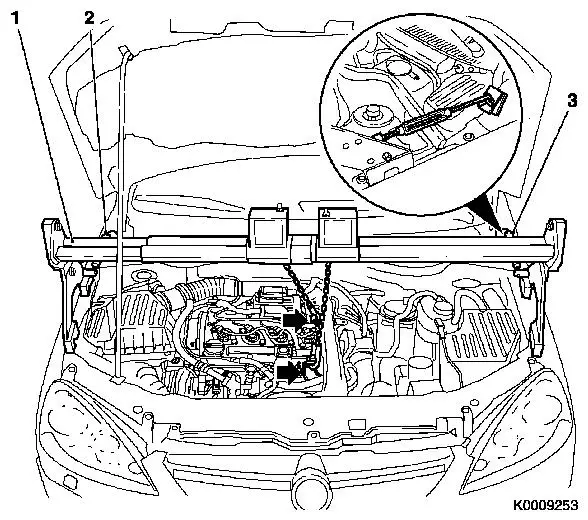
| 7. |
Attach engine bridge MKM-883-1
(1)
Note: Pay attention to
manufacturer's instructions, 2nd person
| • |
Secure with MKM-883-3 (2, 3) to
prevent tilting
|
|
Warning: Comply with manufacturer's
instructions
|
| 8. |
Attach engine
Note: Attach MKM-883-1 to 2 engine transport shackles
(arrows). Tighten tensioning chains, do not lift engine during this
process.
|
|
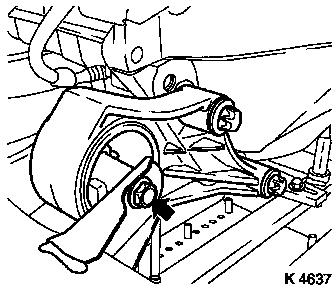
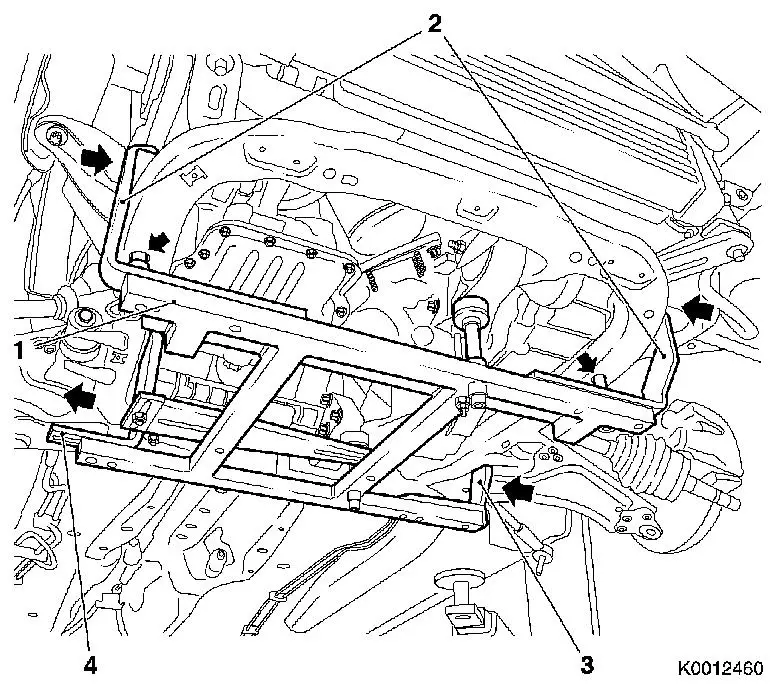
| 10. |
Release front reaction member
| • |
Remove screw connection (arrow)
|
|
|
|
| 11. |
Remove exhaust system
Important: When removing the
centre muffler, a catalytic converter, an exhaust manifold or an
exhaust manifold with catalytic converter, the exhaust system piece
remaining in the vehicle must be prevented from swinging
uncontrollably. The exhaust system piece with the flex pipe inside
can be secured for this purpose using suitable means, such as a
wire on the vehicle underbody. Bends in the flex pipe with an angle
as little as 5 – 10 degrees from the intended installation
position may result in damage with subsequent total failure of the
flex pipe.
|
| • |
Remove front exhaust pipe
|
|
|
|
| 12. |
Attach exhaust system
Note: Second person
required
|
| 13. |
Release rear reaction member
| • |
Remove screw connection (arrow)
|
|
|
|
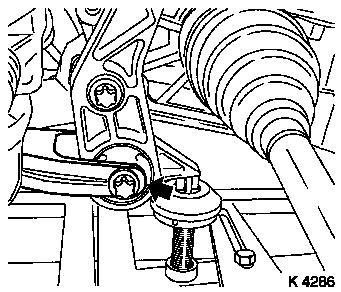
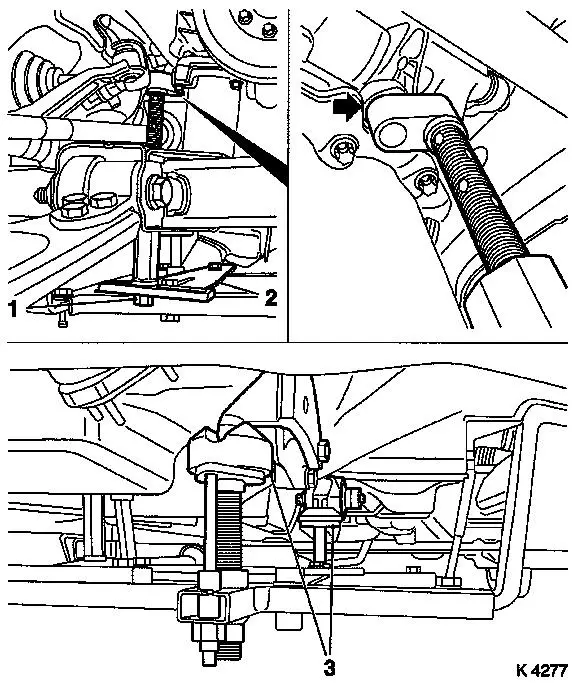
| 15. |
Release left engine damping block adapter
|
| 16. |
Remove left engine damping block bracket
|
| 17. |
Lower engine
Note: Do not damage
attaching parts! Lower engine until just before the point where the
transmission rests on the front axle body
|
| 18. |
Remove left engine damping block
|
|
|
 Install
| 19. |
Install left engine damping block
|
| 20. |
Install left engine damping block bracket
|
| 22. |
Fasten left engine damping block adapter
| • |
Tighten 2 bolts 80 Nm + 60° -
75°
|
|
| 24. |
Fasten left engine damping block
| • |
Tighten bolt
Note: It is not
possible to apply torque to the bolt
|
|
| 25. |
Fasten rear reaction member
|
| 26. |
Attach front reaction member
|
| 27. |
Attach exhaust system
Note: Second person
required
| • |
Attach retaining rubber (5x)
|
|
| 28. |
Fasten front exhaust pipe
| • |
Tighten 3 new nuts 25 Nm
|
|
| 30. |
Remove MKM-883-1
Note: 2nd person
required. Remove tensioning chains from engine
|
| 31. |
Clip wiring harness on to air intake pipe
|
| 33. |
Attach coolant compensation tank
|
Remove
| 34. |
Remove air cleaner housing
|
| 36. |
Remove ribbed V-belt cover
|
|

|
|
| 37. |
Attach KM-6394
| • |
Attach KM-6394 (1) at left side of
front axle body (arrows, fig. I)
Note: Guide pin must be
seated in bore in front axle body
|
| • |
Attach both right brackets on front axle body (arrows, Illus.
II)
Note: Guide pin must be
seated in bore in front axle body (arrow, Fig. III)
|
|
|
|
| 38. |
Install support
| • |
An KM-6169
| – |
Adjust bracket (2) for support
|
|
|
| 39. |
Adjust 3x support
| • |
Transmission side
Note: Turn spindles
until mounts (3) are positioned at guide journals free of play
|
| • |
Engine timing side
| – |
Insert journal of the support in the bore of the cylinder block
free of play (arrow)
|
|
|
|
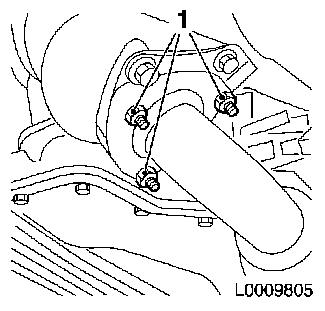
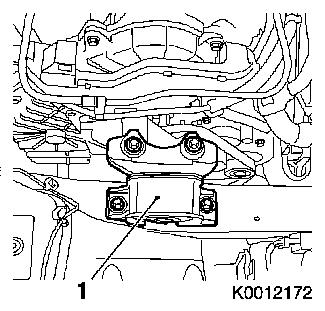
| 41. |
Remove right engine damping block (1)
|
|
|
Install
| 42. |
Install right engine damping block
| • |
At engine bracket adapter
| – |
Tighten 2 bolts 60 Nm + 30° +
15°
|
|
|
| 46. |
Attach ribbed V-belt cover
|
| 48. |
Install air cleaner housing
|
| 51. |
Program volatile memory
|
|
