|
Replace planetary gear P1 (AF13-II)
 Remove Remove
| 1. |
Remove front ring gear assembly with freewheel F1 and planetary
carrier
|
|
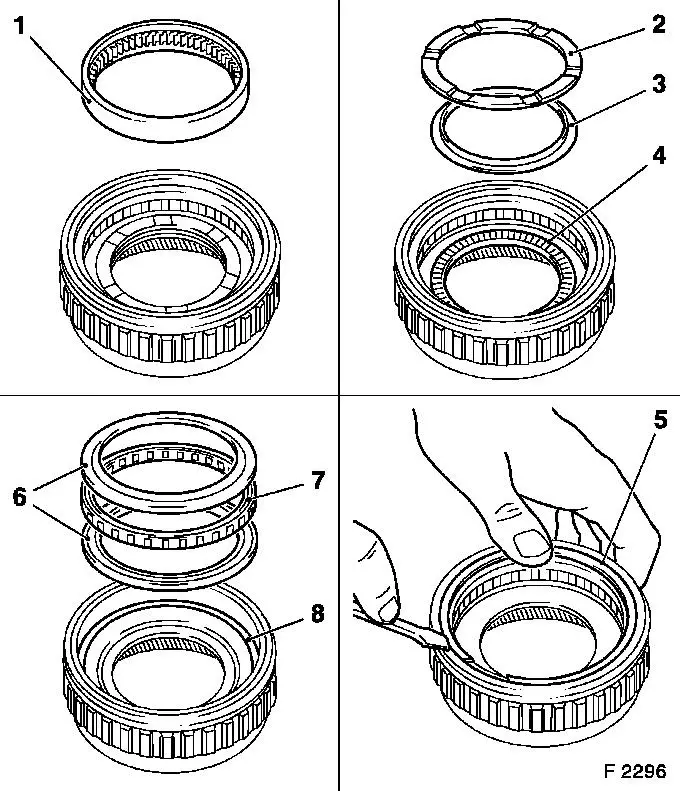
| 2. |
Remove inner ring for freewheel F1 (1)
|
| 3. |
Remove thrust washer (2), friction washer (3) and axial needle
bearing assembly (4)
|
| 4. |
Remove retaining ring (5) for freewheel F1 with a suitable
screwdriver
|
| 5. |
Remove bearing rings (6) with freewheel F1 (7) and thrust
washer (8)
|
|
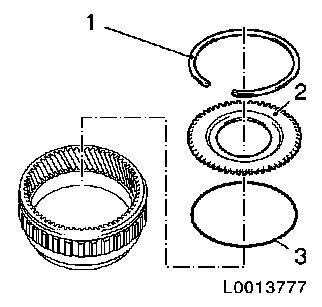
| 6. |
Remove flange (2) and O-ring (3)
| • |
Remove retaining ring (1) with retaining ring pliers
Note: Pay attention to
flange and O-ring installation positions
|
|
|
|
 Install
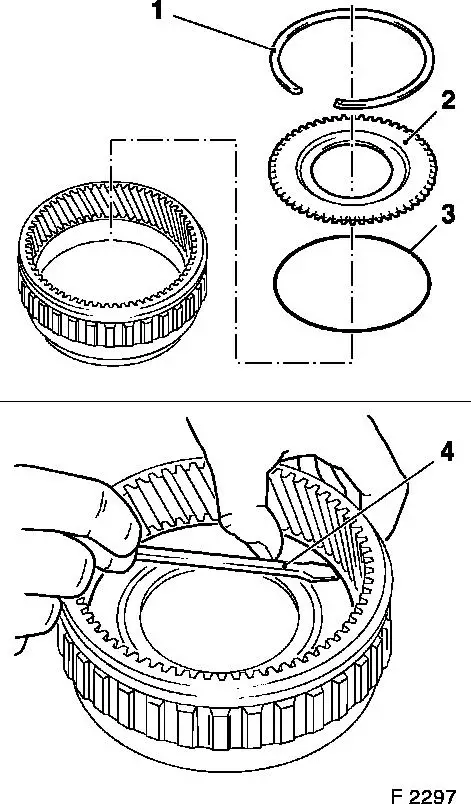
| 7. |
Insert O-ring (3), flange (2) and new retaining ring (1)
| • |
Push retaining ring into groove with screwdriver (4)
Note: Ensure that
retaining ring is correctly seated in groove.
|
|
|
|
|
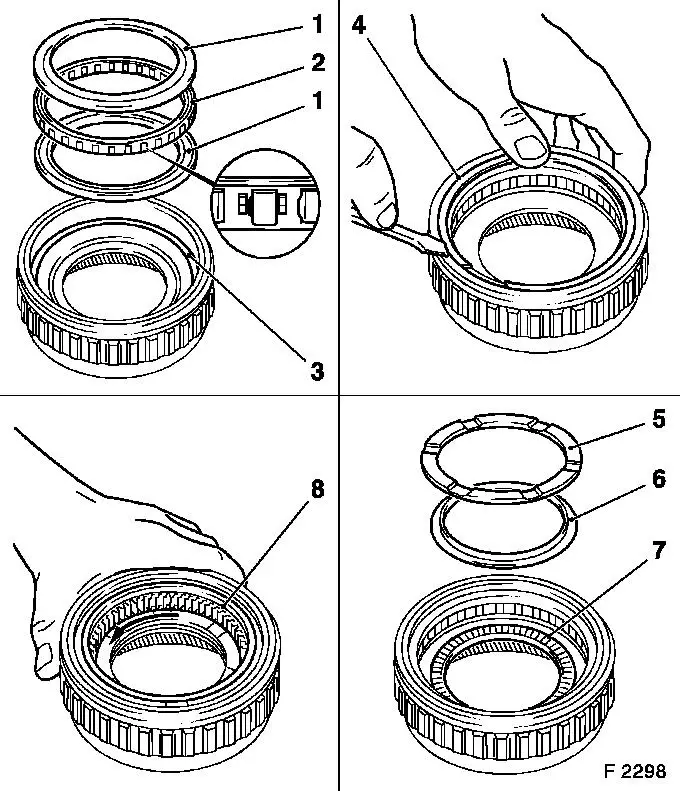
| 8. |
Insert thrust washer (3) and freewheel F1 (2) with bearing
rings (1)
Note: Collar for
overrunning clutch faces upwards.
|
| 9. |
Attach new retaining ring (4) to freewheel F1
|
| 10. |
Install axial needle bearing (7), friction washer (6) and
thrust washer (5)
Note: Install friction
washer with bevel on top
|
| 11. |
Install inner ring (8) for freewheel F1 into freewheel
mechanism
|
| 12. |
Check freewheel
Note: Rotate
anticlockwise (arrow) - freewheel active.
Rotate clockwise - freewheel blocked.
|
|
| 13. |
Install front ring gear assembly with freewheel F1 and
planetary carrier
|
|
