|
Remove and install valve body assembly
(AF13-II)
 Remove Remove
| 1. |
Remove transmission control unit bracket 
|
| 2. |
Remove upper engine cover.
|
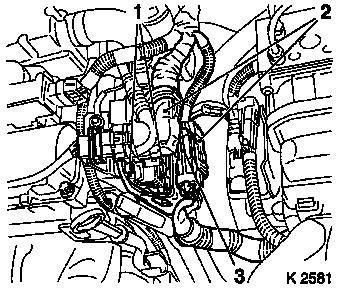
| 3. |
Release and disconnect engine control unit wiring harness plug
(2) and combination plug (3)
|
| 4. |
Remove bracket
| • |
Unscrew 2 bolts (1) for wiring harness plug bracket
|
|
| 5. |
Detach valve body cover from transmission
|
|
|
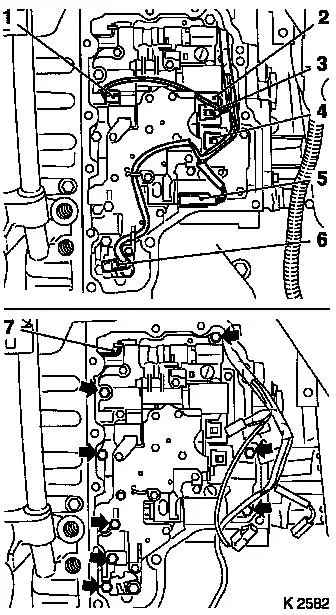
| 6. |
Disconnect wiring harness plug from solenoid valves:
- Neutral shifting (1)
- Pressure regulator (2)
- 2-3 gearshift valve (3)
- 1-2 / 3-4 gearshift valve (4)
- Converter clutch (5)
- Unclip temperature sensor (6)
|
| 7. |
Detach valve body
| • |
Remove 8 bolts (arrows)
Note: Note different
bolt lengths.
|
|
| 8. |
Carefully pull back valve body and unhook connecting rod (7)
from toothed section
|
| 9. |
Remove valve body upwards
|
|
|
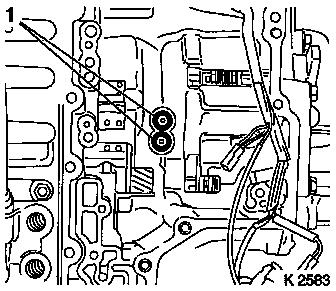
| 10. |
Remove seal rings (1) from transmission housing
|
|
|
 Install
| 11. |
Insert new seal rings (1) with assembly grease into
transmission housing
|
|
|
| 12. |
Insert valve body into transmission housing
| • |
Hook connecting rod (7) into toothed section
|
|
| 13. |
Attach valve body to transmission
Note: Note different
bolt lengths.
|
| 14. |
Connect solenoid valve wiring harness plugs:
Note: Ensure that
cables are laid correctly.
- Neutral shifting (1)
- Pressure regulator (2)
- 2-3 gearshift valve (3)
- 1-2 / 3-4 gearshift valve (4)
- Converter clutch (5)
- Unclip temperature sensor (6)
|
| 15. |
Attach valve body cover to transmission
|
|
|
| 16. |
Install wiring harness plug bracket (1)
|
| 17. |
Connect engine control unit wiring harness plug (2) and
combination plug (3) and lock
|
| 18. |
Install upper engine cover
| • |
Tighten engine cover 8 Nm
|
|
| 19. |
Check and correct transmission fluid level
|
|
|
|
