|
Replace Front Complete
 Remove Remove
| 1. |
Remove front panelling
|
| 4. |
Remove reinforcement front panelling, lower 
|
|
| 5. |
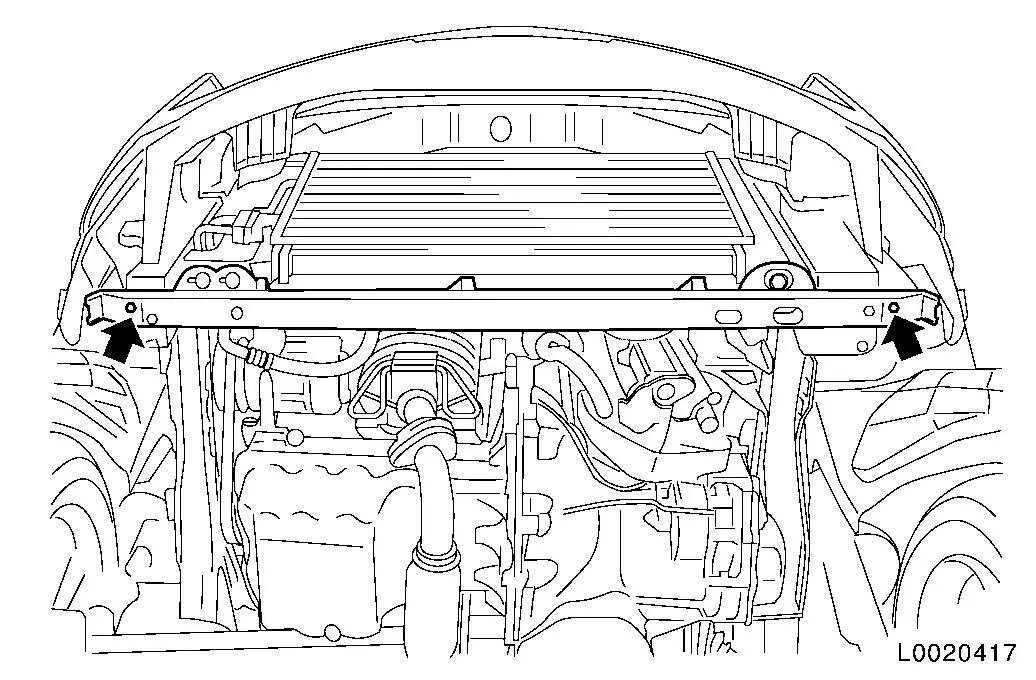
Remove cross member, radiator holder, from front member
bracket
| • |
Unscrew 2x bolts (arrows)
Note: Radiator unit
remains on radiator holder cross-member!
|
| • |
Support radiator unit with radiator holder cross-member on a
suitable tool
Note: Secure radiator
unit against tipping!
Note: Do not kink,
stretch or damage lines and connections!
|
|
|
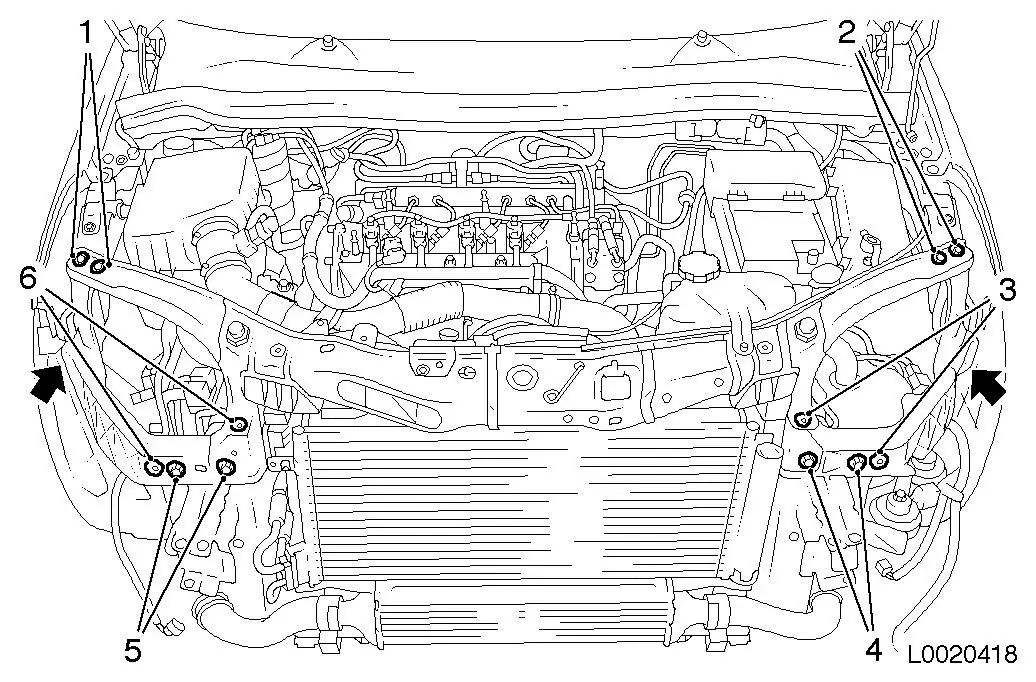
| 6. |
Remove attachments from front top
|
|
| 7. |
Detach front top
| • |
Drill out 4x rivets (3) and (6)
|
| • |
Unscrew 6x bolts (4), (5) and (arrows)
|
| • |
Loosen 4x bolts (1) and (2) and leave in place
|
|
|
|
Important: Risk of damage! Only
pull the front top slightly forwards until the front member bracket
can be removed!
|
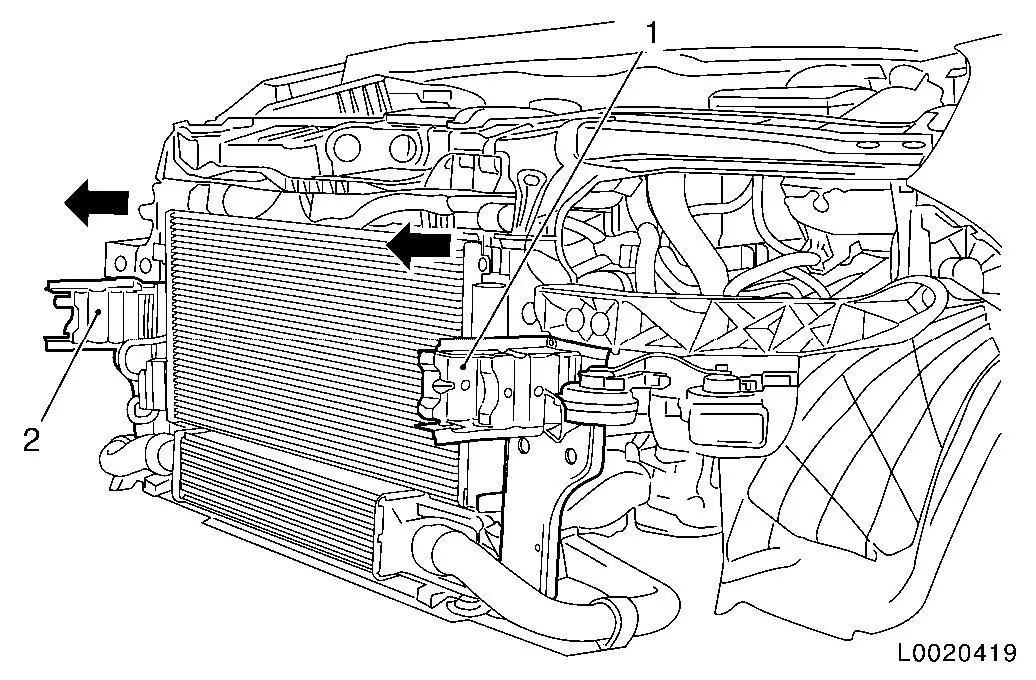
| 8. |
Pull front top slightly forwads (direction of arrow) and remove
front member holder (1) and (2).
|
|
|
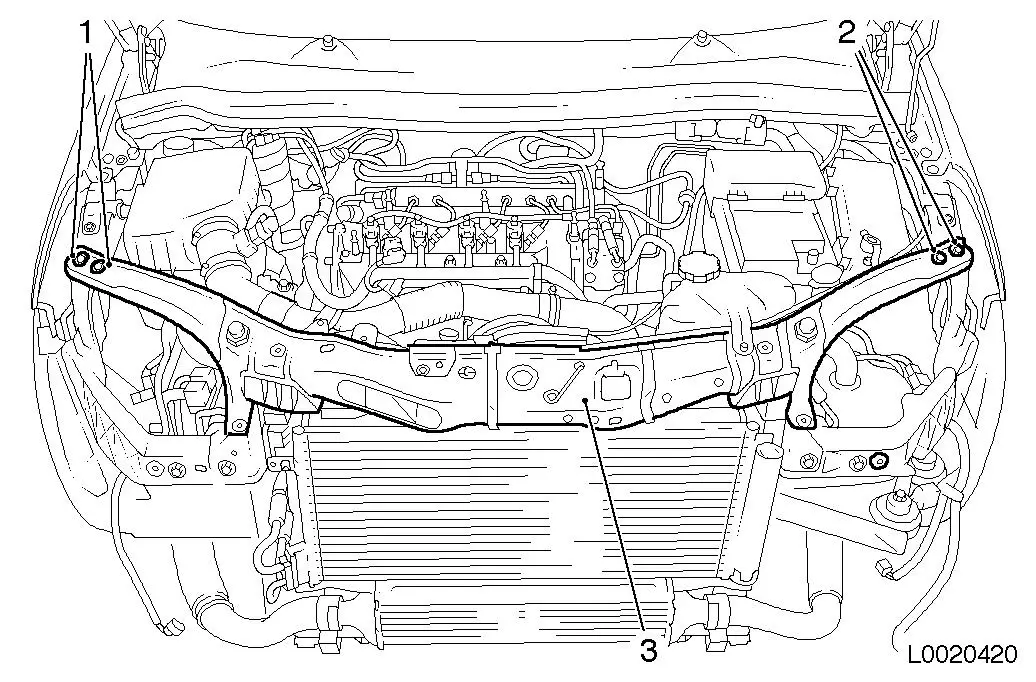
| 9. |
Remove top front
| • |
Unscrew 4x bolts (1) and (2)
|
|
|
 Install
| 10. |
Install top front
| • |
Fit front top and position
|
|
| 11. |
Attach front top
| • |
Insert front member bracket
|
| • |
Rivet on 4x blind rivet
|
|
| 12. |
Fit attachments to front top
|
| 13. |
Attach cross member, radiator holder, to front member
bracket
| • |
Insert radiator unit in top front
|
| • |
Tighten 2x bolts, cross-member to front member bracket
|
|
| 14. |
Install front panelling reinforcement, lower
|
| 16. |
Install both headlamps
|
| 17. |
Install front panelling
|
|
