|
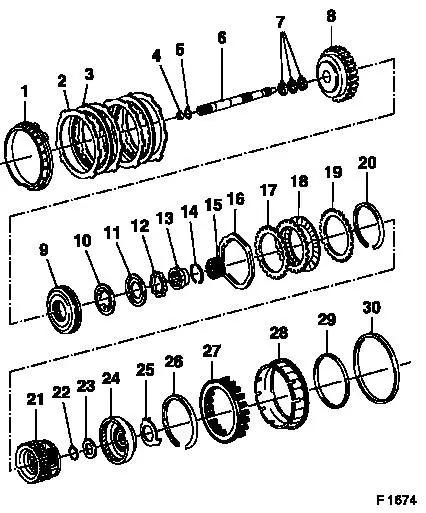
Overrunning Clutch Assembly with Planetary
Carrier, Disassemble and Assemble
Survey of Overrunning Clutch with Planetary
Carrier
|
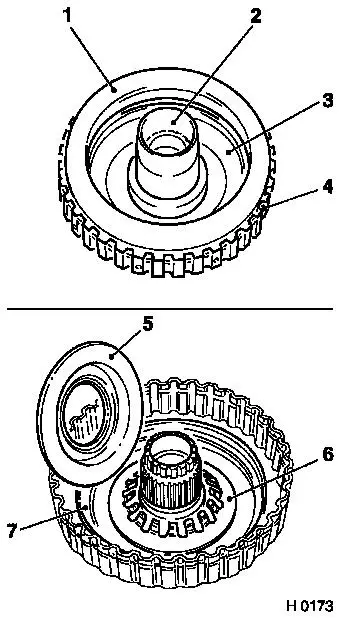
1
|
Thrust ring, 4th gear
|
|
2
|
Clutch plate (steel), x 2
|
|
3
|
Clutch plate (lining)
|
|
4
|
Ball valve
|
|
5
|
O-ring
|
|
6
|
Drive shaft
|
|
7
|
Seal ring, slotted version – from production serial number
4834734 closed seal rings, which may also be used in older
transmissions.
|
|
8
|
Clutch housing, overrunning clutch
|
|
9
|
Clutch piston, overrunning clutch, coated with sealing
rubber
|
|
10
|
Return spring
|
|
11
|
Seat for return spring
|
|
12
|
Overrunning clutch
|
|
|
|
13
|
Overrunning clutch hub
|
|
14
|
Retaining ring
|
|
15
|
Sun gear
|
|
16
|
Damping cushion
|
|
17
|
Clutch plate (steel), x 2
|
|
18
|
Clutch plate (lining)
|
|
19
|
Support plate
|
|
20
|
Retaining ring
|
|
21
|
Planetary carrier assembly
|
|
22
|
Retaining ring
|
|
23
|
Axial needle bearing
|
|
24
|
Internal gear
|
|
25
|
Thrust washer
|
|
26
|
Retaining ring
|
|
27
|
Spring set
|
|
28
|
Clutch piston, 4th gear
|
|
29
|
Seal ring for clutch piston (inner)
|
|
30
|
Seal ring for clutch piston (outer)
|
|
|
 Remove Remove
|
Remove overrunning clutch assembly from transmission – see
operation "Assemblies, Remove and Install".
 Disassemble
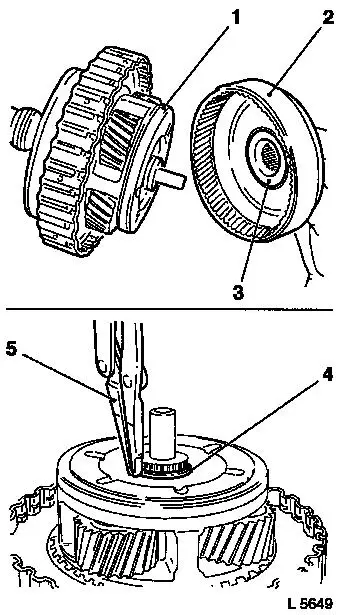
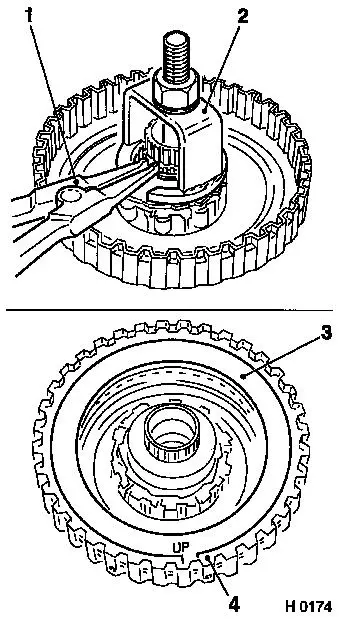
Remove axial needle bearing (3) from the hollow gear (2).
Caution
Use protective jaws on vice.
Disassemble
Clamp overrunning clutch assembly with planetary carrier (1) on
drive shaft in vice.
Remove retaining ring (4) using KM-396 (5).
|
|
|
Detach overrunning clutch assembly with planetary carrier (1)
from drive shaft (2).
 Inspect
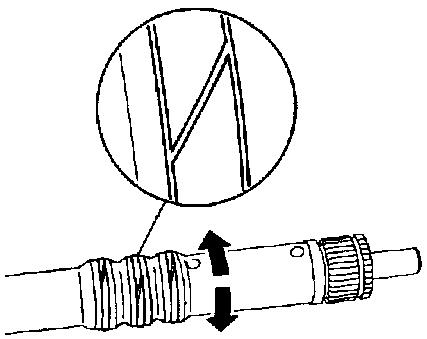
After disassembling, check the seal rings (x 3) on the drive
shaft for wear or damage, replace if necessary.
|
|
 Assemble
|
When replacing, widen seal rings slightly (arrows) and
remove.
Coat the installed seal rings with installation grease.
|
|
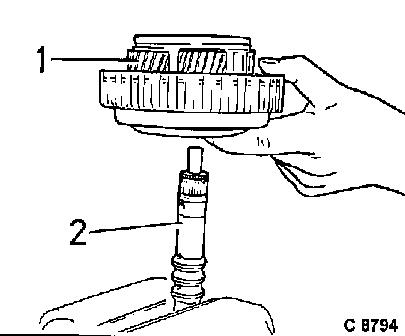
Disassemble
|
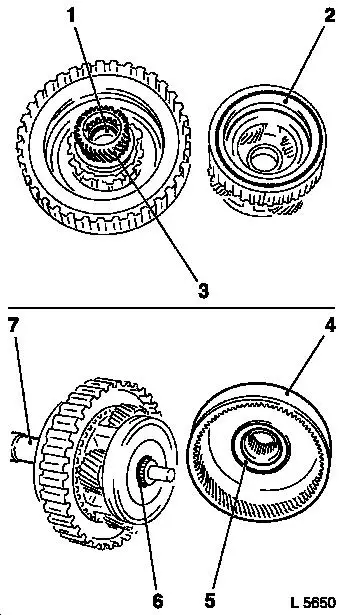
Detach planetary carrier (1) from overrunning clutch (2) and
remove sun gear (3) from planetary carrier.
Lever retaining ring (4) out of ring groove using screwdriver
and remove.
|

|
|
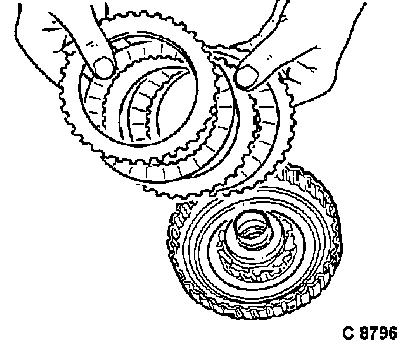
Remove clutch discs and pressure plate
from clutch housing.
|
Steel plates:
|
x 2
|
|
Lining plates:
|
x 1
|
|
Damping cushion:
|
x 1
|
|
Pressure plate:
|
x 1
|
If clutch plates are not being replaced, install in original
position. See also "Technical Data" for number of steel and lining
plates.
|
|
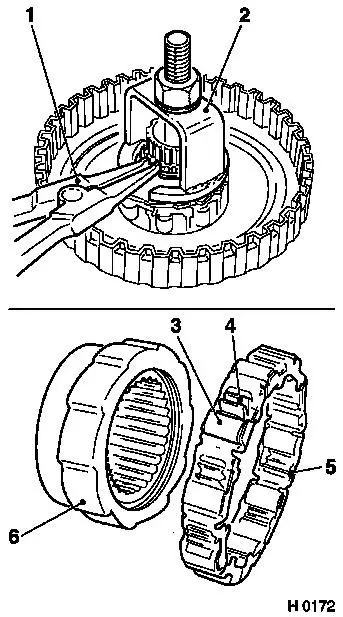
Disassemble
|
Attach KM-679 (2) to clutch piston and compress relief springs
until retaining ring is free.
Remove retaining ring using KM-396 (1).
Release KM-679 and remove.
Detach overrunning clutch assembly from clutch hub.
Detach overrunning clutch (5) from the overrunning clutch hub
(6).
Inspect
Examine springs (4) and cylinder rollers (3) of the overrunning
clutch for damage and wear.
|
|
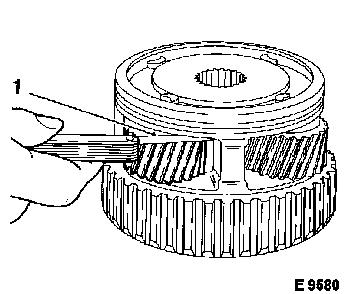
Disassemble
|
Detach intermediate ring (1) and return spring (2) from clutch
piston.
Remove clutch piston (3) from clutch drum. If necessary, knock
clutch housing slightly onto wooden pad.
Assemble
Before assembling, check all components of overrunning clutch
with planetary carrier for wear or damage, replace with new parts,
if necessary.
Check gasket coating of piston, if necessary, replace piston
completely.
|

|
Components of Overrunning Clutch
| 1. |
Retaining ring |
| 2. |
Pressure plate |
| 3. |
Clutch plate (lining), x 1 |
| 4. |
Clutch plate (steel), x 2 |
| 5. |
Sun gear |
| 6. |
Retaining ring |
| 7. |
Overrunning clutch hub |
| 8. |
Overrunning clutch |
| 9. |
Intermediate ring |
| 10. |
Return spring |
| 11. |
Clutch piston, coated with sealing rubber |
| 12. |
Clutch housing |
| 13. |
Damping cushion |
|

|
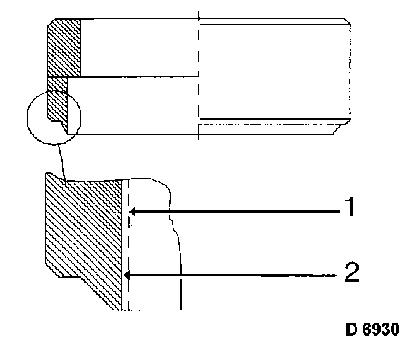
 Measure
|
Measure planetary carrier. Measure play between planetary gear
and planetary carrier at point "1". Play must be between 0.24 mm
and 0.64 mm (0.009 in. and 0.025 in.).
Caution
The overrunning clutch piston coated with sealing rubber has a
slightly larger outer diameter than the one with detachable seal
rings (up to MY '91 on Omega-A and Senator-B).
|
|
|
Therefore perform following modification on KM-687-1: Enlarge
the previous inner diameter from 117.0 to 117.4 mm (1) by turning
the inside to 117.6 to 117.8 mm (2). The surface must be free of
grooves. Mark modification on tool by adding "A" after the tool
number: KM-687-1-A.
New tools which are ordered already have this alteration.
|
|
Assemble
|
To protect the sealing lip on the outer and inner diameter,
slide KM-687-1 (1) onto the clutch piston and KM-687-2 (2) onto the
hub of the clutch housing.
Coat sealing lips of seal rings with transmission fluid or
installation grease.
Insert clutch piston (3) into clutch housing (4) and remove
KM-687.
Place return spring (Belleville type, 6) onto clutch piston
(7).
Place intermediate ring (5) in clutch housing.
|
|
|
Push overrunning clutch onto overrunning clutch hub and place
overrunning clutch assembly onto clutch hub. Insert retaining ring.
Attach KM-679 (2) and compress return springs until ring groove is
free. Insert retaining ring with KM-396 (1). Ensure correct
seating. Relieve tension on KM-679 and detach.
Caution
Immerse lining plates beforehand in transmission fluid for about
20 minutes. The mark "UP" on the last thrust plate to be inserted
(3) must face upwards.
Assemble
Put corrugated washer into clutch housing first. Insert steel
plates (2 pieces) and lining plates (1 pieces) into clutch drum
alternately.
 Install
Insert retaining ring (4). Note correct seating.
|
|
Assemble
|
Position sun gear (3) on spline of clutch hub (1).
Align the carrier pins on the lining plates of the overrunning
clutch with a screwdriver. Slide planetary carrier (2) into the
clutch housing and onto the sun gear.
At the same time, turn the planetary carrier anticlockwise,
until the correct seating has been reached – do not use
force. After assembly, turn overrunning clutch and check for
perfect function.
Insert axial needle bearing (5) into hollow gear (4) –
note installation position.
Push drive shaft (7) into overrunning clutch assembly with
planetary carrier and insert retaining ring (6) using KM-396.
Ensure correct seating.
Push hollow gear (4) onto planetary carrier.
Install
Install overrunning clutch assembly with planetary carrier in
transmission – see operation "Assemblies, Remove and
Install".
|
|
|
