vauxhall Workshop Repair Guides

Vauxhall Workshop Service and Repair Manuals

Damping Bushings|Description and Operation > < Damping Bushing in Trailing Link, Front, Replace


Lower Control Arm and/or Damping Bushing, Remove and Install  

Object Number: 616191  Size: DEFAULT  Remove, Disconnect   

Remove rear wheel.  

Remove locking plate (1) and release fastening bolts (2) and (3) and unscrew.  

Remove lower control arm.  

Clamp control arm in vice with protective jaws.  

Object Number: 616193  Size: DEFAULT  Disassemble   

Pull damping bushing out of control arm with KM-906-70 (6), KM-906-31 (4) and KM-906-34 (5) in conjunction with KM-906-34 (7).  

Object Number: 2395531  Size: DEFAULT


Object Number: 616194  Size: DEFAULT  Assemble   

Carefully pull damping bushing (2) into control arm with KM-906-70 (5), KM-906-33 (1), KM-906-34 (3) and KM-906-32 (4).  
Object Number: 616192  Size: DEFAULT  Install, Connect   

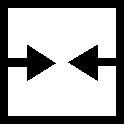
Attach lower control arm with new fastening bolt and new fastening nut to trailing link and crossmember - loosely tighten screw connection.  

Attach rear wheel.  

Lower vehicle and tighten screw connections for lower control arm to crossmember and trailing link. Fasten screw connection for lower control arm to trailing link with new locking plate.  
Object Number: 616200  Size: DEFAULT  Torque - Angle Method   

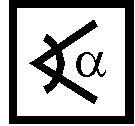
Wheel to wheel hub - 110 Nm / 81 lbf. ft.  

Lower control arm to crossmember and trailing link - 90 Nm / 66 lbf. ft. + 75 ° + 15 ° .  

Object Number: 616196  Size: DEFAULT  Inspect   

Check toe-in and adjust if necessary - see operation "Rear Axle Toe-in, Check / Correct" in group "E".  

Object Number: 2391880  Size: DEFAULT


Related Literature Units
-

Damping Bushings|Description and Operation > < Damping Bushing in Trailing Link, Front, Replace