Shift Lever Assembly, Remove and Install (F 23)
 Remove, Disconnect Remove, Disconnect Remove centre console - see operation "Centre Console, Remove and Install" in group "C".
 Important! Important! Open clamp as far as notch (4) only. Opening any further may damage clamp.
Remove, Disconnect Remove shift Bowden cable (selector tie) (1) from clamping piece for gearshift lever assembly. Remove shift Bowden cable (shift tie) (3) from clamping piece of gearshift lever assembly. Prise shift Bowden cables (2) out of gearshift lever assembly. Remove fastening bolts for gearshift lever assembly from console (arrows) and remove gearshift lever assembly from centre console. | 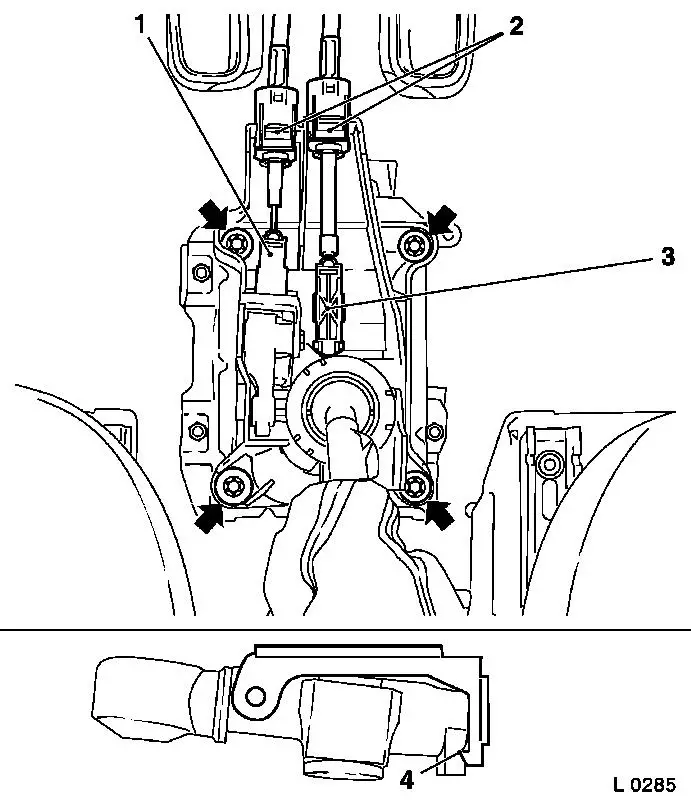
|
Remove, Disconnect Remove clamping piece (shift tie) from gearshift lever assembly. To do this, tap clamping piece (shift tie) (2) with a drift (1) so that the clamping piece socket is released from the gearshift lever assembly ball joint. Remove clamping piece (selector connection) from gearshift lever assembly. For this, engage white sleeve between clamping piece (selector connection) (4) and gearshift lever assembly with KM-6065 (3) and prise off clamping piece (selector connection). | 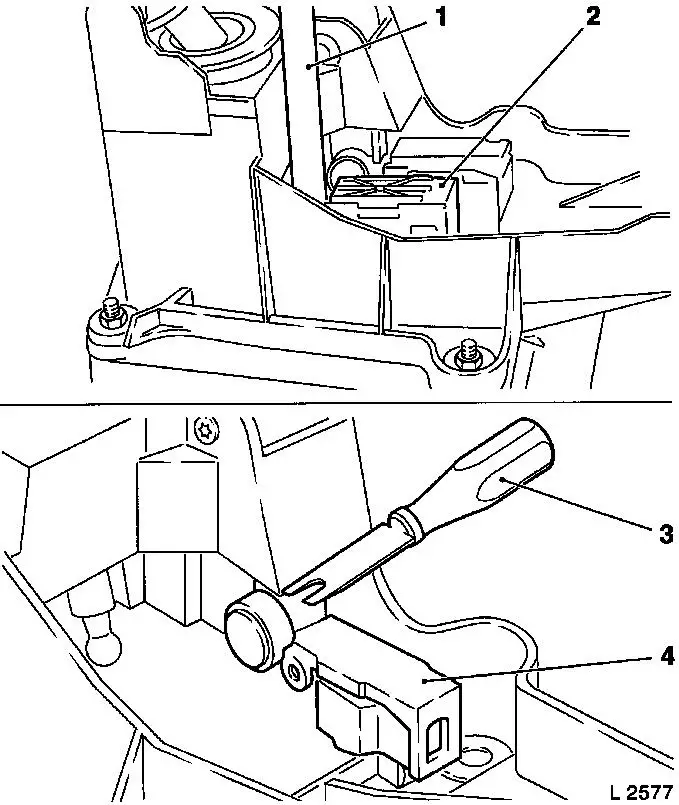
|
 Install, Connect Install, Connect Attach clamp (selector connection) (1) to shift lever assembly. If necessary, assist with pliers. Attach clamping piece (shift tie) to gearshift lever assembly (4). To do this, tap clamping piece (shift tie) with a sleeve (3) and a hammer (2) so that the joint socket of the clamping piece moves onto the shift lever assembly ball joint. | 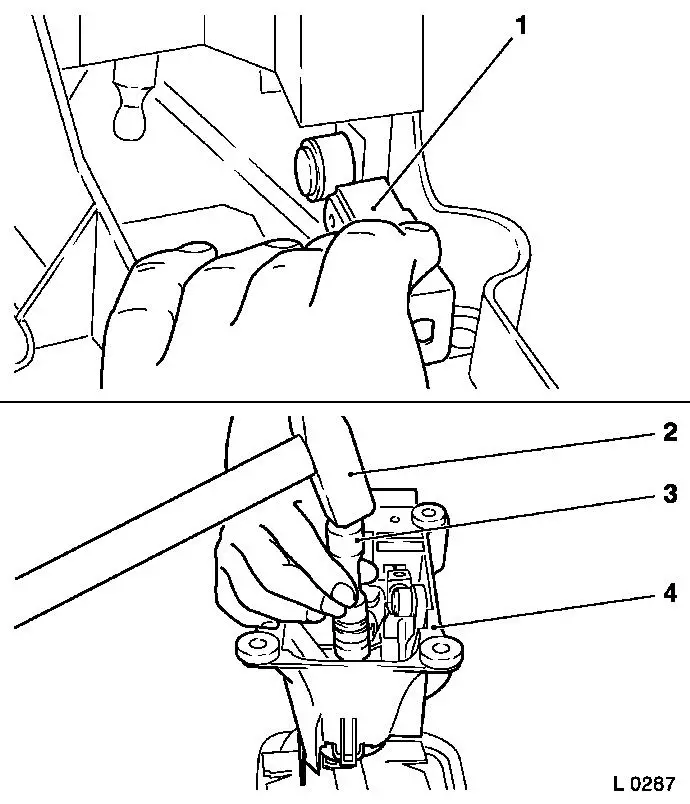
|
Install, Connect Attach shift lever assembly to console and fasten with fastening bolts (arrows) - tightening torque 10 Nm / 7.5 lbf. ft. Insert shift cables (2) in shift lever assembly. Attach shift Bowden cable (selector connection) to clamping piece (1) of gearshift lever assembly. Do not lock clamping piece. Attach shift Bowden cable (shift connection) to clamping piece (3) of gearshift lever assembly. Do not lock clamping piece.
Important! Note allocations. | 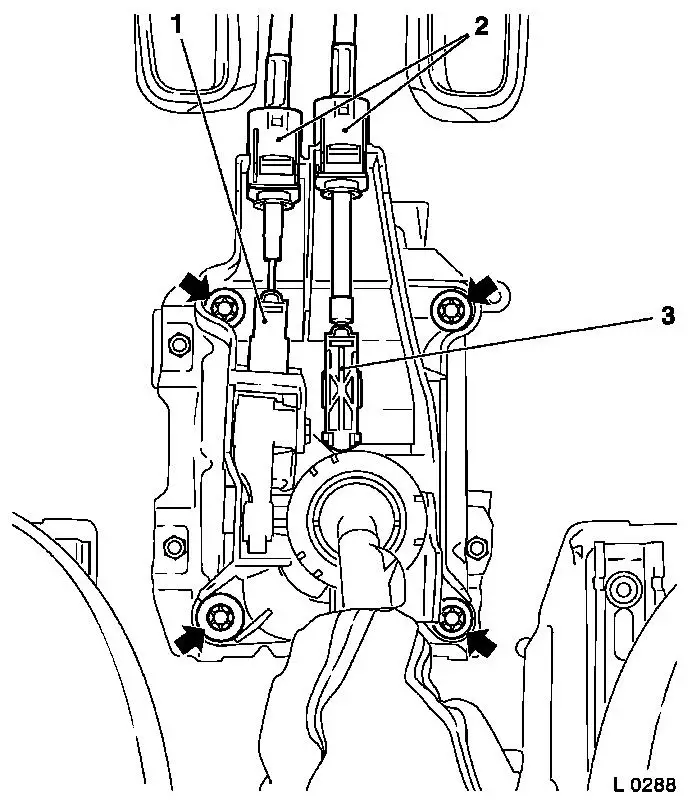
|
 Inspect Inspect Adjust transmission shift linkage - see operation "Transmission Shift Linkage, Adjust (F 23)".
Install, Connect Install centre console - see operation "Centre Console, Remove and Install" in group "C".
|
