volkswagen Workshop Repair Guides

Volkswagen Golf Mk1 Service and Repair Manuals | Workshop Guide

Front door / exploded view - Scirocco > < Installing gas - filled spring - Golf
Body repair work.
Front door / exploded view - Golf, Jetta
 
U57-0001

Remove in numerical order

Install in reverse order

  • Bolt on door
    • ◆ Installation:=> Fig.1
    • ◆ Tightening torque: 45 ± 5 Nm
  • Door check strap with protective sleeve
    • ◆ 2 hexagon bolts
    • ◆ 2 washers
    • ◆ 1 pin
    • ◆ 1 lock washer
    • ◆ Installation: => Fig.2
  • Window lifter
    • ◆ 4 hexagon bolt with dished washers (2 x standard and 2 x oversized, standard washers on drive)
    • ◆ Installation: =>Fig.6
    • ◆ Stiff window winder operation,
      =>page 58-8
 
U57-0001
  • Door Window
    • ◆ 2 hexagon bolts with dished washers
    • ◆ Installation: => Fig.6
  • Corner window with seal
    • ◆ Installation: => Fig.7
  • Guide rail with window channel
    • ◆ 1 Phillips screw at the top
    • ◆ 1 hollow rivet at the bottom
    • ◆ Installation. => Fig.7
  • Clips
    • ◆ Six clips for window slot seals
    • ◆ Installation: => Fig.8
  • Clips
    • ◆ 3 clips for door trim
    • ◆ Installation: => Fig.3
 
U57-0001
  • Internal and external window slot seals
    • ◆ Press into clips for window slot seals
    • ◆ Installation: => Fig.9
  • Window channel
    • ◆ Install starting from corner window
    • ◆ Installation: => Fig.9
  • Fastening rod with securing sleeve
    • ◆ Insert fastening rod with securing sleeve from outside through recess and bring into position until plastic lugs on sleeve contact.
    • ◆ Installation: =>Fig.5
  • Tie rod
    • ◆ Attach tie rod to operating lever
    • ◆ Installation: => Fig.5
  • Door lock
    • ◆ 2 hexagon socket head screws
    • ◆ Installation: => Fig.4,5
 
U57-0001
  • Inner door operating mechanism with tie rod
    • ◆ 2 hexagon bolts with dished washers
  • Expanding nuts and clips for armrest
    • ◆ Installation: => Fig.9
  • Window crank seal
  • Door handle
    • ◆ 2 fillister head screws
    • ◆ 2 washers
    • ◆ 2 packing elements for door handle
    • ◆ 1 trim piece
    • ◆ Installation: => Fig.11
  • Door seals
 
U57-0002

→ Fig.1    Bolting on door

  • ‒ Secure door to mountings using bolts.
  • Tightening torque = 45 ± 5 Nm
 
U57-0003

→ Fig.2    Installing door check strap

  • ‒ Bolt on and grease door check strap.
  • ‒ Insert pin from above and press on lock washers from below.
 
U57-0004

→ Fig.3    Securing clips for door trim (Jetta GL)

  • ‒ Install door seals and sound-absorbing board.
  • ‒ Install door trim clips so that 1 = 40 mm, 2 = 200 mm
    and 3 = 180 mm
 
U57-0005

→ Fig.4    Installing door lock

  • ‒ Raise operating lever -1- by 90° and secure via mounting hole -2- using a screwdriver.
 
V57-0005

→ Fig.5    Installing door lock

  • ‒ Insert fastening rod with securing sleeve -1- from outside through recess and bring into position.
  • Plastic lugs securing sleeve -1- must contact.
  • ‒ Attach tie rod -2- to operating lever.
  • ‒ Withdraw screwdriver from mounting hole.
  • ‒ Secure door lock with hexagon socket head screws.
 
U57-0006

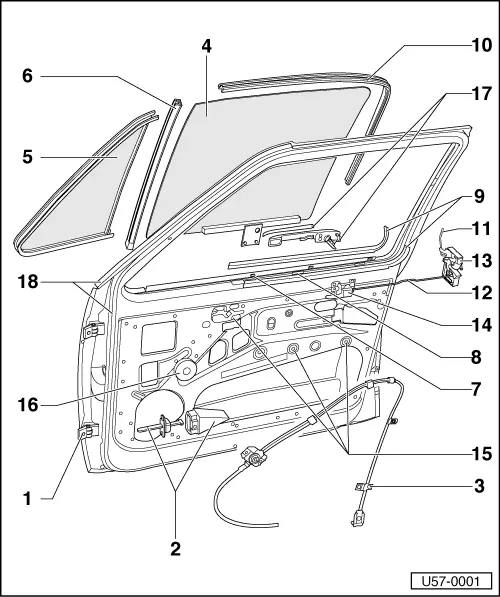
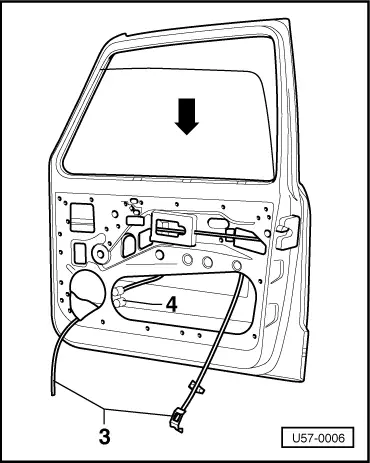
→ Fig.6    Installing window lifter and door window

a - window lifter:

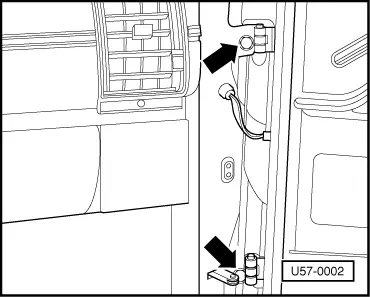
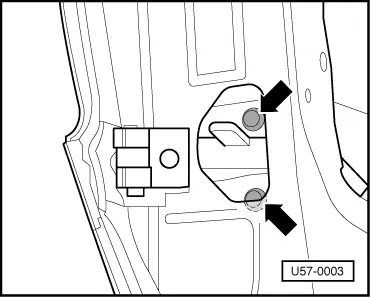
  • ‒ Install window lifter -3- from below and secure with 4 hexagon bolts and dished washers

Note:

Use standard dished washers on drive -4-.

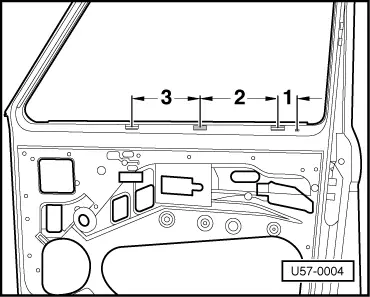
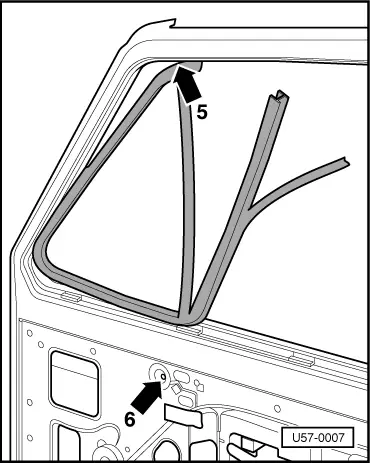
  • ‒ Insert door window from above.
  • ‒ Screw door window loosely together with window lifter
  • ‒ Wind door window right up so that it is positioned by the window channel and window seals.
  • ‒ Wind window down slightly and screw it tightly to the window lifter through the fitting holes.

Note:

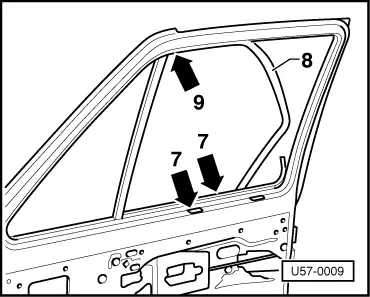
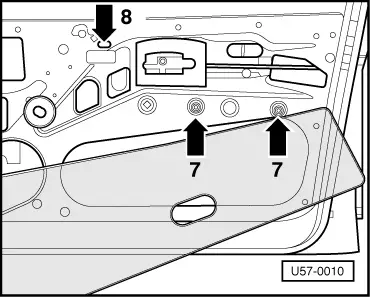
Do not secure door window until corner window, guide rails and window slot seals have been installed.

 
U57-0007

→ Fig.7    Installing corner window and guide rail

  • ‒ Fit corner window and guide rail. Phillips screw at mounting point -5- and compression rivet at mounting point -6-.
  • A screw is used at mounting point -6- in the event of repairs.

Note:

Lubricate corner window seal.

 
U57-0008

→ Fig.8    Fitting clips for window slot seals

  • ‒ Insert clips for window slot seals into recesses.
 
U57-0009

→ Fig.9    Installing window slot seals and window channel

  • ‒ Press window slot seals -7- into clips.
  • ‒ Press window channel -8- into position, starting from corner window -arrow9-.
 
U57-0010

→ Fig.10    Installing expanding nuts and clip for armrest

  • ‒ Fit expanding nuts -7- and clip -8- for armrest
 
U57-0011

→ Fig.11    Installing door handle

  • ‒ Place door handle in position and secure with 2 fillister head screws -arrows-.
  • ‒ Clip on door handle trim.

Front door / exploded view - Scirocco > < Installing gas - filled spring - Golf