
Golf Mk1
|
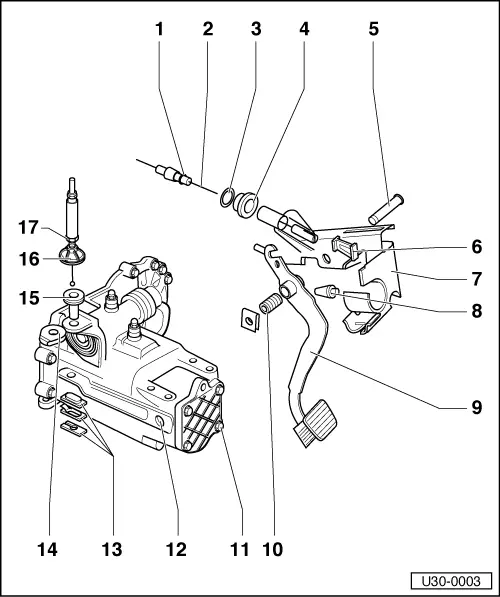
Repairing clutch controls
Release shaft, release lever, return spring, clutch lever and release bearing
Removing and installing => page 34-36
|
 |
|
Removing and installing clutch cable Remove attaching parts at release shaft and pull cable out of guide sleeve. Unhook eye at pedal and take cable out. Grease cable at joints when installing. |
 |
|
|
Fig.1 Removing and installing clutch pedal bush Drive in flush. |
 |
|
|
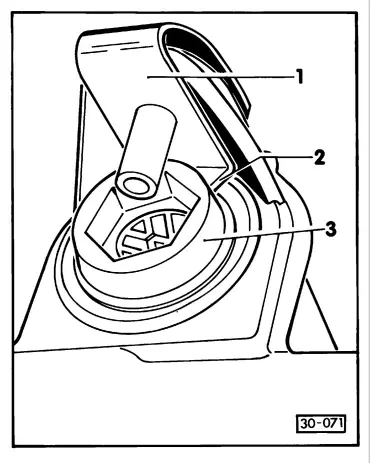
Fig.2 Installing rubber washer Rubber washer -1- must be installed so that sealing lip -2- is parallel to the cap -3-. Otherwise the gearbox breather (above the cap) can get blocked and this will cause the gearbox to leak |
 |
|
|
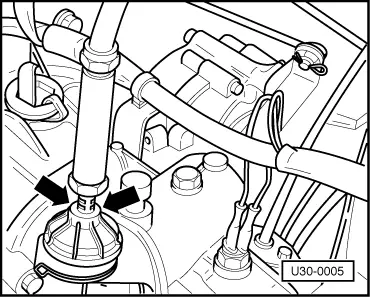
Fig.3 Adjusting clutch cable. 6 mm at release shaft (measured at cable guide bracket), 15-25 mm at clutch pedal Fig.4 Clutch cable chafing against brake fluid reservoir. |
 |
|
|
When problems are experienced where the clutch cable chafes against the brake fluid reservoir, a plastic clip Part No. 172 611 449 which is available from our P&A department, is to be fitted on the brake master cylinder to ensure that a clearance is maintained between clutch cable and reservoir.
|