volkswagen Workshop Repair Guides

Volkswagen Workshop Service and Repair Manuals

Silencer with mountings > < Removing and installing exhaust manifold
Removing and installing front exhaust pipe with catalytic converters
–  Remove Lambda probe -G39- and Lambda probe 2 -G108- → Chapter.
   
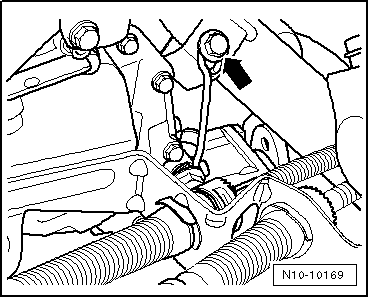
–  If fitted, unscrew bracket from front exhaust pipe -arrow-.
  N10-10169
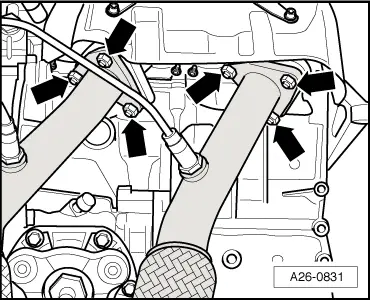
–  Unscrew nuts for front exhaust pipe - accessible from above - from exhaust manifolds -arrows-.
  A26-0831
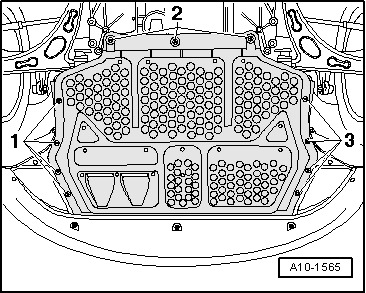
–  Remove middle noise insulation.
  A10-1565
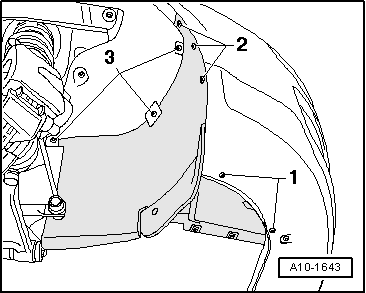
–  Remove right wheel housing liner front part.
  A10-1643
–  Remove three screws of underbody cover on right -arrows-.
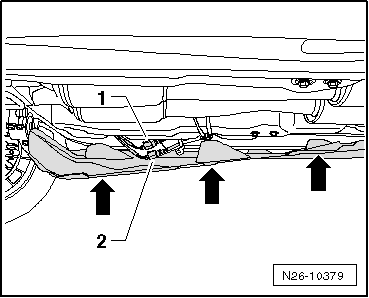
–  Separate electrical connectors for Lambda probe after catalytic converter -G130--1- and Lambda probe 2 after catalytic converter -G131--2- on vehicle underbody.
–  Remove connector from retainer and uncover the line leading to Lambda probe after catalytic converter -G130- and Lambda probe 2 after catalytic converter -G131-.
  N26-10379
–  Unscrew nuts for front exhaust pipe (accessible from below) from exhaust manifolds -arrows-.
  A26-0831
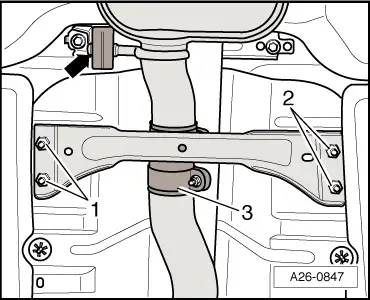
–  Remove front cross member for underbody. To do this, unscrew nuts -1- and -2-.
  Note
The flexible joint in the front exhaust pipe must not be bent more than 20° - risk of damage.
–  Separate exhaust system at clamp -3-.
  A26-0847
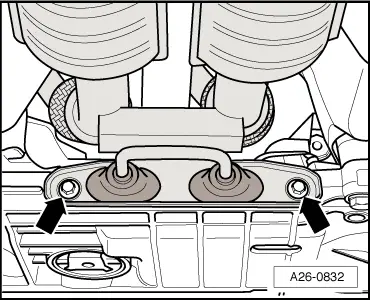
–  Unbolt bracket for exhaust system -arrows-.
–  Remove front exhaust pipe with catalytic converters.
Installing
Installation is carried out in the reverse order. When installing, note the following:
  Note
Renew seals, gaskets and self-locking nuts.
–  Align exhaust system free of tension → Chapter.
Specified torques
  A26-0832
ComponentNm
Front exhaust pipe to exhaust manifold40 → Remark
Catalytic converter to front exhaust pipe23 → Remark
Lambda probe in front exhaust pipe50
Bracket for exhaust system to subframe23

1)  Renew bolts and nuts.
   

Silencer with mountings > < Removing and installing exhaust manifold