volkswagen Workshop Repair Guides

Volkswagen Workshop Service and Repair Manuals

Adjusting bevel gear and shaft bevel gear (gear set) > < Removing and installing freewheel (sequence)
5 Speed Manual Gearbox 02C four wheel drive
Dismantling and assembling freewheel (sequence)

Note:

When dismantling and assembling the freewheel, place freewheel on work bench with machined shoulder on outer ring facing downwards. The subsequent instructions refer to the freewheel in this position.

 
N39-0134

Dismantling

  • ‒ Turn inner ring clockwise and pull out.
  • ‒ Remove clamping mechanism cage from outer ring.

Assembling

  • ‒ → Insert clamping mechanism cage from above into outer ring, when doing this press clamping mechanism inwards.
  • Installation position:
    The embossed arrow (arrow A) for direction of rotation "freewheel open" points toward bolted side (arrow B).
 
N39-0080
  • ‒ Press clamping body outwards to insert inner ring.
  • ‒ → Insert inner ring with shoulder (arrow) pointing upwards, when doing this rotate inner ring clockwise.
 
N39-0081

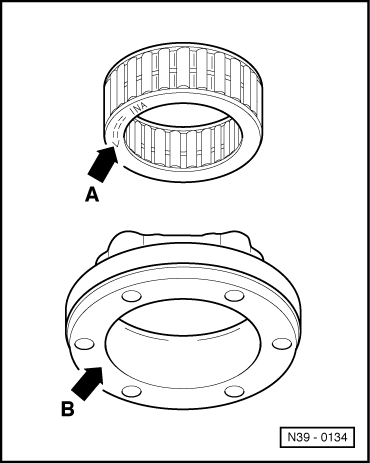
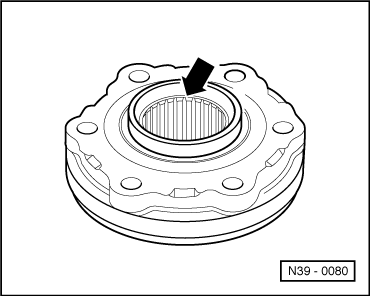
→ On vehicles with 6 cylinder injection engine:

Do not use force if an obstruction is felt when passing the inner ring through the clamping body upper row, if necessary press lower clamping body outwards and rotate inner ring in a clockwise direction whilst pushing in direction of arrow.

  • ‒ Functional check of freewheel:
  • Rotate inner ring in clockwise direction - "freewheel open"
  • Rotate inner ring anti-clockwise - "freewheel closed"

Adjusting bevel gear and shaft bevel gear (gear set) > < Removing and installing freewheel (sequence)