volkswagen Workshop Repair Guides

Volkswagen Workshop Service and Repair Manuals

Brake caliper - remove and install > < Brake pads - remove and install|Remove
Install
Install
  WARNING
Always replace self-locking nuts and screws subject to angular torque
Before repositioning the plungers, aspirate a little of brake fluid from the fluid reservoir with a ventilation container. Otherwise - if brake fluid recirculates during this interval - brake fluid may leak and cause damage.
   
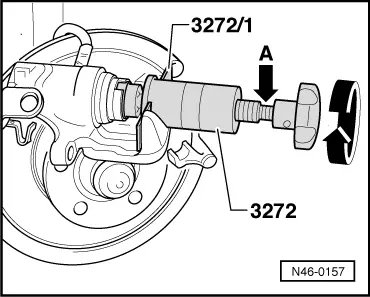
–  Screw the plungers by turning the handle of the Puller/Fitter -3272- to the right, do not damage the protection cover.
–  To screw, use  /1 as an aid.
t  Install the Puller/Fitter -3272- so that the tool's edge is over the tool.
t  For locked plungers, you can use an SW 13 spanner on the faces intended for this -arrow A-.
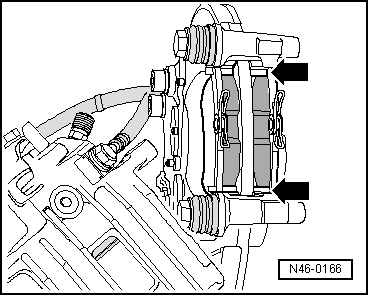
–  Remove the protection sheet from the rear brake pad plate.
  N46-0157
–  Install the pad retaining springs -arrows- and pads on the brake support.
  N46-0166
–  Tighten new screws fastening the brake cylinder to 35 Nm; meanwhile, hold the guide pins.
t  The repair set has four hexagonal head, self-locking screws that must be installed.
  N46-0184
–  Press the brake lever -2- in direction of arrow and fit the handbrake cable -3-.
–  Install the clip -1-.
–  Install the wheels.
Tightening torques → Running gear, axles, steering; Rep. Gr.44.
–  Adjust the handbrake → Chapter.
t  After replacing each brake pad, press the brake pedal repeatedly and strongly with the vehicle stopped so that the brake pads are perfectly seated for operation.
t  After replacing the brake pads, check the brake fluid level.
  N46-0176

Brake caliper - remove and install > < Brake pads - remove and install|Remove