volkswagen Workshop Repair Guides

Volkswagen Workshop Service and Repair Manuals

Compression - checking > < Head - remove and install|Removal
Installation
Installation
  Note
t  Replace head screws regularly.
t  In case of repair, carefully remove joint pieces between head and cylinder block. Be careful not to cause any scratches. Any files or sand paper used must not have granulation under 100
t  Carefully remove residues from sandpapering and grinding operations.
t  New engine head joint must be unpacked immediately before installation.
t  Be extremely careful in handling the new joint. Damages to the silicon layer and groove region may cause leaks.
–  Before placing head, place crankshaft on PMS.
–  Turn crankshaft in the engine rotation opposite direction, until all pistons are equally positioned below PMS.
–  Place head joint.
–  Place joint and tighten the 8 screws manually.
   
–  Tighten head in four steps in the sequence shown:
–  1. Previously tighten with torque meter: Step I  = 40 Nm Step II = 60 Nm
–  2. Continue turning with fixed wrench: Step III =90 ° Step IV = 90 °
  Note
Head screw re-tightening is not necessary after a repair.
  V15-0738
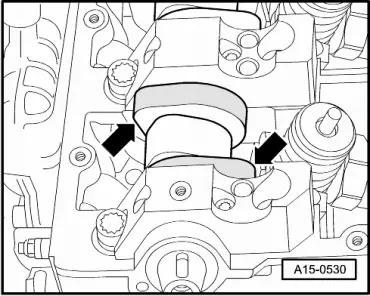
–  After affixing the head, turn valve command shaft in such a way that cams for cylinder 1 point homogeneously upwards. Before installing indented belt, place crankshaft in PMS in the engine rotation direction → Chapter, Indented belt - remove and install, adjust.
–  Install valve command shaft gear cube. → Chapter, Valve command shaft - remove and install
–  Perform test drive and consult fault memory → Chapter; check and erase engine command unit fault memory.
  A15-0530

Compression - checking > < Head - remove and install|Removal