volkswagen Workshop Repair Guides

Volkswagen Workshop Service and Repair Manuals

Swivel guide - remove and install|Installation > < Swivel guide - remove and install
Removal
Removal
–  Loosen the fastening nut (dodecagonal) from the drive semi-shaft → Chapter.
–  Remove the respective wheel.
   
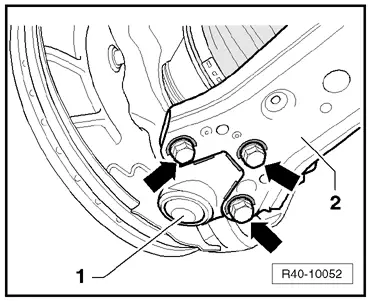
–  Mark the installation position for the screws -arrows- from the the swivel guide -1- on the wishbone -2-.
  R40-10052
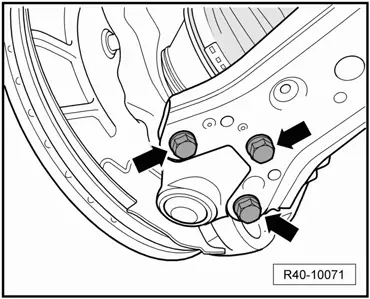
–  Remove the fastening screws -arrows-.
–  Remove the suspension column with the swivel guide, moving it away from the wishbone.
Continuation for vehicles with anti-roll bar:
  R40-10071
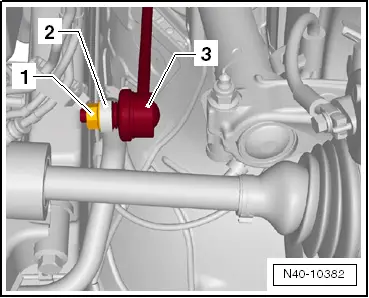
–  Remove the hexagonal nuts -1- from both sides of the coupling rod -3-.
–  Remove the coupling rod -3- from the anti-roll bar -2-.
Continuation:
  N40-10382
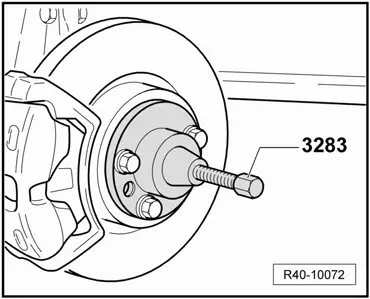
–  Press the drive semi-shaft out of the roller bearing case. To do this, install the Puller -3283- as shown in the figure.
  Note
While the drive semi-shaft is being pressed outwards, observe if there is enough free space.
  R40-10072
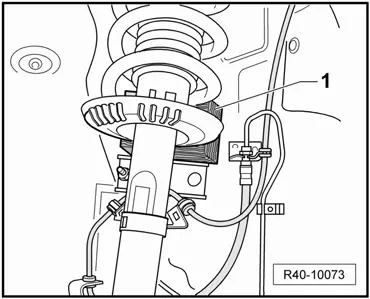
–  Pull the suspension column outward and support it with a wooden block -1- (for example) and simultaneously remove the drive semi-shaft out from the wheel roller bearing.
–  Fasten the drive semi-shaft to the body with the aid of a wire.
  Note
The final drive must not be pressed down. Otherwise, the internal articulation will be damaged due to excessive tilting.
  R40-10073
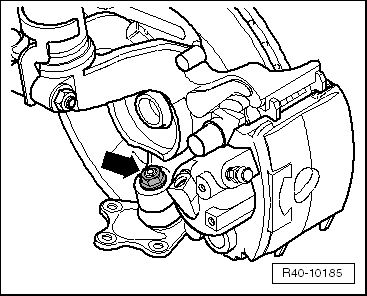
–  Loosen the hexagonal fastening nut -arrow- on the swivel guide.
  WARNING
To protect the thread, leave the nut screwed a few turns at swivel guide.
  R40-10185
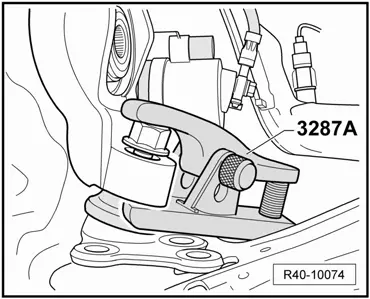
–  Position the Puller -3287A- as shown in illustration and press the swivel guide out.
  Note
Position the Transmission jack or engine set + transmission or EQ 7081 -VAG 1383A- and Tray for hydraulic jack EQ 7081 -VAG 1359/2-, or something similar (danger of accidents due to parts that may fall when the axel joint is removed).
–  Remove swivel guide.
  R40-10074

Swivel guide - remove and install|Installation > < Swivel guide - remove and install