
Up!
 Note
Note
|
|
| Carry out following work: |
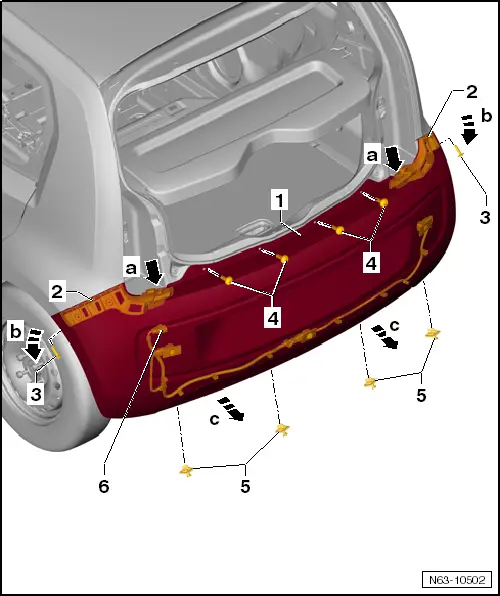
| – | Remove tail lights in side panel → Electrical system; Rep. gr.94. |
| – | Remove bolts -4-. |
| – | Undo bolts -3- in wheel housing (pointing upwards) on left and right. |
| – | Remove spreader rivets -5- from underneath. |
| Further dismantling requires the assistance of a second mechanic. |
| – | Pull rear bumper cover -1- out of catches of guides -2- on left and right side panel -arrows b-. |
| – | Release rear bumper cover -1- from catches -arrows a-. |
| – | With the aid of a second mechanic, pull rear bumper cover -1- parallel off vehicle -arrows b-. |
| – | Disconnect connectors -6- from installed electrical components. |
|
| Carry out following work: |
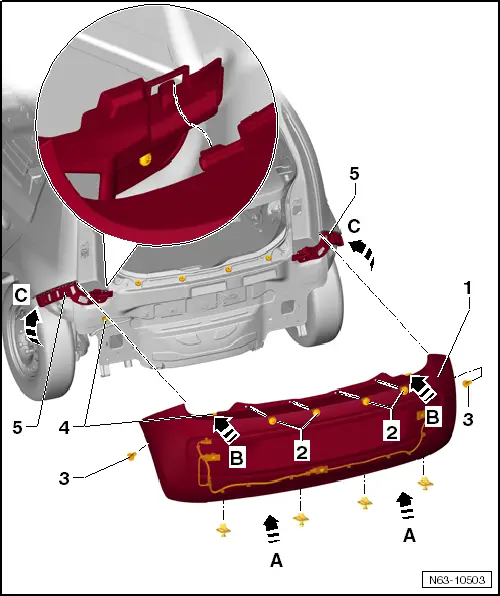
| – | Connect connectors to installed electrical components. |
| – | Guide rear bumper cover -1- parallel to vehicle -arrows b-. |
| – | Press rear bumper cover -1- into catches -arrows b-. |
| – | Press rear bumper cover -1- onto guides -5- on left and right side panel until they engage with each other -arrow c-. |
| – | Ensure joints are parallel and shut lines are equal → Rep. gr.00. |
| – | Start bolts -2- and -3- and tighten them to the respective specified torque → Chapter. |
| – | Clip in spreader rivets -3- from underneath. |
| – | Install tail lights in side panel → Electrical system; Rep. gr.94. |