
Up!
|
 Note
Note
|
|
| Carry out following work: |
| – | Remove wiper arms → Electrical system; Rep. gr.92. |
| – | Remove plenum chamber cover → General body repairs, exterior; Rep. gr.50. |
| – | Remove side dash panel covers -1- and -2- → Chapter. |
| – | Remove centre console upper and lower parts -3- and -4- → Chapter. |

|
|
|
|
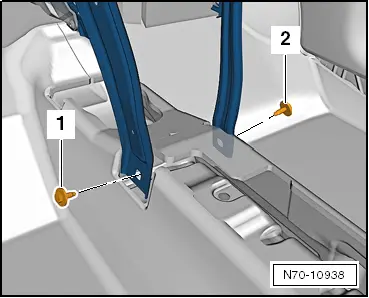
| – | Loosen nuts -1- and bolt -2- 2 to 3 turns (20 Nm). |

| Aligning height of dash panel |
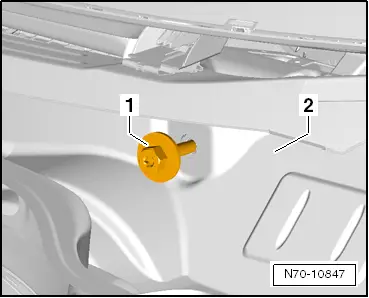
Note| t | The height of the dash panel is set using eccentric bolts -1- and -2-. |
| t | In the default position, the longer surface of the eccentric faces the outside of the vehicle. |
| t | The eccentric must not be turned further than ±90° from the default position. |
| – | Set the desired dash panel height via eccentric bolts -1- and -2-. |
| t | -Direction of arrow A-: raise dash panel at left |
| t | -Direction of arrow B-: raise dash panel at right |
| t | -Direction of arrow D-: lower dash panel at left |
| t | -Direction of arrow C-: lower dash panel at right |
| Aligning dash panel horizontally |
| – | Move dash panel to desired position vertically. |
Note| When aligning the dash panel horizontally, loads may only be applied to the surface planes -grid-. |

| – | After aligning dash panel in vehicle, fasten it in place, tightening bolts to specified torques. |
| Installation of parts is carried out in reverse order of removal. |