volkswagen Workshop Repair Guides

Volkswagen Workshop Service and Repair Manuals

Mount assembly toolT10134 with sealing flange on crankshaft flange > < Pressing sealing flange with sender wheel onto crankshaft
Mount seal with sender wheel on assembly toolT10134
Mount seal with sender wheel on assembly tool -T10134-
   
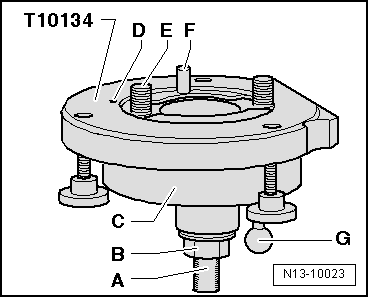
–  Screw on hexagon nut -B- until just before it touches clamping surface -A- of threaded spindle.
  N13-10023
–  Clamp assembly device -T10134- in a vice on clamping surface -A- of threaded spindle.
–  Press assembly housing -C- downwards until it lies on hexagon nut -B-.
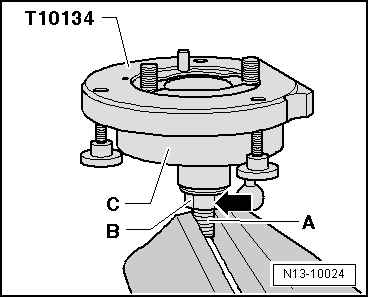
–  Screw hexagon nut onto threaded spindle until inner part of assembly device and assembly housing are at same height.
  N13-10024
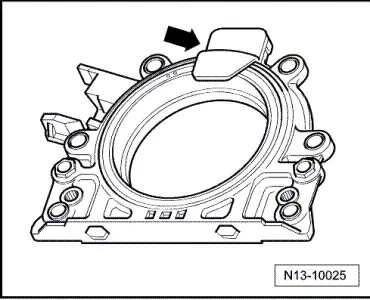
–  Remove securing clip -arrow- from new sealing flange.
  Note
The sender wheel must not be taken out of the sealing flange or twisted.
  N13-10025
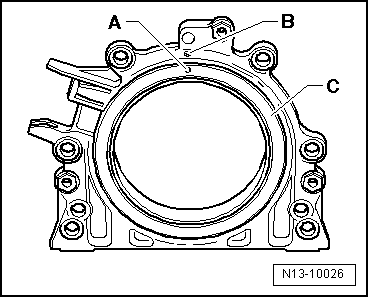
–  Locating hole -A- on sender wheel -C- must align with marking -B- on sealing flange.
–  Place sealing flange with front side facing down on a clean level surface.
  N13-10026
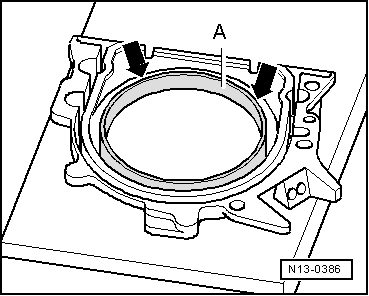
–  Push sealing lip support ring -A- downwards in direction of arrow until it lies on flat surface.
  N13-0386
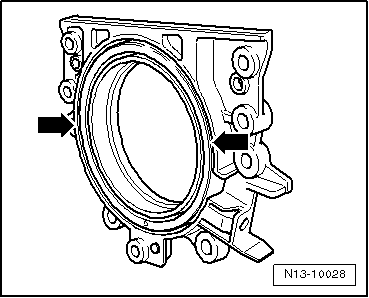
–  Upper edge of sender wheel and front edge of sealing flange must align -arrows-.
  N13-10028
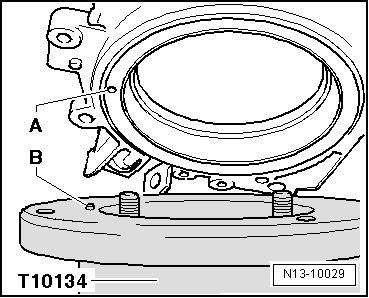
–  Place sealing flange with front side facing downwards onto assembly tool -T10134- so that locating pin -B- can be inserted in sender wheel hole -A-.
  Note
Ensure sealing flange lies flat on assembly tool.
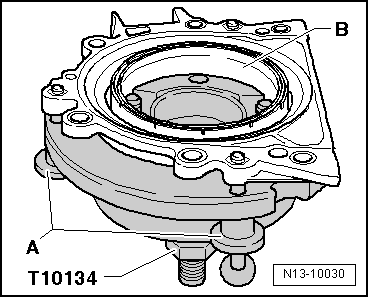
–  Press sealing flange and sealing lip support ring -B- against surface of assembly tool -T10134- whilst tightening 3 knurled screws -A-.
  N13-10029
This prevents locating pin from slipping out of sender wheel hole.
  Note
When installing sealing flange, ensure that sender wheel remains fixed in assembly tool.
  N13-10030

Mount assembly toolT10134 with sealing flange on crankshaft flange > < Pressing sealing flange with sender wheel onto crankshaft