volkswagen Workshop Repair Guides

Volkswagen Workshop Service and Repair Manuals

Emptying fuel tank > < Assembly overview - fuel tank
Removing and installing fuel tank
Special tools and workshop equipment required
   
t  Torque wrench -V.A.G 1331-
  W00-0427
t  Engine and gearbox jack -V.A.G 1383 A-
  W00-0120
t  Removal wedge -3409-
Removing
–  Observe safety precautions → Chapter.
–  Observe rules for cleanliness → Chapter.
–  Check whether a coded radio is fitted. If so, obtain anti-theft code:
–  Disconnect battery earth → Electrical system; Rep. gr.27.
  Caution
To prevent damage to the electronic components when disconnecting the battery:
Observe notes on procedure for disconnecting the battery.
  W00-0016
–  Open tank flap.
–  Remove cap -arrow- from fuel filler neck.
–  Clean area around fuel filler neck.
–  Drain fuel tank completely → Chapter.
–  Remove tank flap unit → General body repairs, exterior; Rep. gr.55.
–  Remove bench seat → General body repairs, interior; Rep. gr.72.
  A20-1068
–  Unclip cover -1- at retaining tabs -arrows-, using removal wedge -3409-.
  A20-10835
–  Release and pull off connector -1-.
–  Remove rear right wheel → Wheels, tyres, wheel alignment; Rep. gr.44.
  N20-10928
–  Unscrew bolts -arrows- of filler neck -1- from body structure.
  Note
The aid of a 2nd mechanic is required to remove the rear part of the exhaust system.
  N20-10927
Vehicles with clamp on exhaust system
–  If fitted, loosen clamp -arrows-.
  V26-0733
Vehicles without clamp on exhaust system
On vehicles without clamp on exhaust system, separate exhaust system → Rep. gr.26.
Continuation for all vehicles
  N26-10868
–  Remove exhaust system cross member -1- from underbody -2-.
–  Unscrew nuts -arrows-.
  N20-10944
–  Remove rear bracket -1- for exhaust system -2-.
–  Remove bolt -arrow-.
–  Remove rear silencer → Rep. gr.26.
  WARNING
Fuel supply lines are under pressure! Wear eye protection and protective gloves to avoid injuries and skin contact. Before loosening hose connections, wrap a cloth around the connection. Then release pressure by carefully pulling hose off connection.
  N20-10943
–  Disconnect fuel lines. Separate push-on couplings → Chapter.
–  Lower rear axle → Rep. gr.42 → Running gear, axles, steering; Rep. gr.42.
  N20-10938
–  Place engine and gearbox jack -V.A.G 1383 A- under fuel tank to support it.
  A20-10843
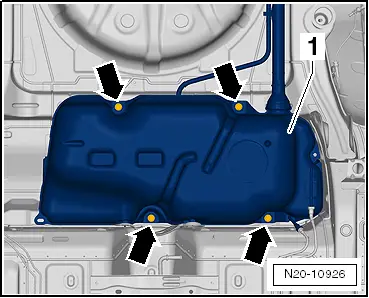
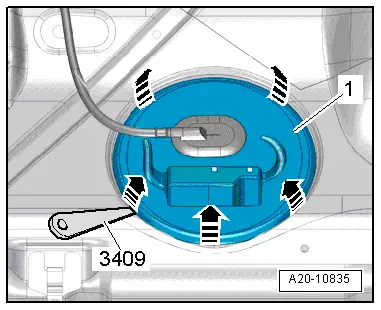
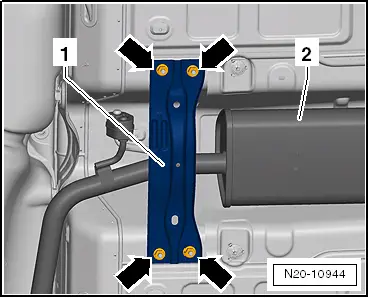
–  Unscrew bolts -arrows- on fuel tank -1-.
  Note
The aid of a 2nd mechanic is required to remove the fuel tank.
–  Lower fuel tank and guide it out of the body structure.
If fuel tank is to be renewed, remove activated charcoal filter → Chapter.
Installing
Install in reverse order. In the process, note the following:
t  
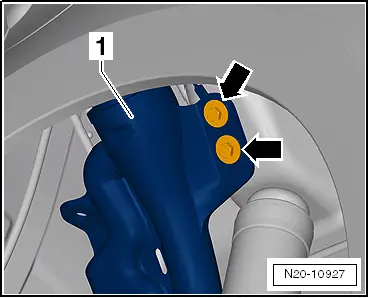
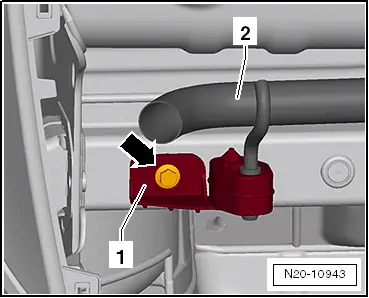
Take installation position of earth connection into account → Fig.
t  
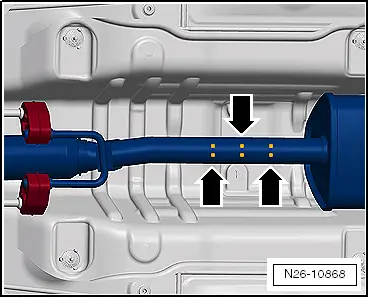
Make sure that the filler neck of the fuel tank is correctly inserted into the opening in the body.
t  
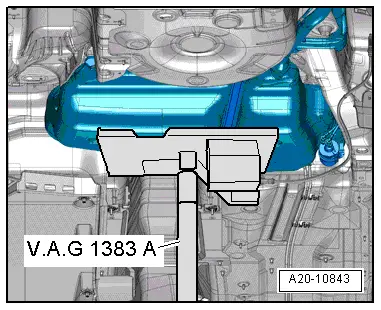
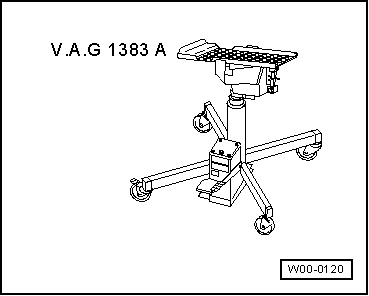
Use engine and gearbox jack -V.A.G 1383 A- to position fuel tank on underbody.
t  Ensure proper seating of activated charcoal filter.
t  
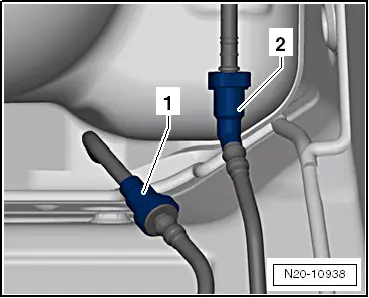
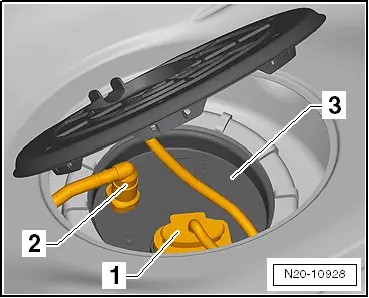
Install breather and fuel lines free of kinks.
t  Ensure that line connections are tight.
t  After installing fuel tank, check that supply and breather lines are still clipped onto fuel tank.
  N20-10926
Specified torque
ComponentSpecified torque
Filler neck of fuel tank to body
t  Renew.
8 Nm + 90°
Fuel tank to underbody
t  Renew.
20 Nm + 90°
Bench seat → General body repairs, interior; Rep. gr.72
Exhaust system → Rep. gr.26
Tank flap unit → General body repairs, exterior; Rep. gr.55.


Emptying fuel tank > < Assembly overview - fuel tank