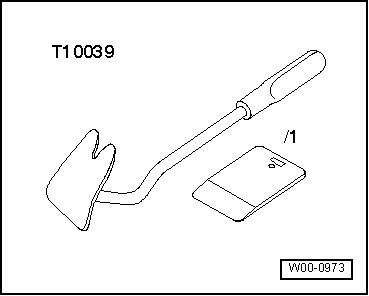
When removing and installing components that are in view (switches, covers, trim and so on), mask off areas in which tools (assembly wedge -T10039/1-, screwdriver) are used to lever out those components using commercially available masking tape.
Special tools and workshop equipment required
t
Wedge -T10039/1-
Removing:
–
Switch off ignition and all electrical loads, and pull out ignition key.
–
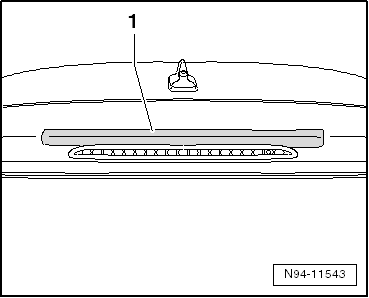
Attach a strip of commercially available adhesive tape -1- to the area of the rear lid above the bulb for the additional brake light.
–
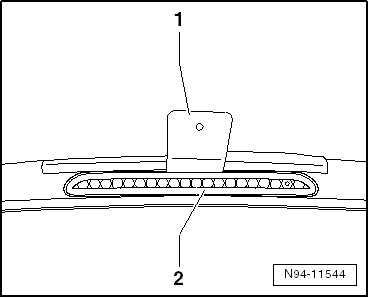
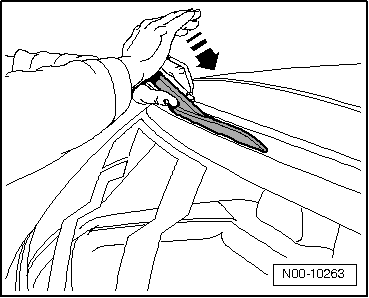
Insert assembly wedge -T10039/1--1- at top between bulb for additional brake light -M25--2- and rear lid.
–
Release catch of bulb for additional brake light -M25- by pushing assembly wedge in direction of front of vehicle.
–
Take bulb for additional brake light -M25- out of rear lid, taking connected wiring lengths into account.
–
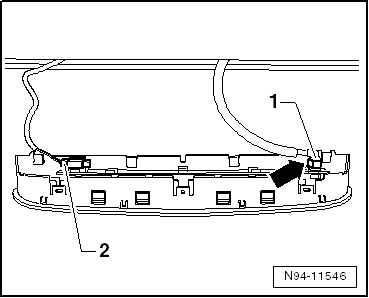
Pull out hose lock -arrow- and pull off hose connection -1- from additional brake light bulb -M25-.
–
Release and pull connector -2- off and remove additional brake light bulb -M25-.
Installing:
Install in the reverse order of removal. When doing this, note the following:
Note
When installing additional brake light -M25-, ensure seal is seated correctly. Make sure that the seal is undamaged and that no loops are formed.
–
Attach connector so that it latches into place.
–
Starting at the lower edge, insert bulb for additional brake light into rear lid, making sure it engages securely.
–
Check functioning of additional brake light lamp -M25-.
 Note
Note