
240 L4-2320cc 2.3L SOHC B23F FI (1983)
Shift Linkage: Service and Repair
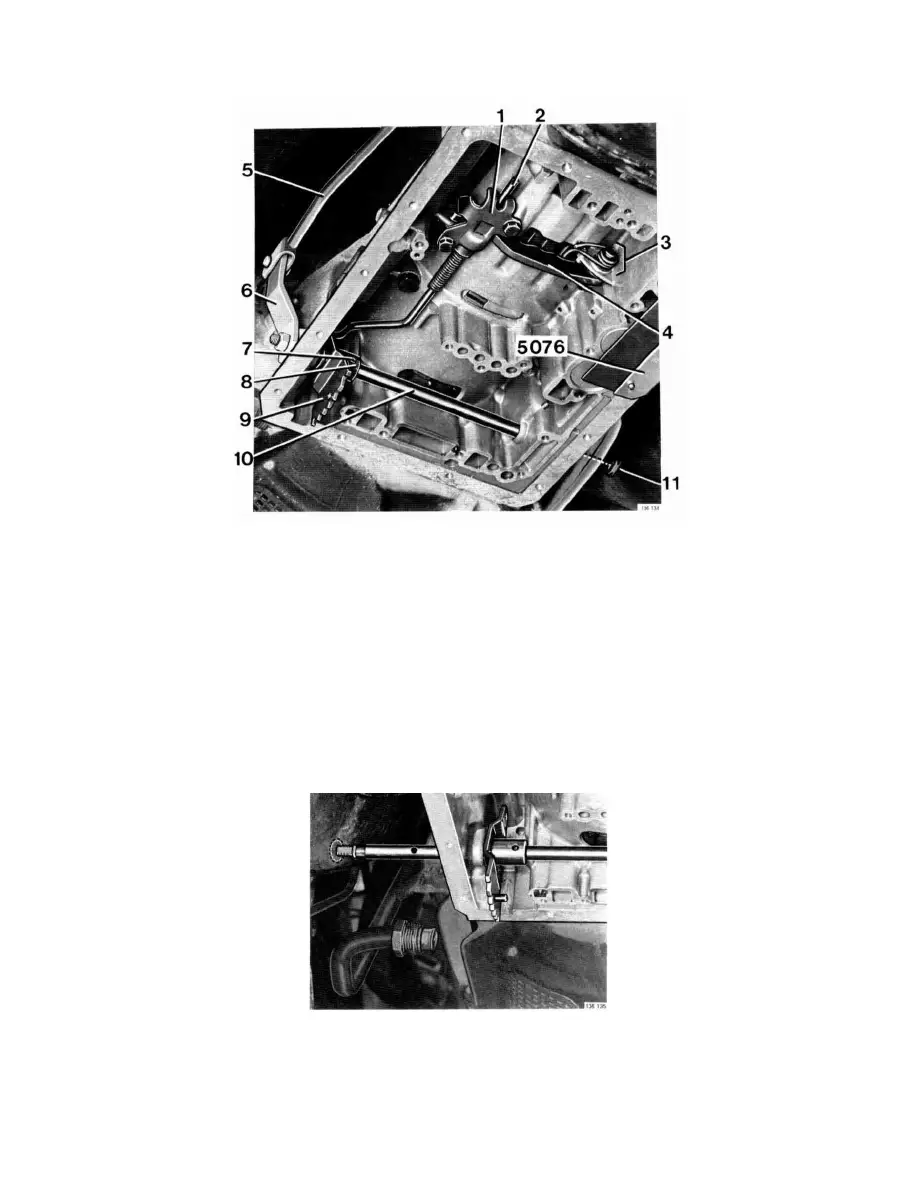
Removal
1 - Lock plate
2 - Thrust rod
3 - Spring, lock ring, pivot pin
4 - Parking pawl (catch)
5 - Control rod
6 - Lever
7 - Pin
8 - Lock ring (not early type AW55 and 8W55)
9 - Gear selector cam
10 - Gear selector shaft
11 - Oil seal
1. Remove valve body assembly. Do not forget to use retainer P/N 5076.
2. Check for excessive play between gear selector shaft and cam.
3. Remove selector mechanism in numerical order shown at top. Use a 3 or 5 mm punch to tap out cam pin, depending on size of pin.
NOTE: It is necessary to drill a 19 mm (3/4 in) hole in left floor to be able to remove gear selector shaft.
Move carpet to one side to prevent damage and drill hole with a 19 mm hole saw.
4. Clean and check all parts. Replace if worn or defective.