
C70 L5-2.4L Turbo VIN 63 B5244T7 (2003)
-
Remove the 3 mounting screws for the starter motor. Place the starter motor to one side
-
Remove the blind cover plug and the sealing washer
-
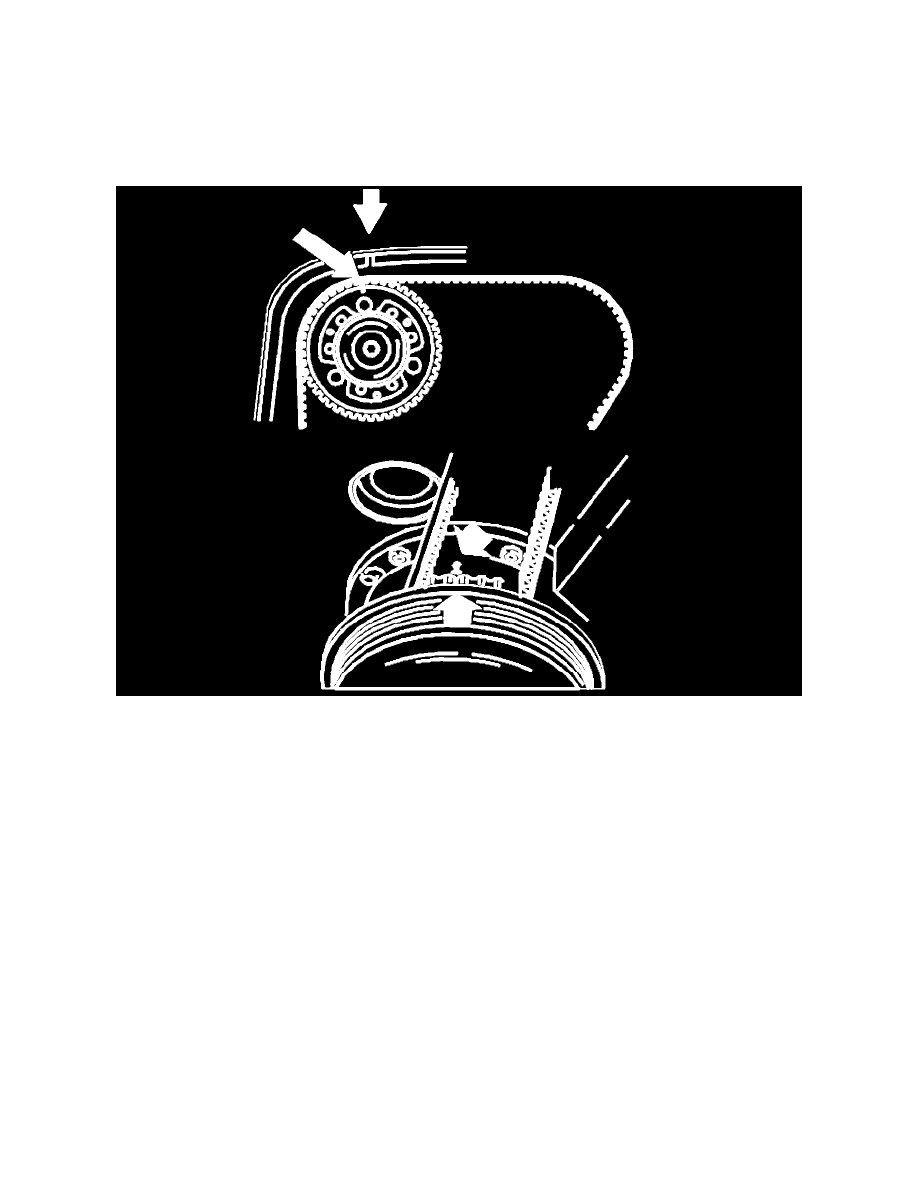
Turn the crankshaft clockwise slightly to avoid the adjustment tool being in the wrong position
-
Install adjustment tool: 999 5451. Ensure that the camshaft adjustment tool bottoms out against the cylinder block
-
Turn the crankshaft counter-clockwise as far as it will go against the camshaft adjustment tool
-
Check that the marking on the crankshaft timing gear pulley corresponds with the marking on the oil pump.
Installing The Variable Valve Timing (VVT) Unit On The Exhaust Camshaft
-
Slacken off, but do not remove the screws which secure the timing gear pulley to the variable valve timing unit.
-
Press the timing gear pulley and variable valve timing (VVT) unit on to the camshaft -Install the center screw which secures the variable valve
timing unit to the camshaft. Tighten slightly.
-
Turn the variable valve timing unit counter clockwise as far as it will go.
-
Slacken off the center screw
-
Position the upper timing cover.
-
Turn the timing gear pulley clockwise until the screws at the oval holes are in the limit position.
-
Continue turning clockwise until the timing gear pulley marking is 1 tooth before the marking on the upper timing cover.
NOTE: Do not turn counter clockwise during this procedure.
-
Check that the timing gear pulley is still in the limit position in the oval holes.
-
Tighten the center screw in the variable valve timing unit.
-
Check that the variable valve timing unit does not rotate when tightening.
-
Tighten the center plug.