
V50 L5-2.4L VIN 39 B5244S7 (2005)
Remove the 1 screw securing the air conditioning (A/C) pipes to the evaporator. See the illustration.
Pull the pipes off from the evaporator connection.
Separate the pipes to the hear exchanger as follows:
Heat exchanger See: Heater Core/Service and Repair/Heat Exchanger
Heat exchanger, L.H.D See: Heater Core/Service and Repair/Heat Exchanger, L.H.D
Heat exchanger, R.H.D See: Heater Core/Service and Repair/Heat Exchanger, R.H.D
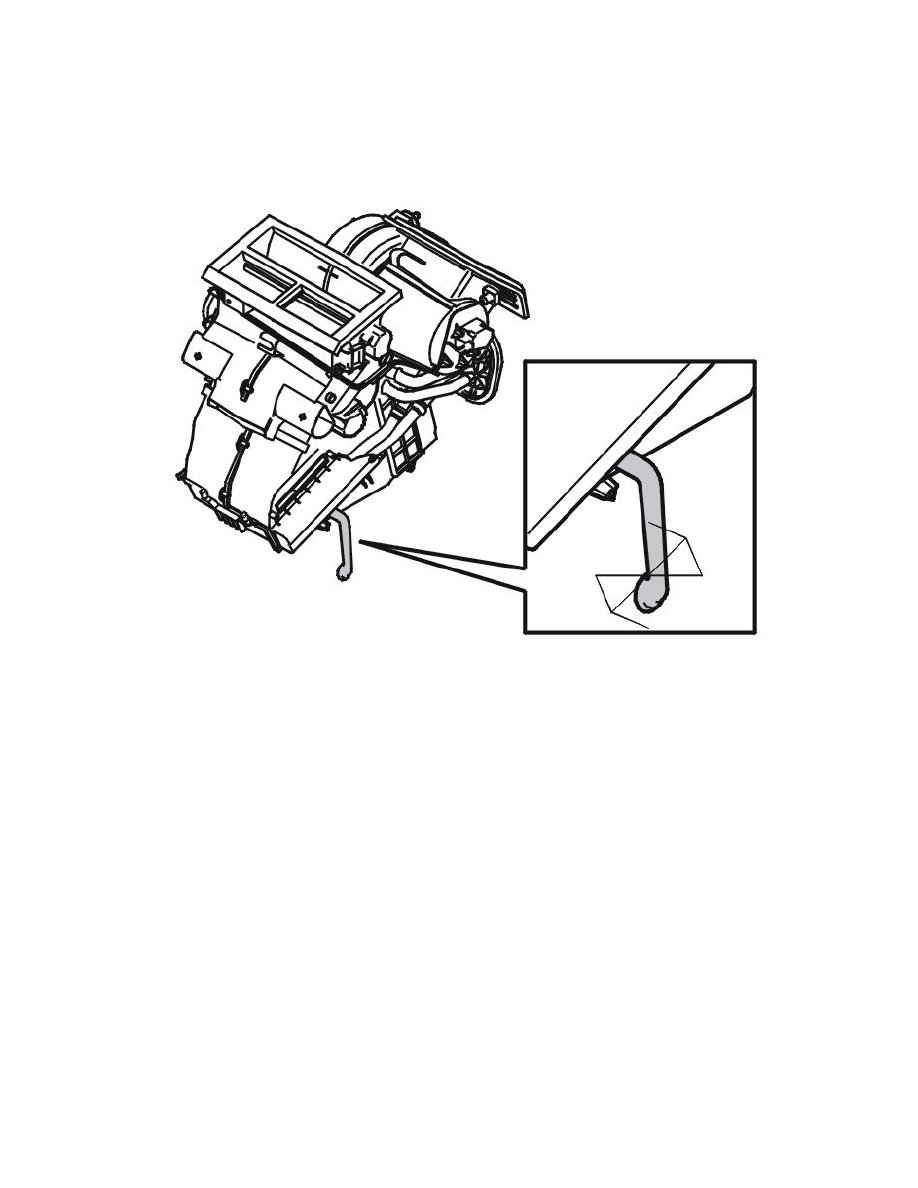
Remove:
-
the drainage hose from the lower connection on the right-hand side under the heat exchanger housing
-
the climate control unit.
Installation
Note! For tightening torques, see Specifications. See: Body and Frame/Specifications
Installing the climate control unit
Install:
-
the climate control unit
-
the drainage hose from the heat exchanger housing
Install the pipes to the heat exchanger as follows:
Heat exchanger See: Heater Core/Service and Repair/Heat Exchanger
Heat exchanger, L.H.D See: Heater Core/Service and Repair/Heat Exchanger, L.H.D
Heat exchanger, R.H.D See: Heater Core/Service and Repair/Heat Exchanger, R.H.D
Install:
-
the 1 M8 screw securing the air conditioning (A/C) pipes to the evaporator in the engine compartment. Tighten
-
both the air conditioning (A/C) hoses in their mountings below the right-hand spring strut turret
-
the spacer that holds the heat exchanger and evaporator pipes apart
-
the 2 screws and the right-hand half of the lead-in. Tighten
-
the dashboard. Do not install the glove compartment. See: Dashboard See: Body and Frame/Interior Moulding / Trim/Dashboard / Instrument
Panel/Service and Repair/Dashboard Dashboard See: Body and Frame/Interior Moulding / Trim/Dashboard / Instrument Panel/Service and
Repair/Dashboard
-
the drain nipple on the radiator.
Fill with coolant and warm up the engine until the thermostat opens. Top up if necessary.
Check that the pipe coupling does not leak.