
3.5RL V6-3474cc 3.5L (2001)
3M Super Automotive Attachment Tape
Tools:
-
Protective tape
-
Knife or cutter
-
Sponge or shop towel
-
Infrared dryer
-
Film
-
Putty knife
-
Alcohol
CAUTION: Put on gloves to protect your hands.
1. If necessary, replace any damaged clips on the molding.
2. Apply the stripe remover evenly to the bonding surface of the body and molding.
3. Cover the bonding surface of the body and molding with a film, then heat to 104 - 122 °F (40 - 50 °C) for 5 - 10 minutes with an infrared dryer.
NOTE: Use care when heating to prevent deformation of the body and molding.
4. Scrape the adhesive tape with a putty knife.
5. For removal of adhesive tape residue, follow-up with stripe adhesive remover, then scrape the adhesive tape with a putty knife.
6. Remove the protective tape, then clean the bonding surface with a sponge dampened in alcohol.
NOTE: Make sure the bonding surface is kept free of water, oil, and grease.
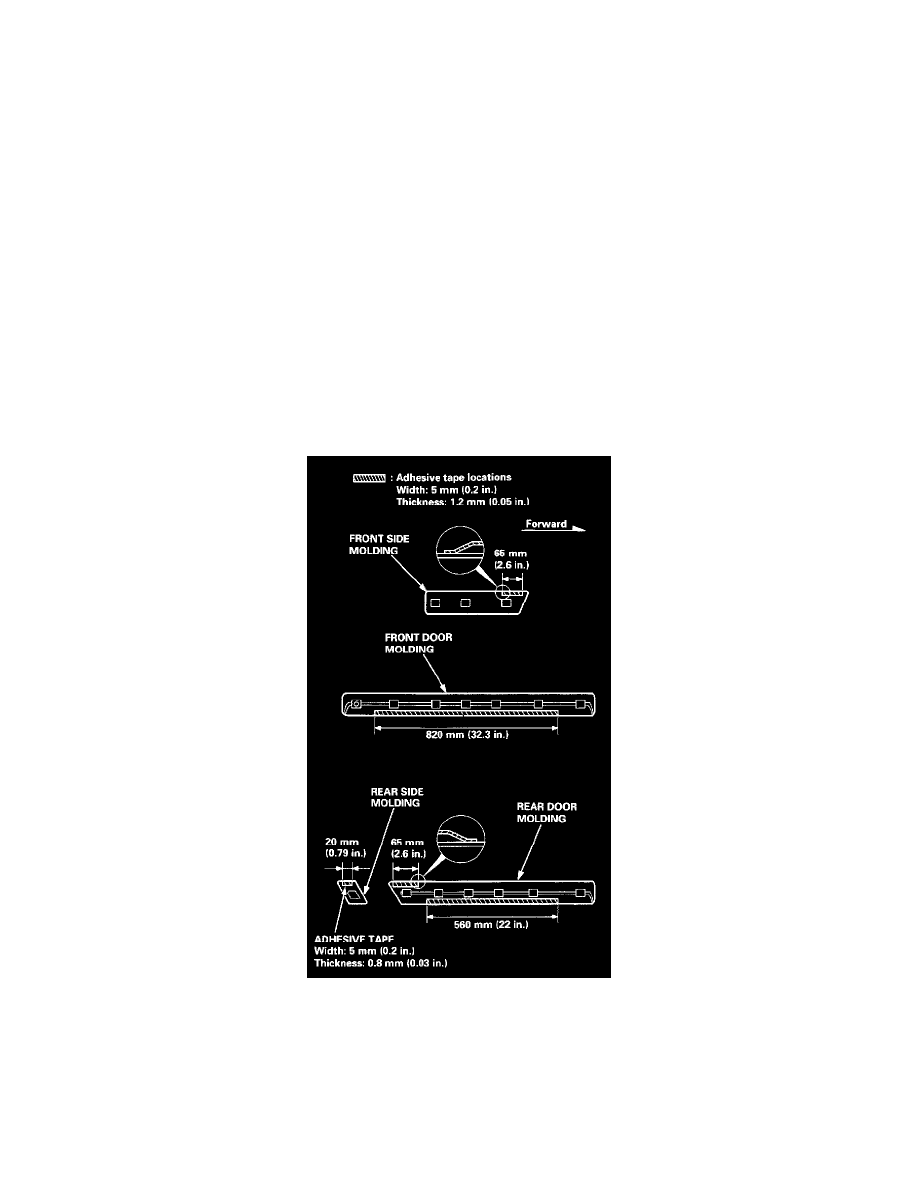
7. Glue the new adhesive tape to the moldings as shown.
8. Heat the bonding surface of the door and molding with an infrared dryer.
Door: 104 - 140 °F (40 - 60 °C)
Molding: 68 - 86 °F (20 - 30 °C)
NOTE: Use care when heating to prevent deformation of the molding.
9. Align the molding with the clip locations and set the molding. Lightly push on the molding until its edge is fully seated on the adhesive tape.