
CL L4-2156cc 2.2L SOHC F22B1 MFI (1997)
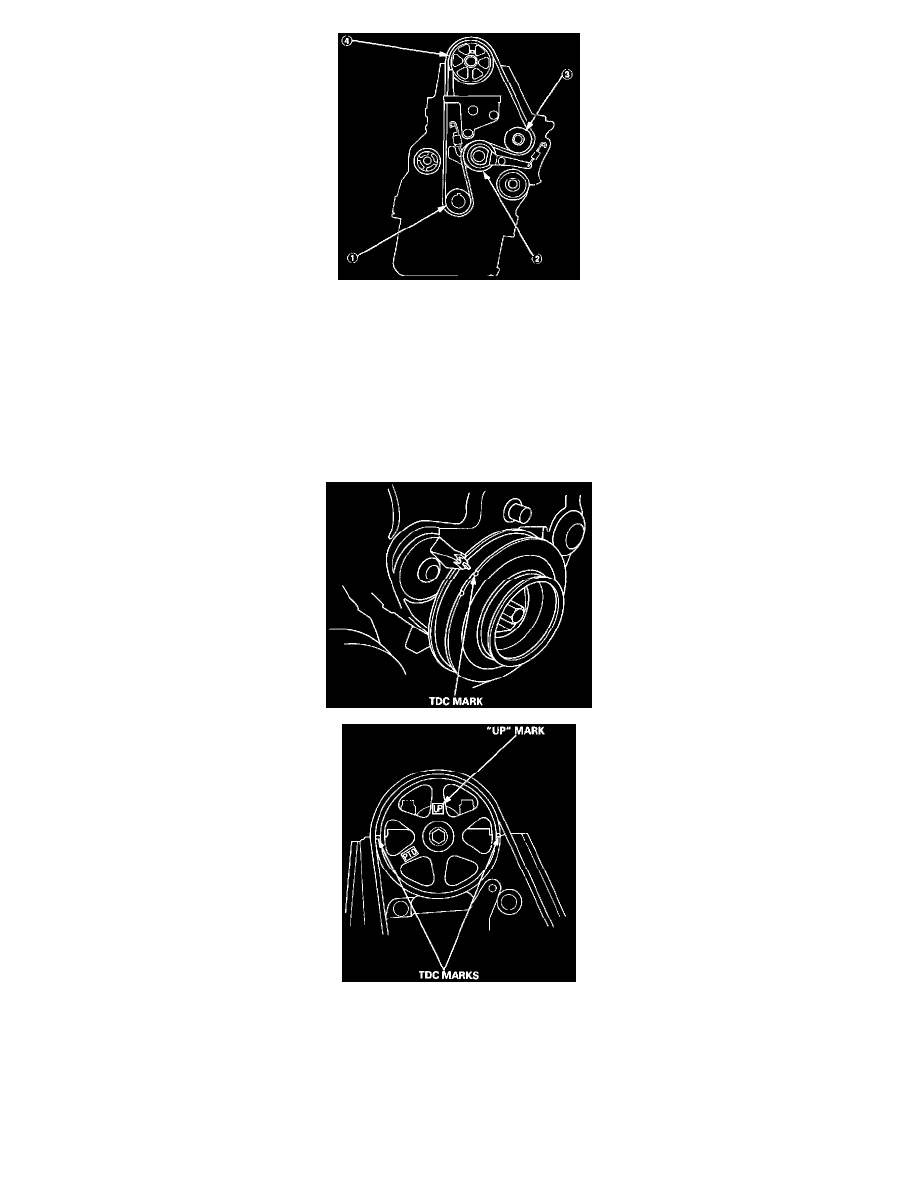
4. Install the timing belt tightly in the sequence shown.
(1) Timing belt drive pulley (crankshaft)-> (2) Adjusting pulley-> (3) Water pump pulley-> (4) Camshaft pulley.
NOTE: Make sure the timing belt drive pulley and camshaft pulley are at TDC.
5. Loosen and retighten the adjusting nut to tension the timing belt.
6. Install the balancer belt drive pulley and lower cover.
7. Install the crankshaft pulley, then tighten the pulley bolt.
8. Rotate the crankshaft pulley about five or six turns counterclockwise so that the timing belt positions on the pulleys.
9. Adjust the timing belt tension.
10. Make sure the crankshaft pulley and camshaft pulley are at TDC.
11. If the camshaft or crankshaft pulley is not positioned at TDC, remove the timing belt and adjust the positioning then reinstall the timing belt.
12. Remove the crankshaft pulley and lower cover.
13. Set the timing belt drive pulley so that the No. 1 piston at TDC.
14. Lock the timing belt adjuster arm in place by installing one of the 6 x 1.0 mm bolts.
15. Loosen the adjusting nut 2/3-1 turn, and verify that the balancer belt adjuster moves freely.
16. Push the tensioner to remove tension from the balancer belt, then retighten the adjusting nut.