
CL TYPE S V6-3.2L SOHC (2001)
Glove Compartment: Service and Repair
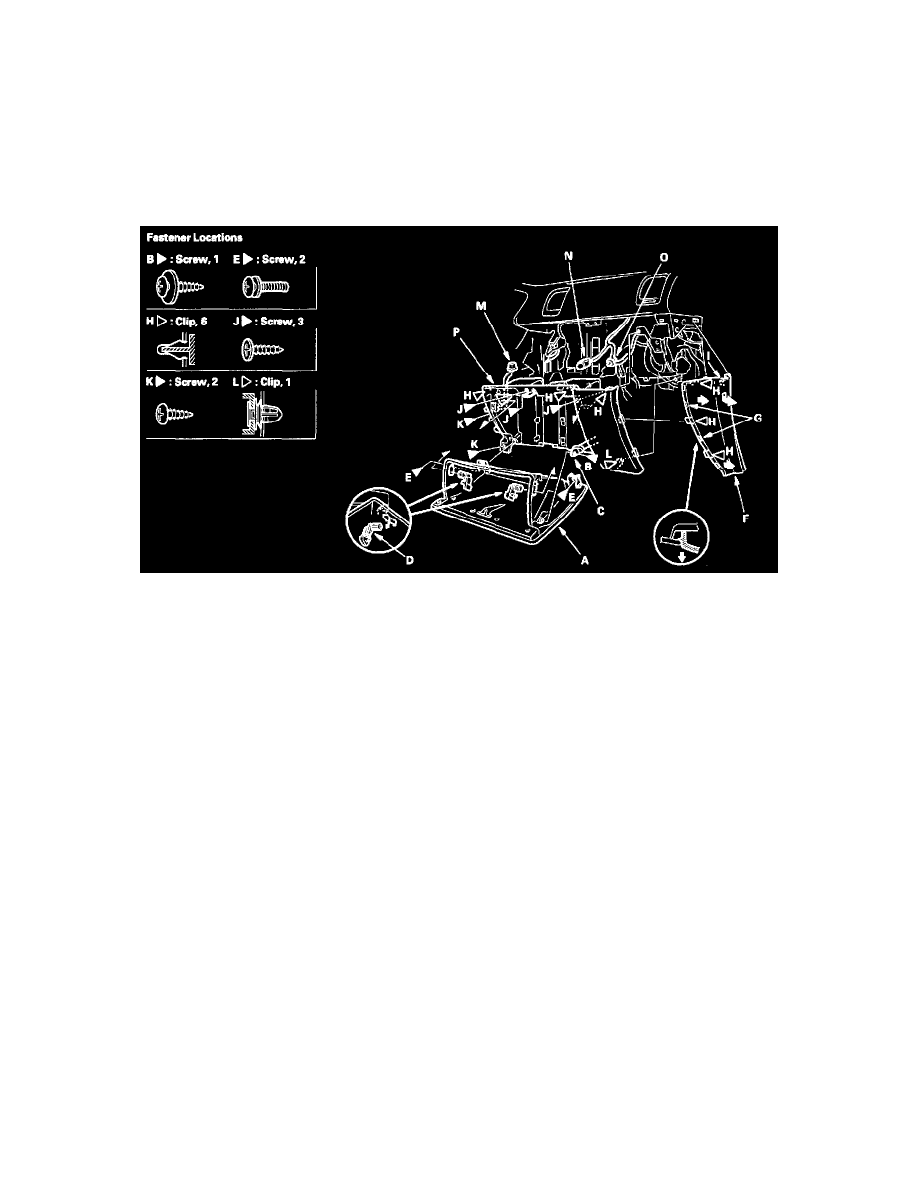
Glove Box Removal/Installation
SRS components are located in this area. Review the SRS component locations and precations and procedures before performing repairs or service.
NOTE:
-
When prying with a flat-tip screwdriver, wrap it with protective tape, and apply protective tape around the related parts to prevent damage.
-
Take care not to scratch the dashboard and related parts.
1. If it is necessary to remove the glove box cover, remove the passenger's front console cover first.
2. Remove the glove box (A):
1. Remove the screw (B), then remove the damper (C) from the glove box.
2. While holding the glove box, remove the glove box stop (D) on each side.
3. Remove the screws (E), then remove the glove box.
3. While pulling out on the bottom of the right dashboard side cover (F), pry the rear edge portions (G) of the cover to detach the clips (H). Release
the hook (I), then remove the cover.
4. Remove the screws (J and K), and detach the clips (H and L). Disconnect the trunk lid opener main switch connector (M) and glove box light bulb
socket (N), and detach the harness clip (O), then remove the glove box cover (P).
5. Install the glove box in the reverse order of removal, and note these items:
-
Replace any damaged clips.
-
Make sure the connector and glove box light bulb socket are plugged in properly.
-
Push the clips of both the glove box cover and the dashboard side cover into place securely.