
CL TYPE S V6-3.2L SOHC (2001)
Headliner: Service and Repair
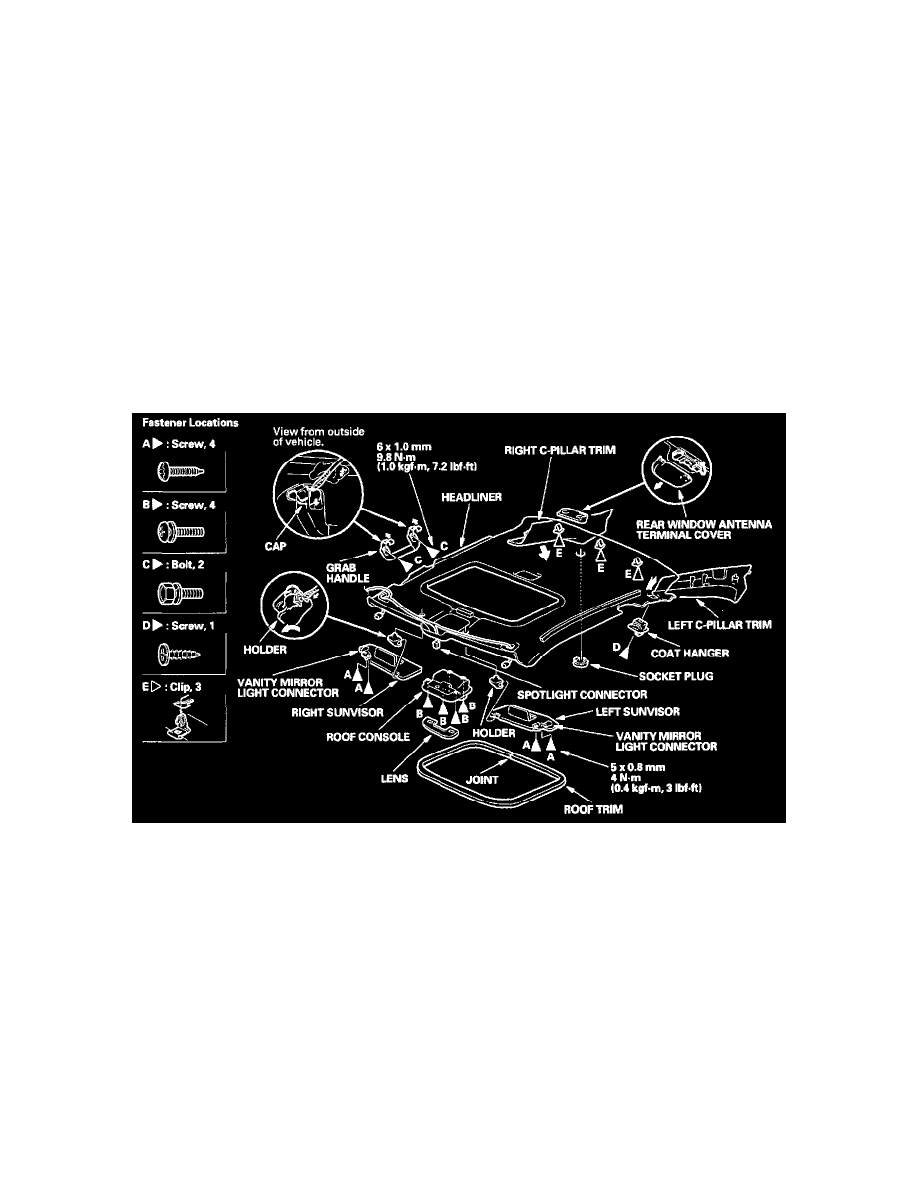
Headliner Removal/Installation
NOTE:
-
Put on gloves to protect your hands.
-
When prying with a flat-tip screwdriver, wrap it with protective tape to prevent damage.
-
Take care not to bend and scratch the headliner.
-
Be careful not to damage the dashboard or other interior pieces.
1. Remove these items:
-
A-pillar trim, both sides
-
Ceiling light
-
Door trim, both sides as necessary
-
Front seat belt upper anchor, both sides
-
B-pillar upper trim, both sides as necessary
-
Quarter window trim, both sides as necessary
-
C-pillar trim, roof portion as necessary
2. Remove the headliner as shown.
NOTE: When removing the grab handles, lower the handle before releasing the caps.
3. Install the headliner in the reverse order of removal, and note these items:
-
When reinstalling the headliner through the door opening, be careful not to fold or bend it. Also, be careful not to scratch the body.
-
When reinstalling the roof trim, install the joint toward the rear center.
-
Check that both sides of the headliner are securely attached to the trim.