CL TYPE S V6-3.2L SOHC (2001)

Rear Shelf: Service and Repair
Trim Removal and Installation - Rear Shelf
NOTE:
-
Put on gloves to protect your hands.
-
When prying with a flat-tip screwdriver, wrap it with protective tape to prevent damage.
-
Take care not to bend or scratch the trim and panels.
1. Remove these items:
-
Rear seat-back
-
C-pillar trim
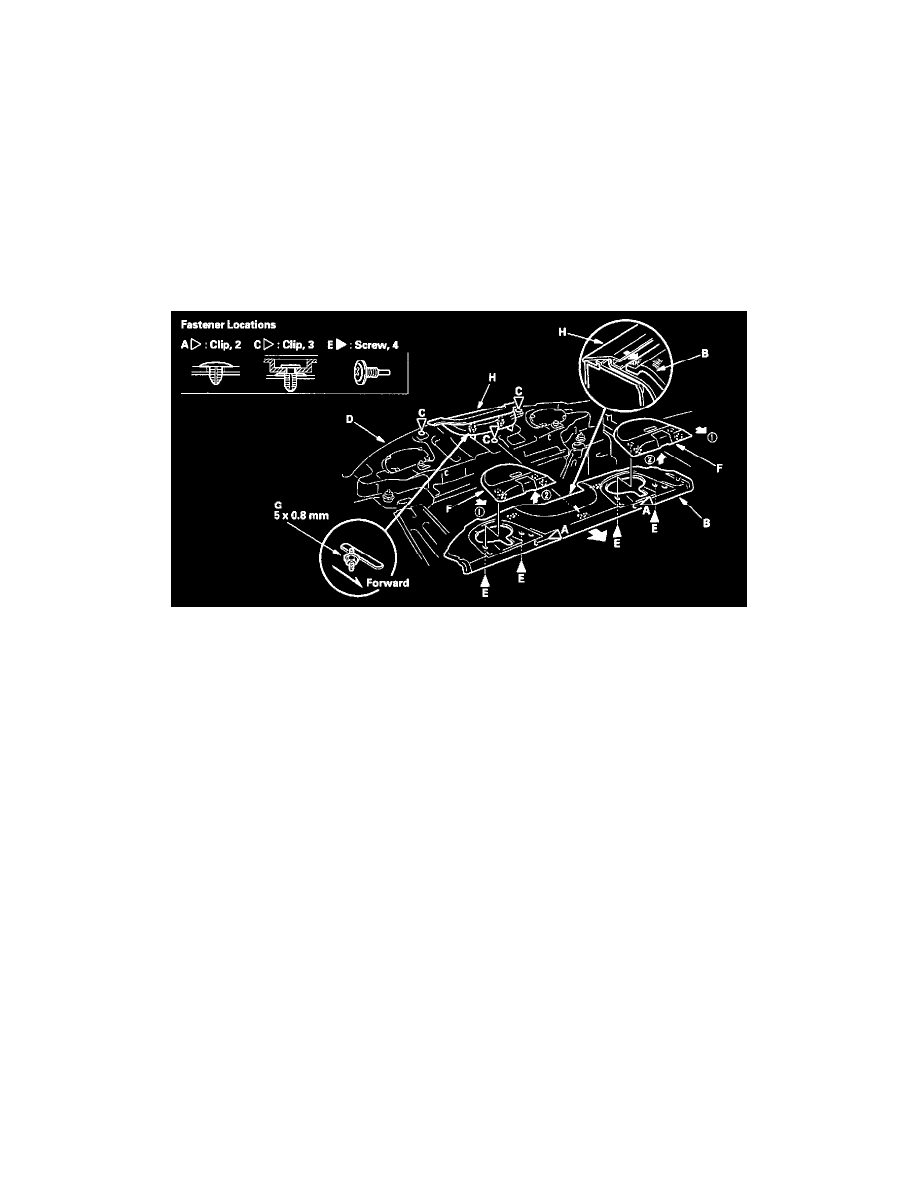
2. Remove the rear shelf.
1. Detach the front clips (A).
2. Slide the rear shelf (B) forward, and remove it. The clips (C) will stay on the rear parcel shelf (D).
3. Remove the clips (C) from the rear parcel shelf with a clip remover.
3. If necessary, remove the screws (E), and remove both rear speaker grilles (F) by sliding them forward, and lifting them up.
4. Replace any damaged clips. Install both rear speaker grilles.
5. Install the clips (C) onto the rear shelf.
6. Loosen the high mount brake light mounting nuts (G) from the trunk compartment, and slide the high mount brake light (H) rearward fully.
7. Fit the rear shelf clips into the holes in the rear parcel shelf, then push on the clip portion of the shelf. Then install the front clips. Make sure each
clip is installed securely.
8. Slide the high mount brake light against the rear shelf, then tighten the mounting nuts.
