
CL TYPE S V6-3.2L SOHC (2001)
Evaporator Core: Service and Repair
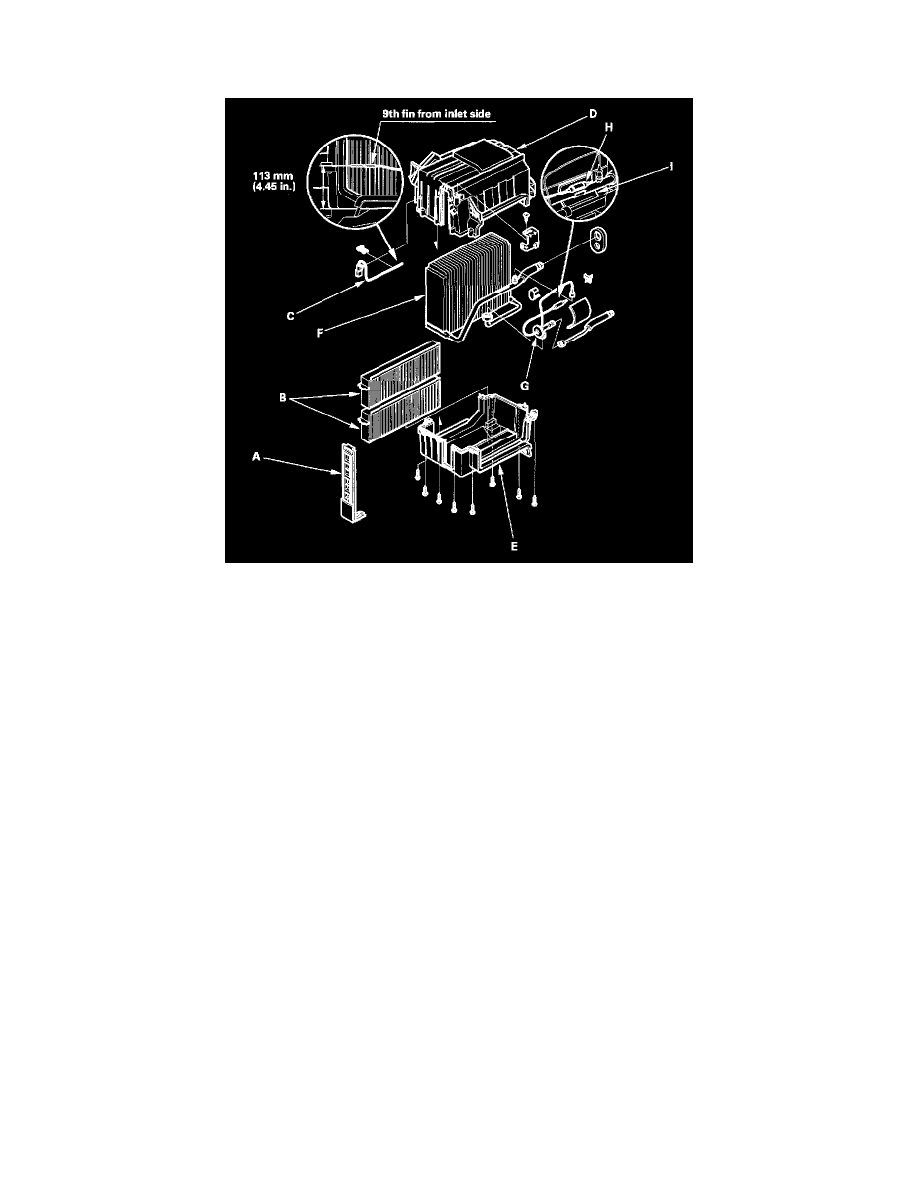
Evaporator Overhaul
1. Remove the filter lid (A), then pull out the A/C filters (B).
2. Pull out the evaporator temperature sensor (C) from the evaporator fins.
3. Remove the screws, carefully separate the upper housing (D) from the lower housing (E), then remove the evaporator core (F).
4. If necessary, remove the expansion valve (G). Use a second wrench to hold the other fitting on the valve so the evaporator line won't twist. Leave
the first fitting loosely connected so you can use it to hold the valve while you loosen the second fitting.
5. Reassemble in the reverse order of disassembly, and note these items:
-
Replace all O-rings with new ones at each fitting and apply a thin coat of refrigerant oil before installing them. Be sure to use the right O-rings
for HFC-134a (R-134a) to avoid leakage
-
Immediately after using the oil, replace the cap on the container, and seal it to avoid moisture absorption. Install the capillary tube (H) directly
against the outlet line, and wrap it with electrical tape (I).
-
Reinstall the evaporator temperature sensor in its original location.
-
Make sure no air is leaking from the upper housing and the lower housing fitting.