
CL TYPE S V6-3.2L SOHC (2001)
12. Attach a hose (A) to the end of the flow control valve (B) as shown. Then submerge the flow control valve in a container of power steering fluid or
solvent (C), and blow in the hose.
^
If air bubbles leak through the valve at less than 98 kPa (1.0 kgf/cm2, 14.2 psi), replace the pump as an assembly. The flow control valve is
not available separately.
^
If the flow control valve tests OK, set it aside for reassembly later.
13. Inspect the ball bearing by rotating the outer race slowly. If you feel any play (axial or radial) or roughness, remove the faulty ball bearing (A), and
install a new one (B).
14. Inspect each part shown with an asterisk in the Exploded View; if any of them are worn or damaged, replace the pump as an assembly.
Reassembly
15. Clean the disassembled parts with solvent, and dry them with compressed air. Do not dip rubber parts in solvent.
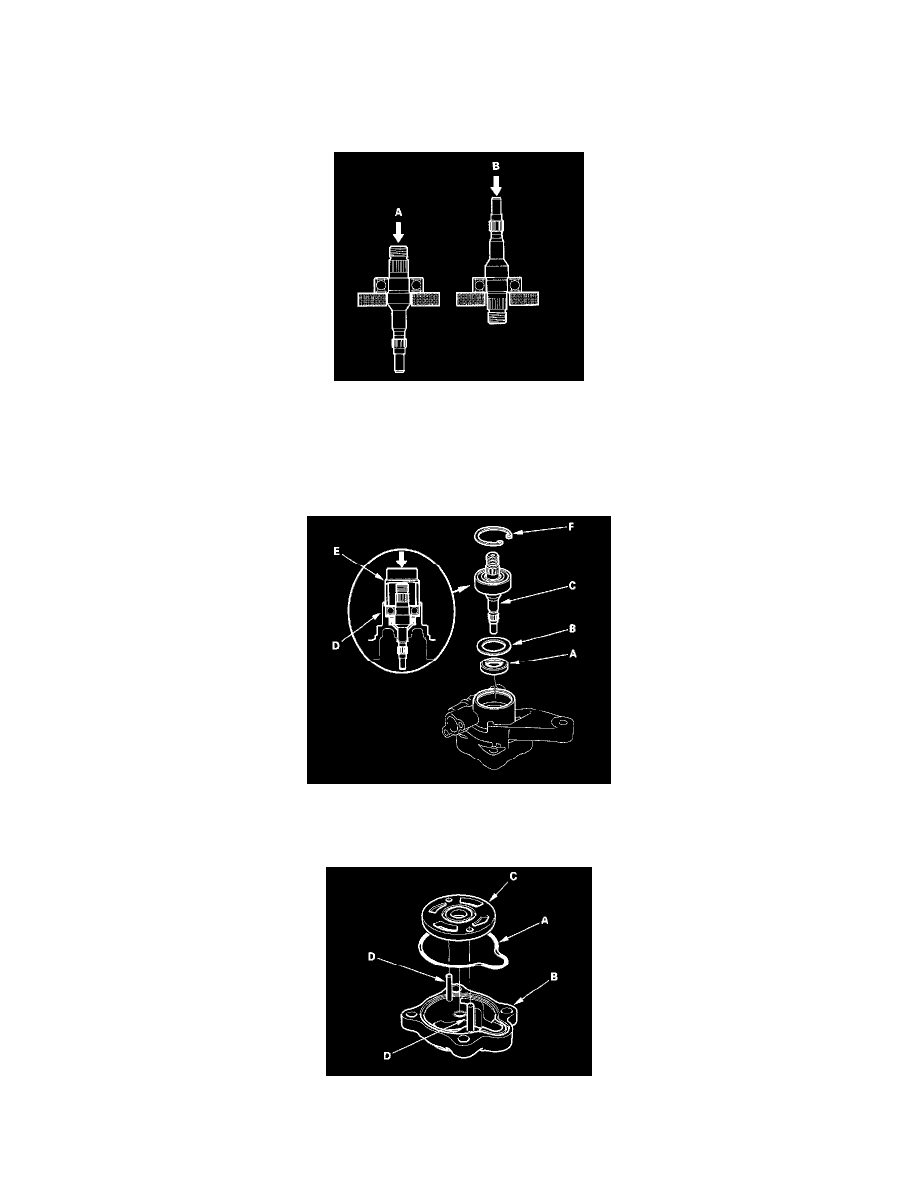
16. Install the new pump seal (A) (with its grooved side facing inch) into the pump housing by hand, then install the pump seal spacer (B).
17. Position the pump drive shaft (C) in the pump housing (D), then drive it in using a socket (E).
18. Install the 40 mm snap ring (F) with its radiused side facing out.
19. Coat the new pump cover seal (A) with power steering fluid, and install it into the groove in the pump cover (B).
20. Install the outer side plate (C) over the two roll pins (D).