
CL TYPE S V6-3.2L SOHC (2001)
14. Loosen the 17 mm flare nut (C), and remove the return line (D).
15. After disconnecting the hoses and lines, plug or seal them with a piece of tape or equivalent to prevent foreign materials from entering.
NOTE: Do not loosen the cylinder line A and B between the valve body unit and cylinder.
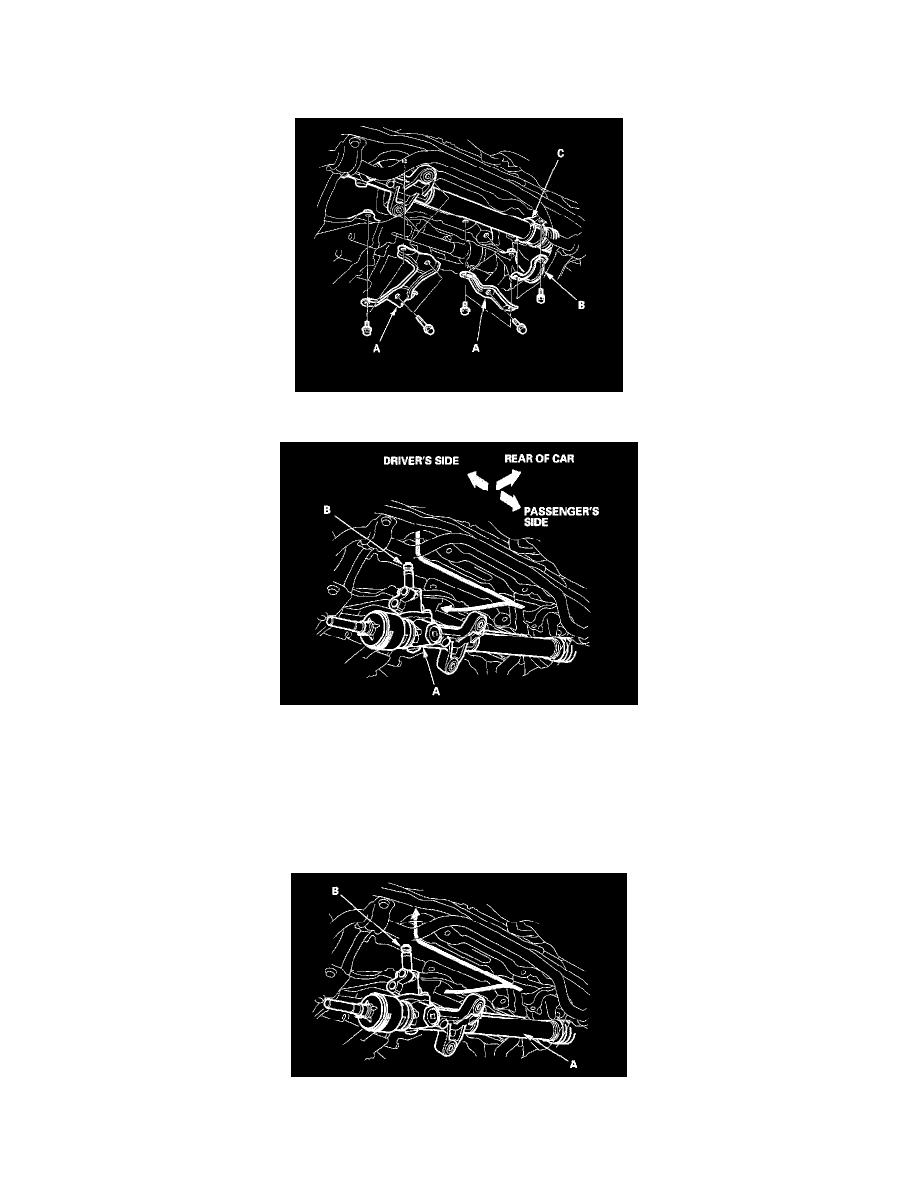
16. Remove the stiffener plates (A), then remove the right mounting brackets (B) and the cushion (C).
17. Pull the steering gearbox (A) down until the pinion shaft (B) clears the bulkhead, and remove the pinion shaft grommet from the top of the valve
body unit.
18. Move the steering gearbox to the passenger's side until the driver's side rack end rests on the end of the rear beam.
19. To get the driver's side rack end around the rear beam, push up and back on the passenger's side rack end, then pull down on the driver's side of the
steering gearbox.
Steering Gearbox Installation
1. Before installing the gearbox, slide the rack all the way to right.
2. Pass the passenger's side of the steering gearbox (A) above and through the passenger's side of the rear beam. Be careful not to bend or damage the
power steering lines and cylinder lines when installing the gearbox.
3. Raise the driver's side of the steering gearbox above and through the driver's side of the rear beam. Then insert the pinion shaft (B) up through the