
CL TYPE S V6-3.2L SOHC (2001)
Control Arm: Service and Repair
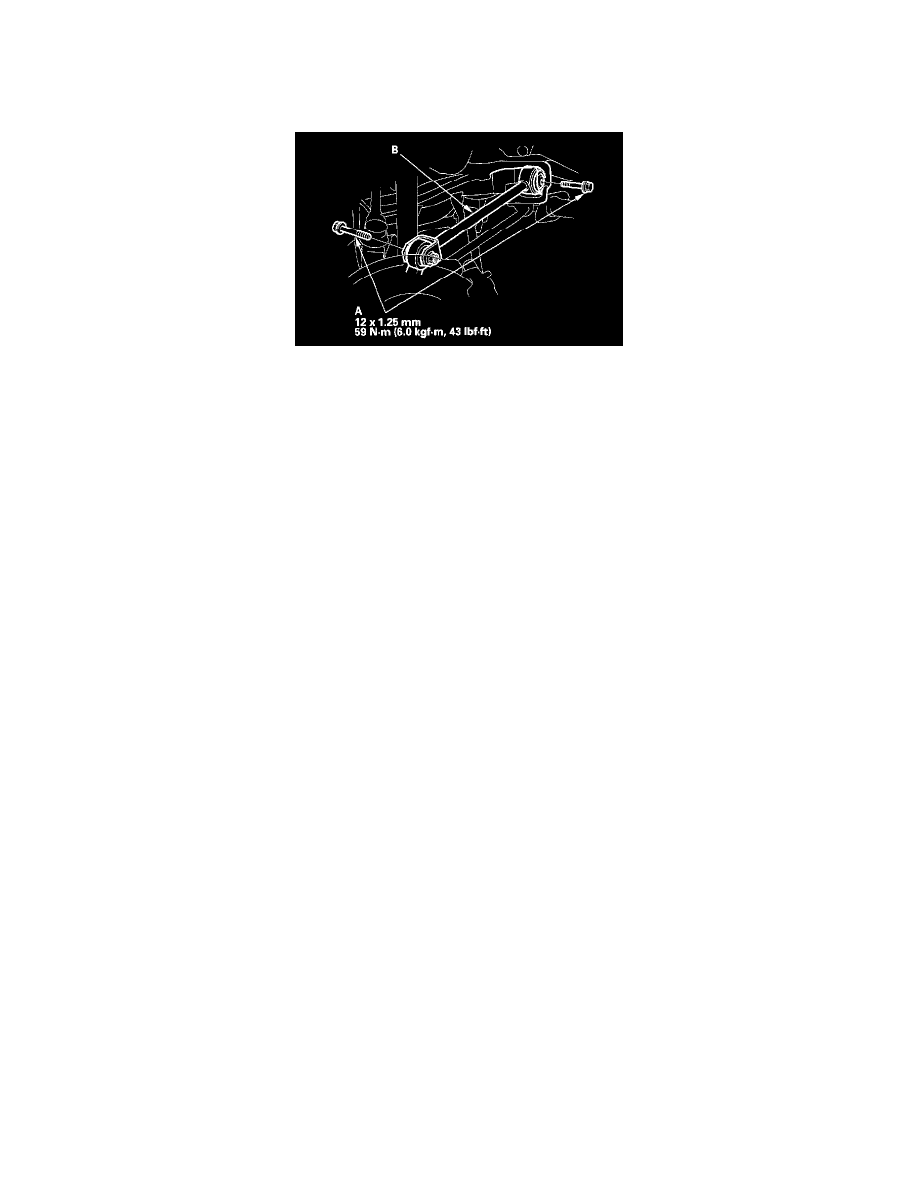
Leading Arm
Replacement
1. Raise the rear of the vehicle, and make sure it is securely supported. Remove the rear wheels.
2. Remove the leading arm mounting bolts (A), and remove the leading arm (B) from the vehicle.
3. Install the leading arm in the reverse order of removal, and note these items:
^
First install all the suspension components and lightly tighten bolts and nuts, then place a jack under the knuckle, and raise the suspension to
load it with the vehicle weight before fully tightening bolts and nuts to the specified torque values.
^
Tighten all mounting hardware to the specified torque values.
^
Before installing the wheel, clean the mating surfaces on the brake disc/drum and the inside of the wheel.
^
Set the rear wheel alignment.