
CL TYPE S V6-3.2L SOHC (2001)
Control Arm: Service and Repair
Upper Arm
Replacement
Special Tools Required
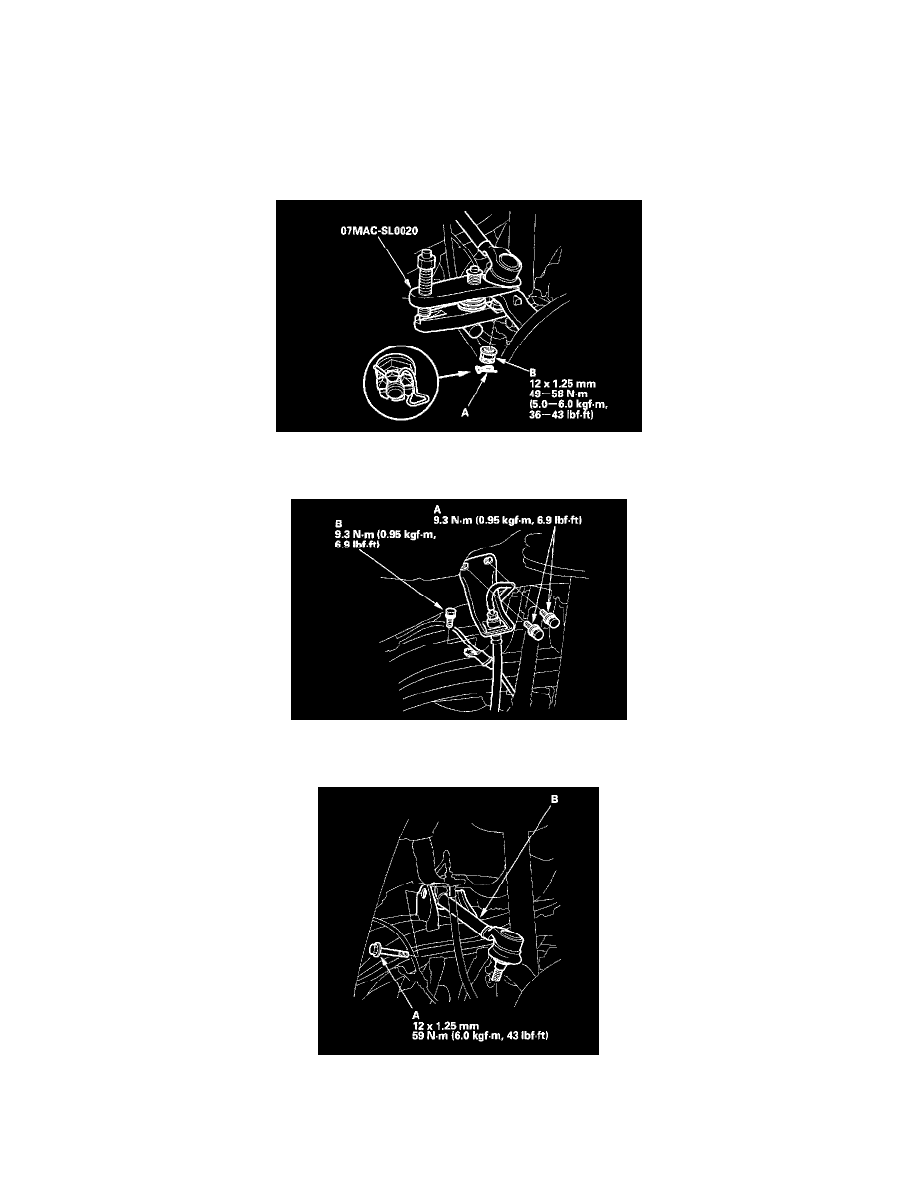
Ball joint remover, 28 mm 07MAC-SL00200
1. Raise the rear of the vehicle, and make sure it is securely supported. Remove the rear wheels.
2. Remove the lock pin (A) from the upper arm ball joint, and remove the castle nut (B).
3. Disconnect the upper arm ball joint from the knuckle using the special tool.
4. Remove the brake hose mounting bolts (A).
5. Remove the wheel sensor mounting bolt (B).
6. Remove the upper arm mounting flange bolt (A), and remove the upper arm (B) from the vehicle.
7. Install the upper arm in the reverse order of removal, and note these items:
^
Be careful not to damage the ball joint boot when connecting the upper arm to the knuckle.
^
First install all the suspension components and lightly tighten bolts and nuts, then place a jack under the knuckle, and raise the suspension to